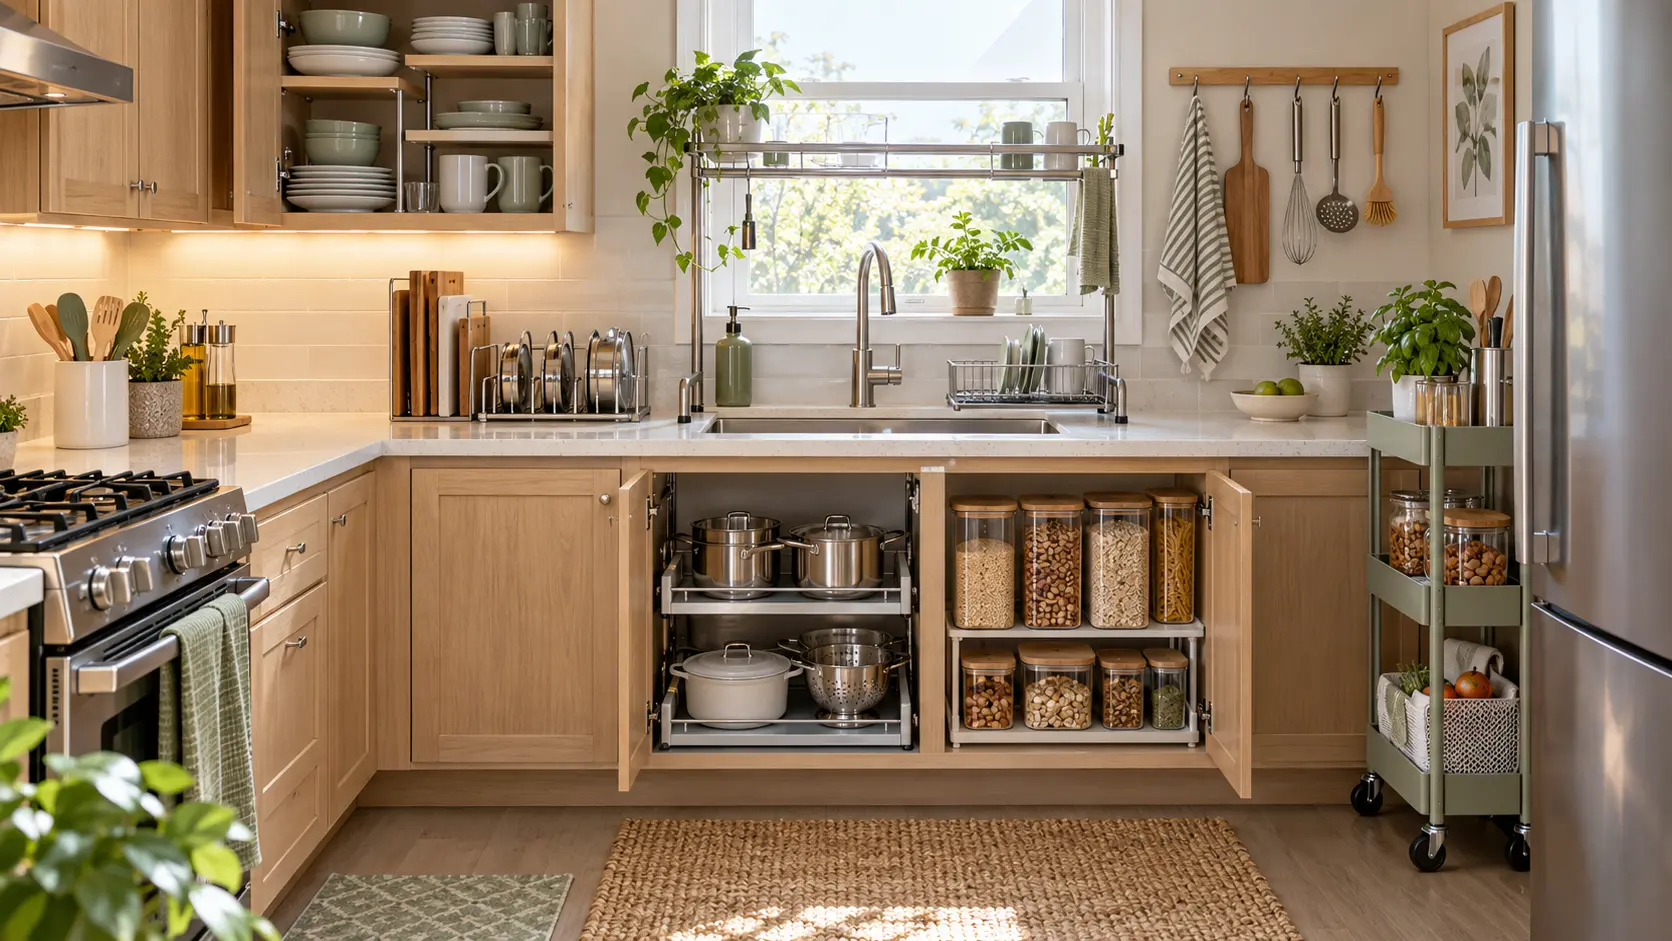
A small kitchen can hold more than you think, but only when every shelf, drawer, and open surface has a clear job. Crowded counters and deep cabinets often make the room feel smaller while hiding the items you use most.
These small kitchen organization ideas focus on practical storage, easy access, and a clean modern look. Each solution works with real cooking habits, from unloading groceries to washing dishes. You don’t need a full renovation—start with the area that causes the most daily frustration.
1. Clear the Counter
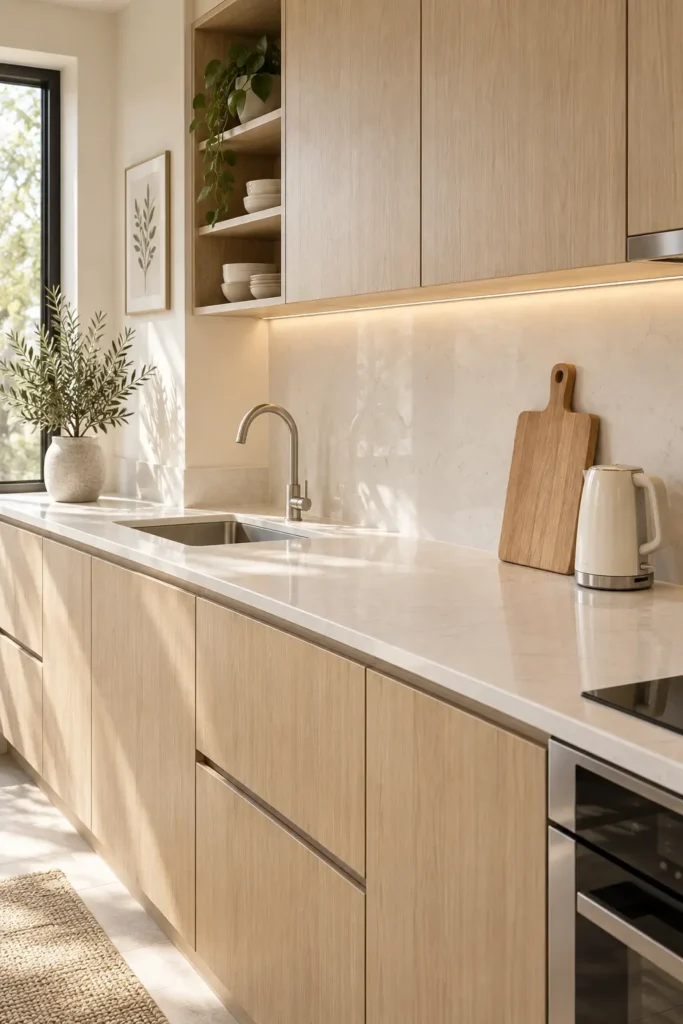
Keep only the items you use every day on the counter, such as a kettle, coffee maker, or cutting board. Store occasional appliances, extra jars, and packaged food inside cabinets.
Leave at least one uninterrupted 24-inch-wide work area when your layout permits. That open stretch makes chopping and meal preparation easier while creating valuable negative space. Group the remaining essentials on one washable tray so you can lift everything at once when cleaning the counter.
2. Create Kitchen Zones
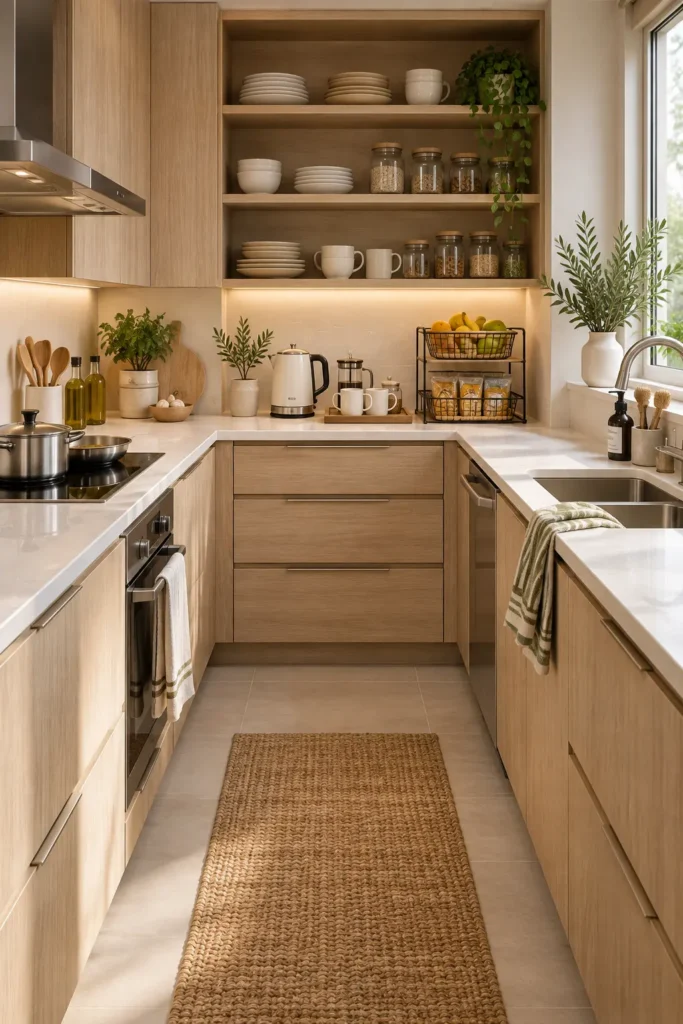
Divide the room according to activity instead of placing items wherever they fit. Keep pans, cooking utensils, and oils near the stove. Store mugs, tea, coffee, and sugar beside the kettle or coffee maker.
Place snacks together in an accessible cabinet, while cleaning products stay near the sink. These zones reduce unnecessary movement and make it easier for another person to find something. In a narrow kitchen, keeping each activity within one or two neighboring cabinets also helps prevent people from blocking the main walkway.
3. Add Shelf Risers
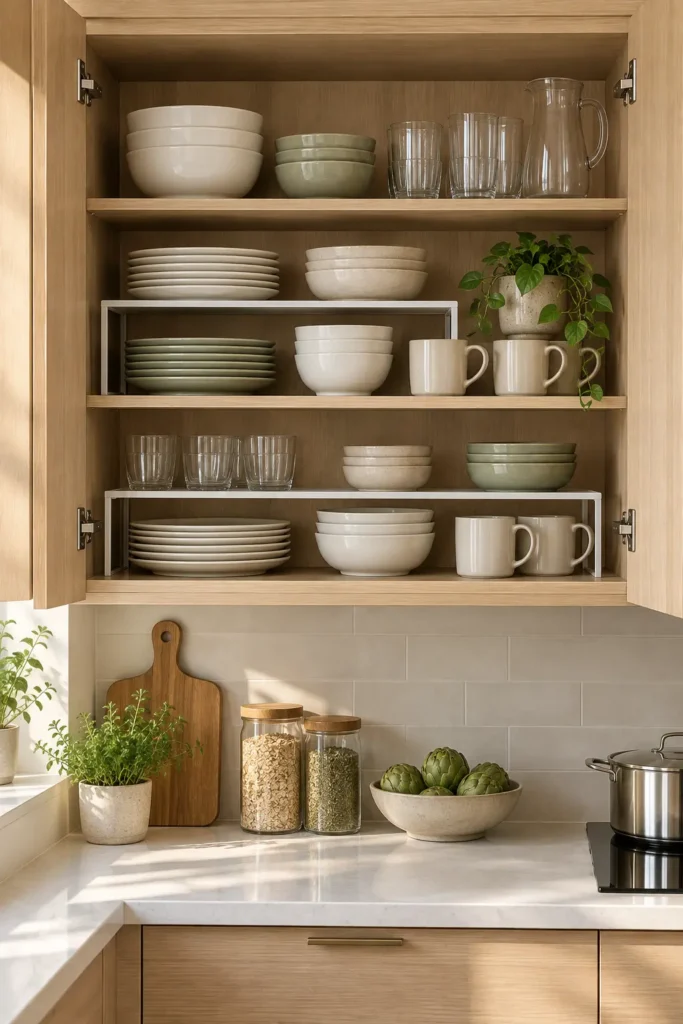
Tall cabinet openings often leave several inches of unused space above short bowls and mugs. A shelf riser creates another level without requiring permanent cabinet alterations.
Choose a riser wide enough to support dinner plates without overhanging the shelf. Metal versions are durable, while solid wood or bamboo looks more integrated with modern cabinetry. Place everyday bowls underneath and lighter plates or mugs above. Avoid stacking too many dishes on the upper tier, since an overloaded riser can shift when you remove something.
4. Divide Your Drawers
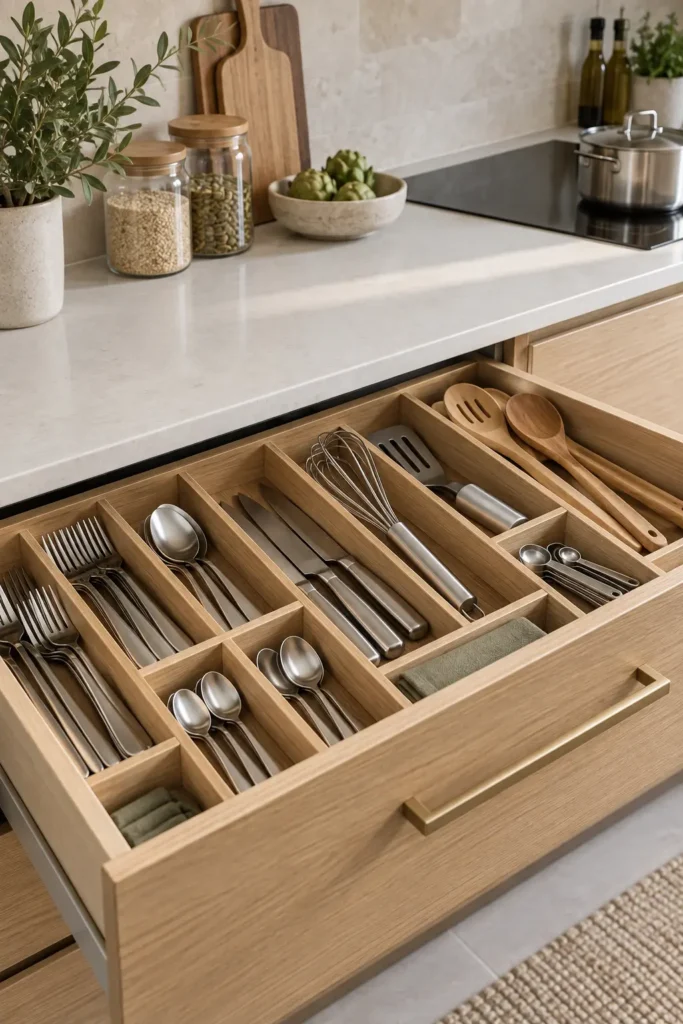
A fitted divider keeps forks, knives, cooking utensils, and small tools from becoming one tangled pile. Measure the drawer’s internal width, depth, and height before buying an organizer; decorative trim around a drawer can reduce the usable space.
Expandable bamboo inserts suit warm wood kitchens, while washable plastic works well near food-preparation areas. Give frequently used utensils the longest compartments. Move duplicate tools and rarely used gadgets elsewhere so the drawer opens smoothly and every item remains visible.
5. Organize Spice Jars
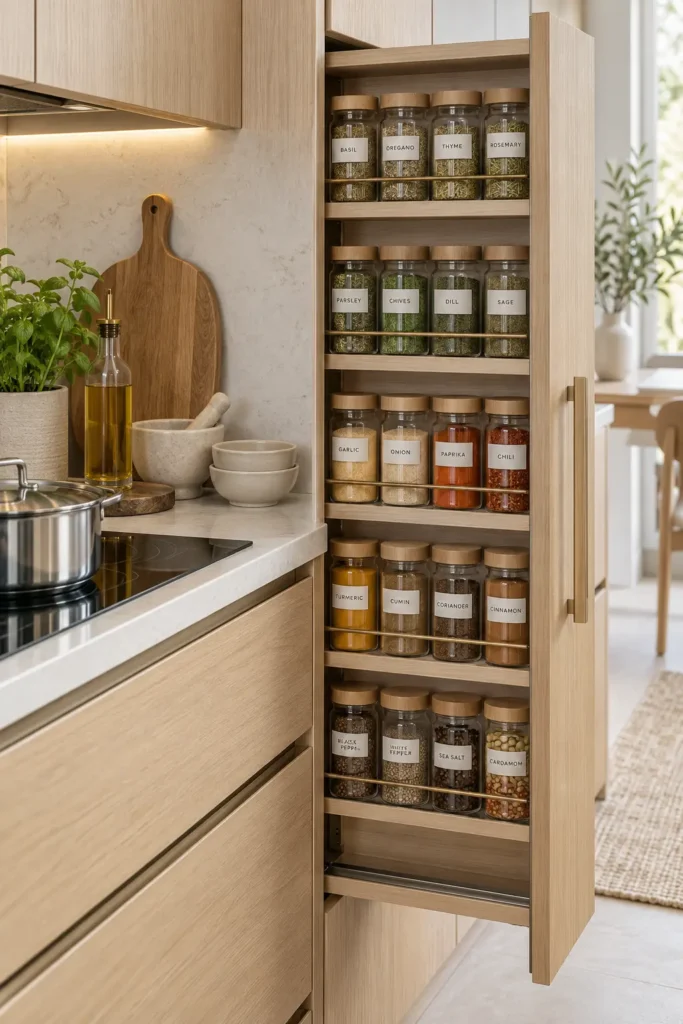
Transfer spices into matching clear jars so you can identify their contents and remaining quantity quickly. Square jars waste less shelf space than round containers, although either shape works when the sizes are consistent.
Label both the front and lid if the jars sit in a drawer. Keep everyday seasonings near the cooking area and less-used baking spices farther back. Store them away from direct sunlight and stove heat, which can weaken flavor and fade color. Buy jars gradually if replacing every container at once feels unnecessarily expensive.
6. Use Square Pantry Containers
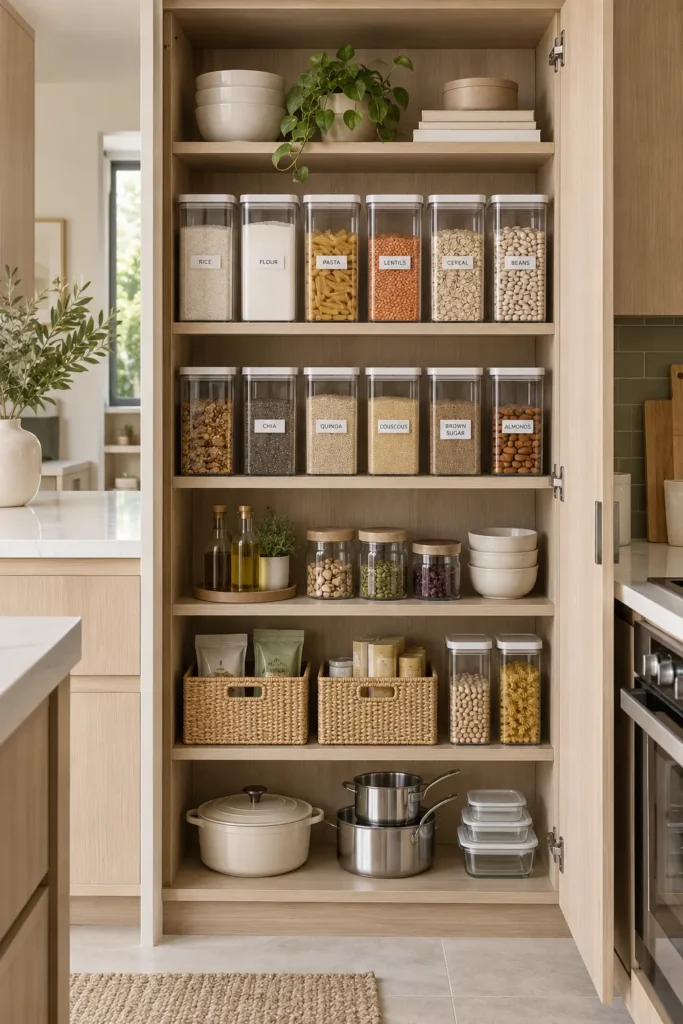
Square airtight containers sit closely together, making better use of narrow shelves than mixed bags and round packages. Use them for rice, flour, pasta, cereal, lentils, and other dry staples you purchase regularly.
Choose transparent containers with wide openings, secure seals, and lids that can be replaced individually. Before buying a full set, measure your shelf depth and the height between shelves. Oversized containers look impressive in photographs but become inconvenient when they are heavy, difficult to refill, or too tall to remove comfortably.
If you need a complete system for shelves, bins, and dry goods, explore these 17 small pantry organization ideas for more practical storage solutions.
7. Store Pans Vertically
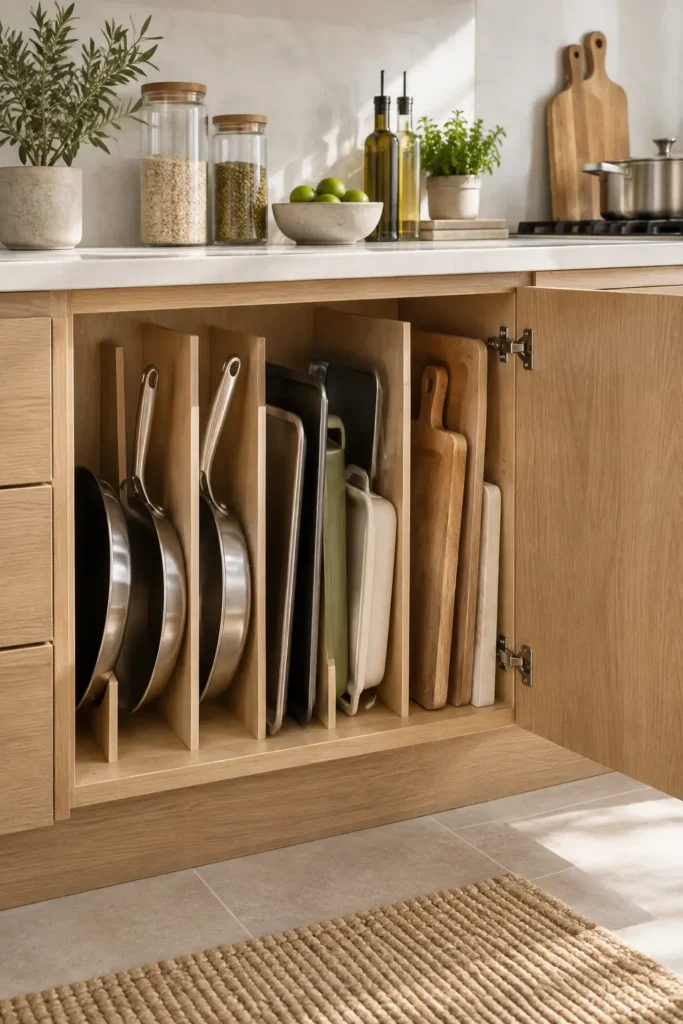
Pans, baking sheets, trays, and cutting boards are easier to access when stored upright between dividers. You can remove one piece without lifting an entire stack or creating a noisy pile on the floor.
Install a metal rack or adjustable dividers inside a lower cabinet. Allow enough width for handles and deeper frying pans, and place the heaviest cookware closest to the cabinet wall for stability. A removable rack is a useful renter-friendly choice, provided it has nonslip feet and doesn’t scrape the cabinet base.
8. Mount a Lid Holder
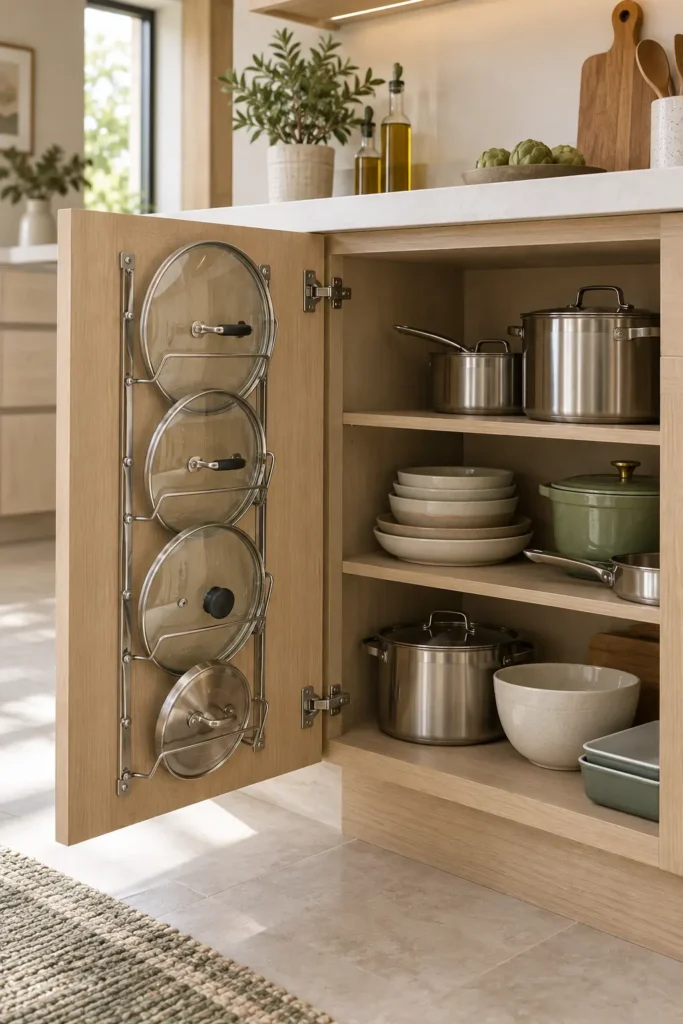
Pot lids take up surprising amounts of cabinet space because their handles prevent neat stacking. Mounting a slim holder inside a cabinet door keeps lids visible and separates them from the pots.
Check the door’s thickness before using screws, and position the rack where it won’t hit shelves when closed. Adhesive holders can work for renters, but they’re better suited to lightweight lids. Leave clearance around hinges and avoid overloading the door with heavy cast-metal pieces, which may pull it out of alignment.
9. Install an Over-Sink Rack
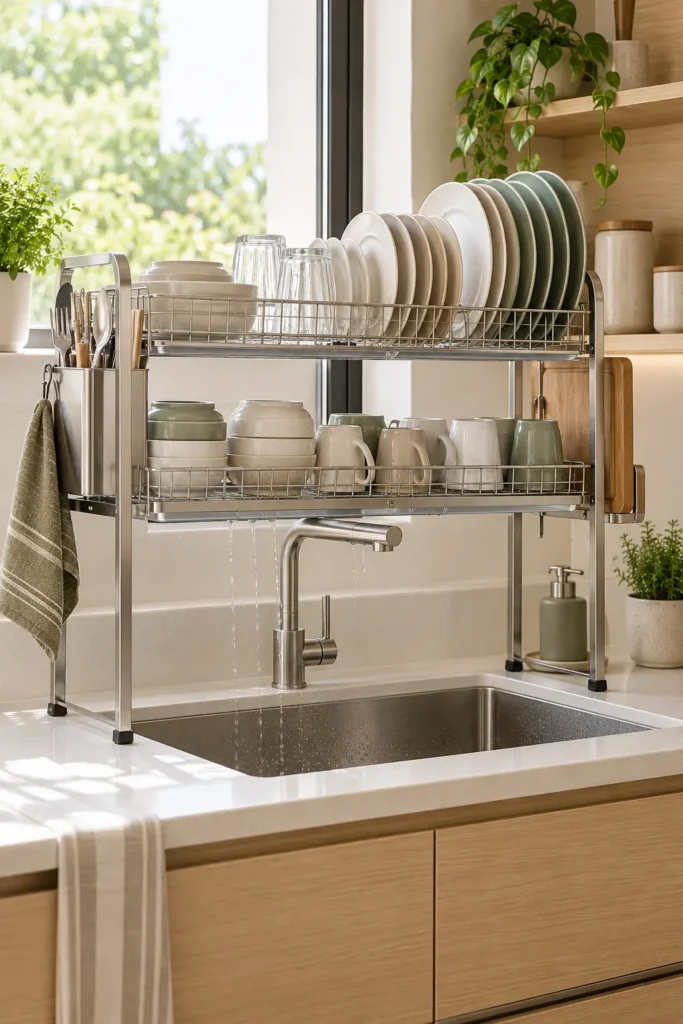
An over-sink drying rack frees the counter while allowing water to drip directly into the basin. It’s especially helpful when a small kitchen lacks space for both food preparation and a traditional dish drainer.
Measure the sink width, faucet height, and distance beneath any upper cabinet before ordering. Choose rust-resistant stainless steel and check its weight limit. Arrange plates vertically, with bowls and cups on a lower tier if available. Keep the rack edited; storing every dish there permanently can make the sink feel visually crowded.
10. Add Pull-Out Sink Baskets
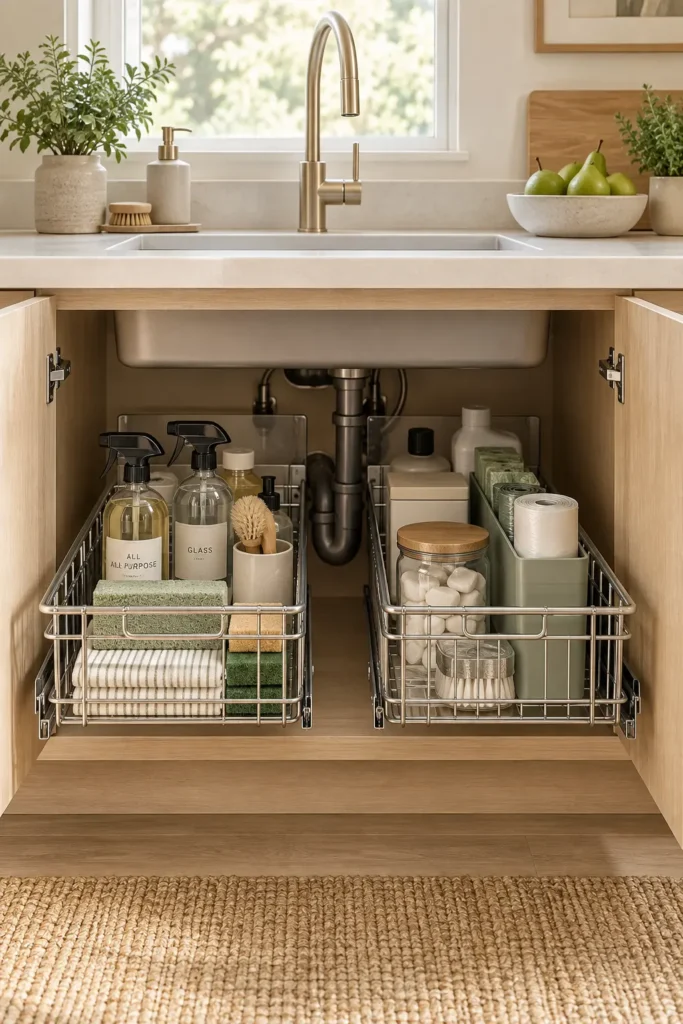
The cabinet beneath a sink is deep but difficult to use because plumbing occupies its center. Two narrow pull-out baskets—one on either side of the pipes—can make cleaning products easy to reach.
Use one basket for sprays and dishwasher supplies and another for sponges, cloths, and trash bags. Select washable, rust-resistant materials because minor leaks and condensation are common here. Never pack items tightly around shutoff valves or the drain trap. A removable waterproof liner will protect the cabinet base and reveal leaks sooner.
11. Hang Tools on a Rail
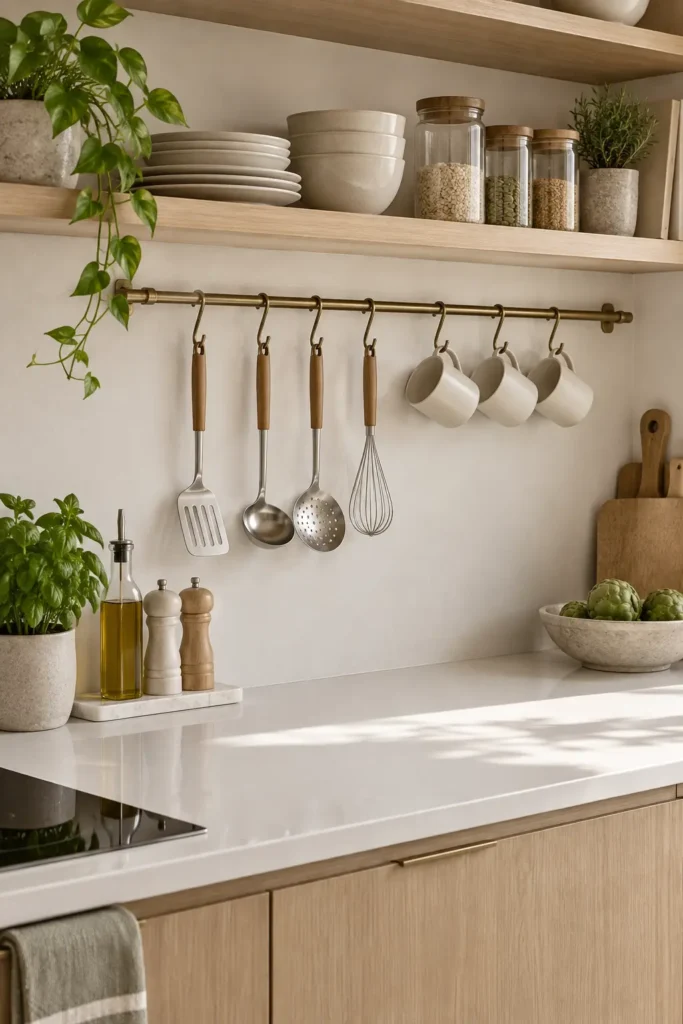
A simple wall rail can hold spatulas, ladles, whisks, and a few mugs without taking up counter or drawer space. It also creates an orderly horizontal line that suits a modern kitchen.
Mount the rail near the prep area but far enough from the stove to avoid grease buildup and heat exposure. Leave around 2–3 inches between bulky tools so they don’t overlap. Polished steel gives a cooler, commercial look, while brushed brass or wood adds visual warmth. Use removable mounting strips only within the manufacturer’s weight limit.
12. Group Food in Fridge Bins
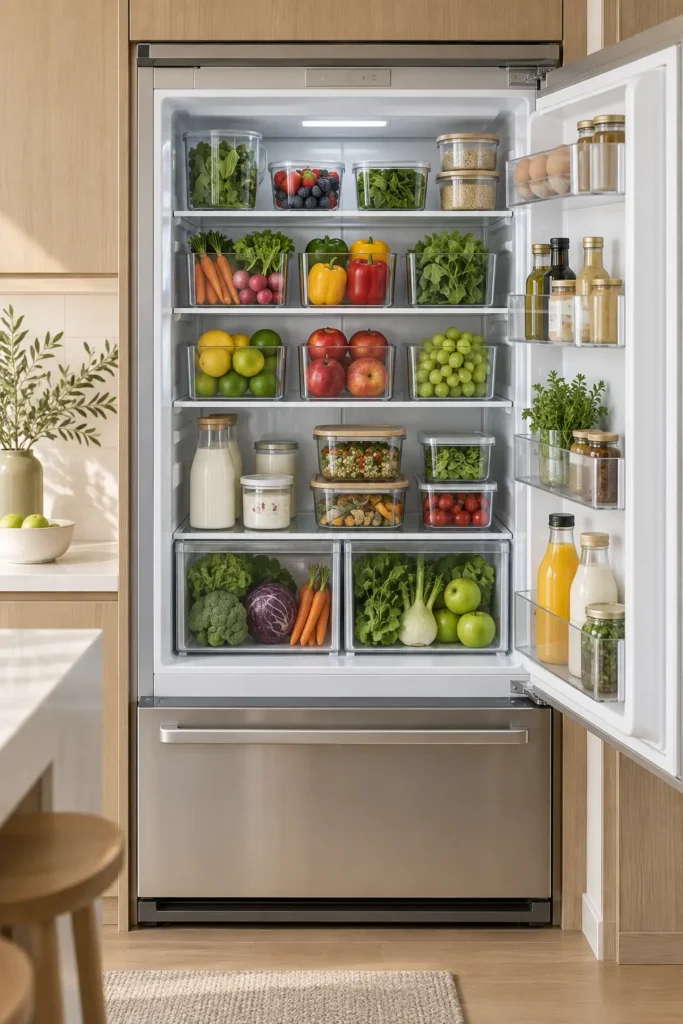
Transparent refrigerator bins prevent small cartons, jars, and produce from disappearing behind larger items. Group food by type—such as dairy, sauces, snacks, or meal-prep ingredients—rather than giving every product its own container.
Choose bins with handles and straight sides, then leave space around them for cold air to circulate. Avoid filling the refrigerator so tightly that vents become blocked. Glass containers resist stains and odors better than inexpensive plastic, but they add weight. Use lighter bins for items that you pull out as a group.
13. Make a “Use First” Bin
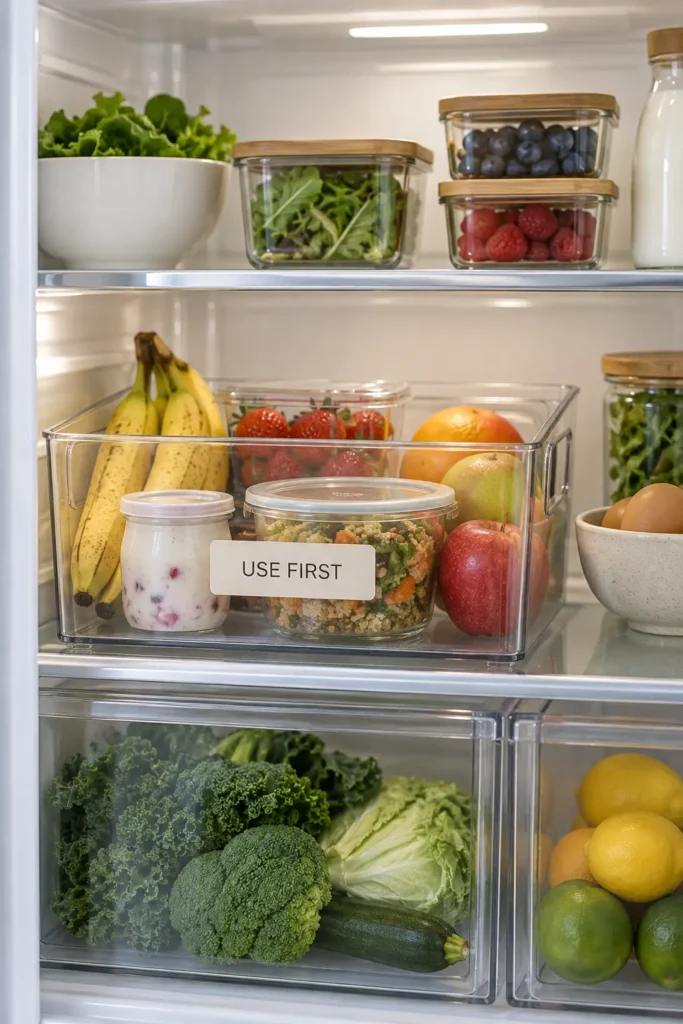
Dedicate one clearly labeled refrigerator bin to food that should be eaten soon. Place opened yogurt, ripe produce, leftovers, and ingredients approaching their expiration dates inside it.
Keep the bin at eye level, where everyone in the household can see it before reaching for something newer. A shallow transparent container works better than a deep basket because food won’t become buried. Review it before grocery shopping and meal planning. This small routine reduces waste without requiring a complicated inventory system or a refrigerator full of labels.
14. Add a Lazy Susan
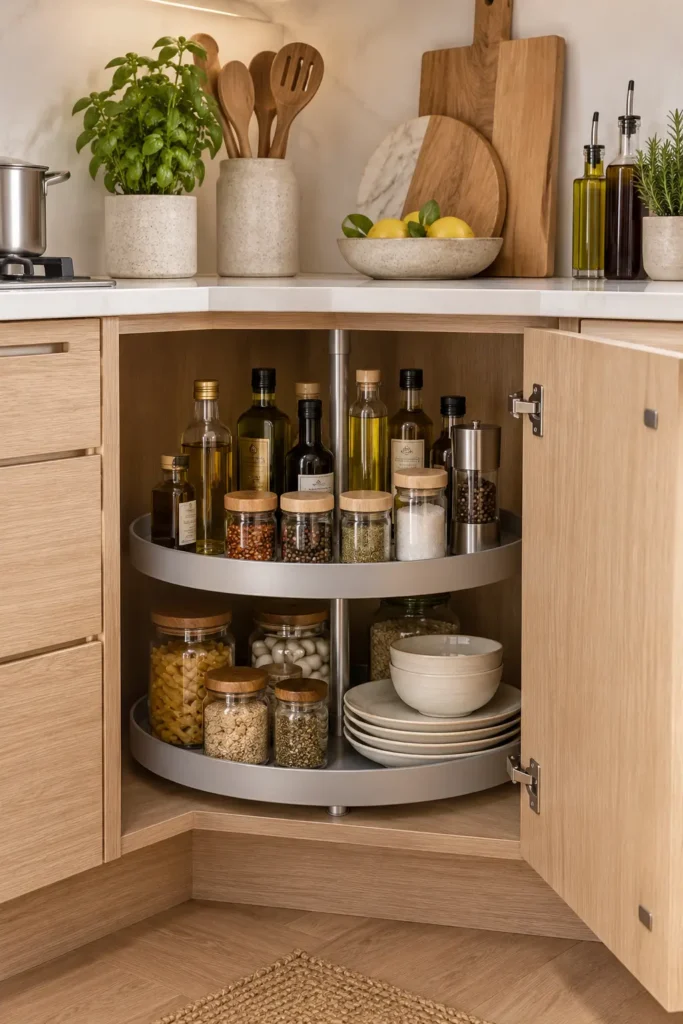
A rotating Lazy Susan makes oils, sauces, vinegars, and spice jars accessible inside a deep or corner cabinet. Instead of reaching behind several bottles, you can turn the tray and bring each item forward.
Select a model with a raised rim so narrow bottles don’t fall when it rotates. Measure the cabinet opening as well as its internal width; the turntable must clear the door and hinges. Place tall bottles near the center and shorter jars around the edge. Washable plastic is practical, while wood offers a more finished appearance.
15. Fit a Slim Rolling Trolley
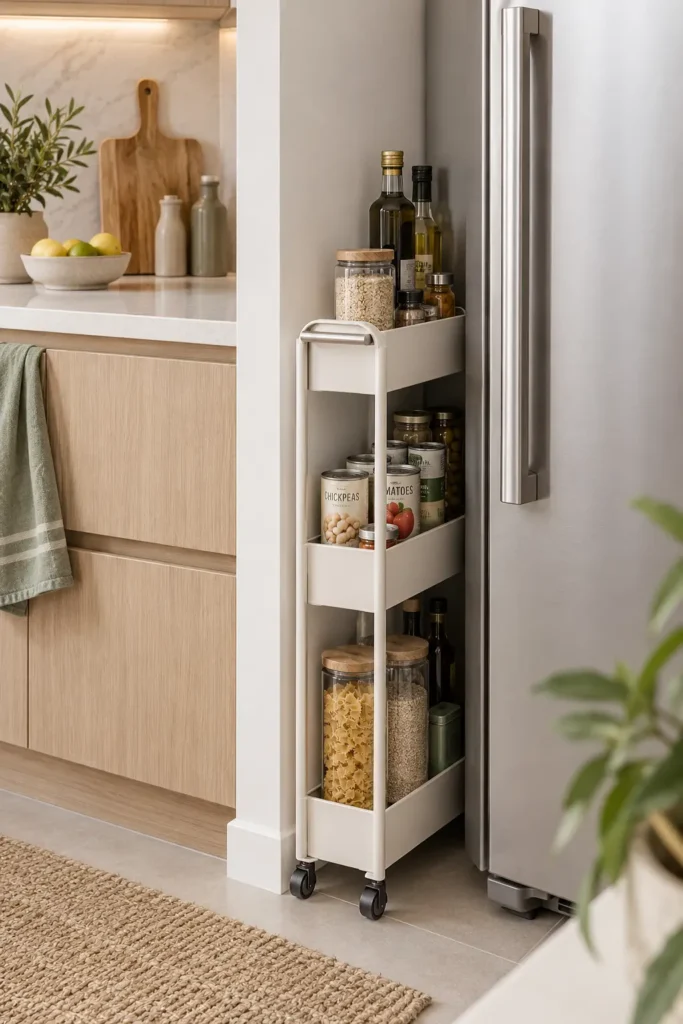
The narrow gap beside a refrigerator can hold a rolling trolley for cans, bottles, jars, or packaged pantry goods. Models between 5 and 8 inches wide suit many unused gaps, but measure the narrowest point before purchasing.
Choose raised sides to stop products from falling when the cart moves. Store lighter goods on top and heavier bottles near the bottom to keep it stable. Confirm that the trolley can roll out completely without hitting cabinet handles. In rental kitchens, this adds storage without drilling into walls or altering cabinetry.
16. Ventilate Root Vegetables
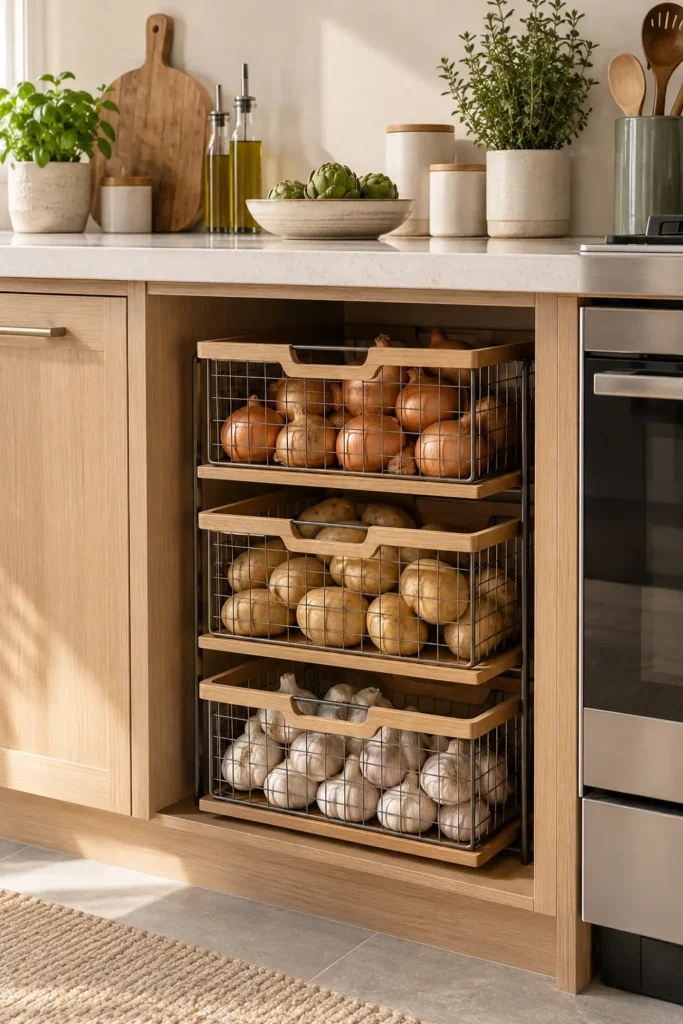
Onions, potatoes, and garlic last better in breathable baskets than in sealed containers. Give each type its own wire, mesh, or woven basket and place them in a cool cabinet away from direct sunlight.
Separate onions from potatoes because storing them together can make both spoil more quickly. Open baskets also let you notice soft spots before decay spreads. Natural woven fibers soften the appearance of hard kitchen surfaces, but wire baskets are easier to wipe clean. Avoid placing the produce beneath a sink, where moisture can encourage mold.
17. Arrange Shelves by Use
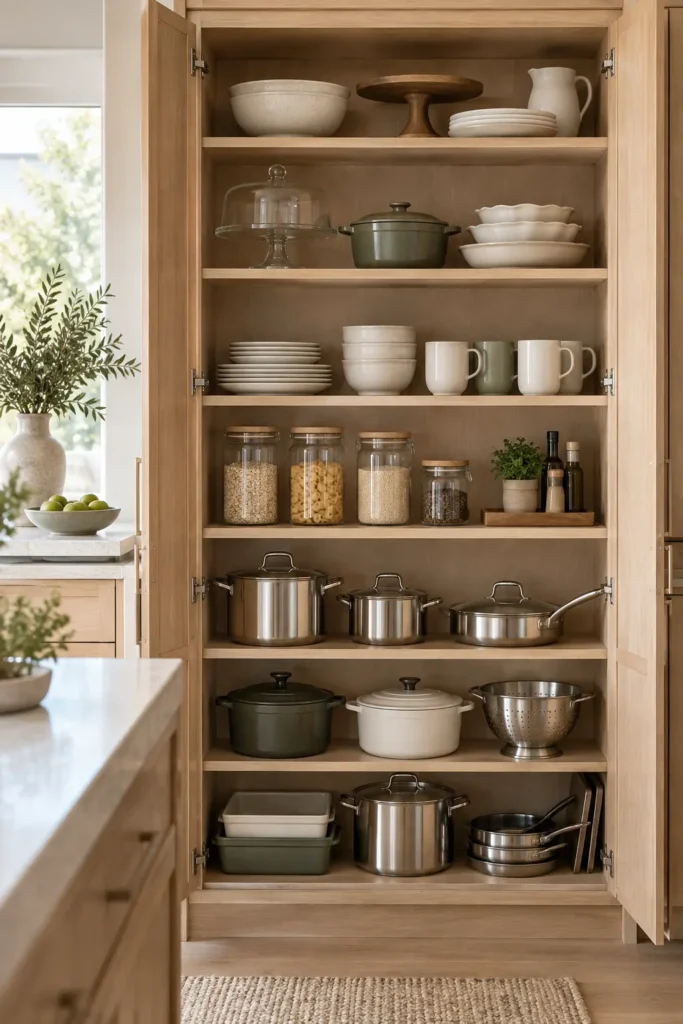
Store everyday plates, bowls, and mugs at eye level so you can reach them without stretching or crouching. Heavy pots, cast-iron pans, and bulky appliances belong on lower shelves, where they are safer to lift.
Reserve upper cabinets for lightweight serving pieces and items used only occasionally. This arrangement gives the cabinet a calmer visual rhythm because frequently used crockery remains together. If children access the kitchen, keep breakable glassware and sharp tools above their reach while maintaining safe access for the adults who use them.
18. Schedule a Weekly Reset
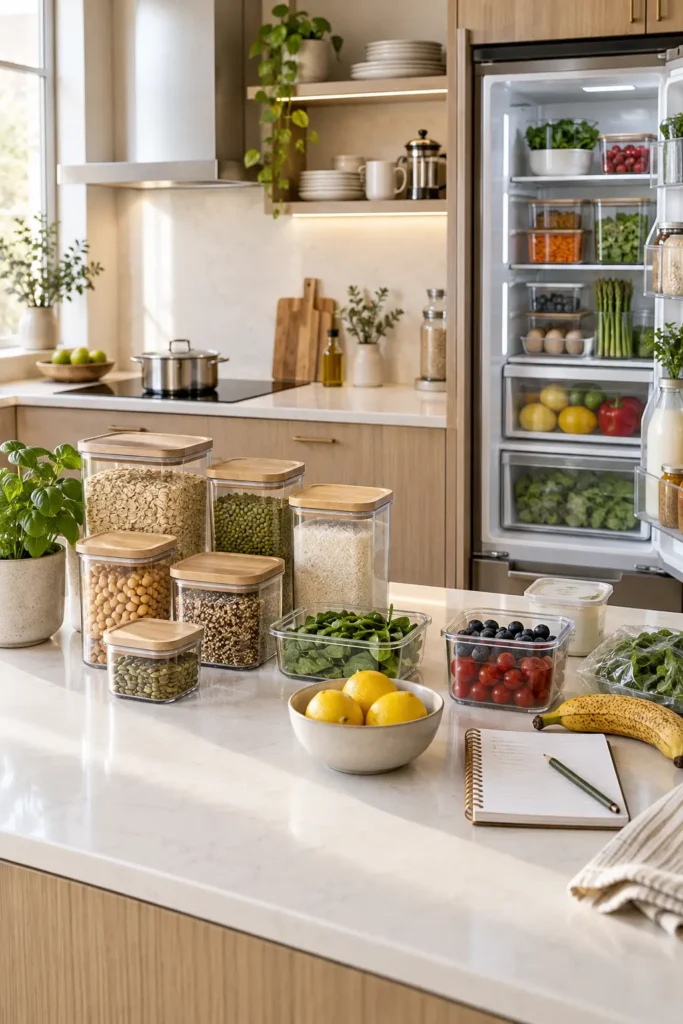
Set aside ten minutes each week to return items to their zones, check expiration dates, and remove empty packaging. Wipe containers before putting them back and note pantry staples that need replacing.
This reset prevents small problems from becoming a full cabinet cleanout. It also reveals which systems aren’t working. If a basket constantly overflows or an item never returns to its assigned place, change the storage location rather than blaming the household. A useful kitchen system should follow your habits and require little effort to maintain.
Common Mistakes to Avoid
Buying organizers before measuring is the most common mistake. A beautiful bin or rack has little value if it blocks a hinge, prevents a drawer from closing, or leaves unusable gaps. Measure cabinet interiors at their narrowest points and account for handles, pipes, shelf supports, and door swing.
Avoid filling every empty inch. Cabinets, drawers, and refrigerator bins need breathing room so items can be removed easily. Matching containers create a clean appearance, but replacing functional storage purely for appearance can become expensive. Organize first, then upgrade the most visible pieces gradually.