A first apartment kitchen can fill up surprisingly fast. One oversized cookware set, three roommate-owned toasters, and a drawer of flimsy gadgets can consume the available storage before anyone cooks a real meal.
A useful list of college apartment kitchen essentials should help you prepare breakfast, pack lunch, cook simple dinners, store leftovers, and clean up without crowding the counters. This checklist focuses on durable basics, realistic quantities, removable storage, and pieces that can follow you to your next apartment.
1. Start With a One-Cabinet Kitchen Kit, Not a Matching 50-Piece Set
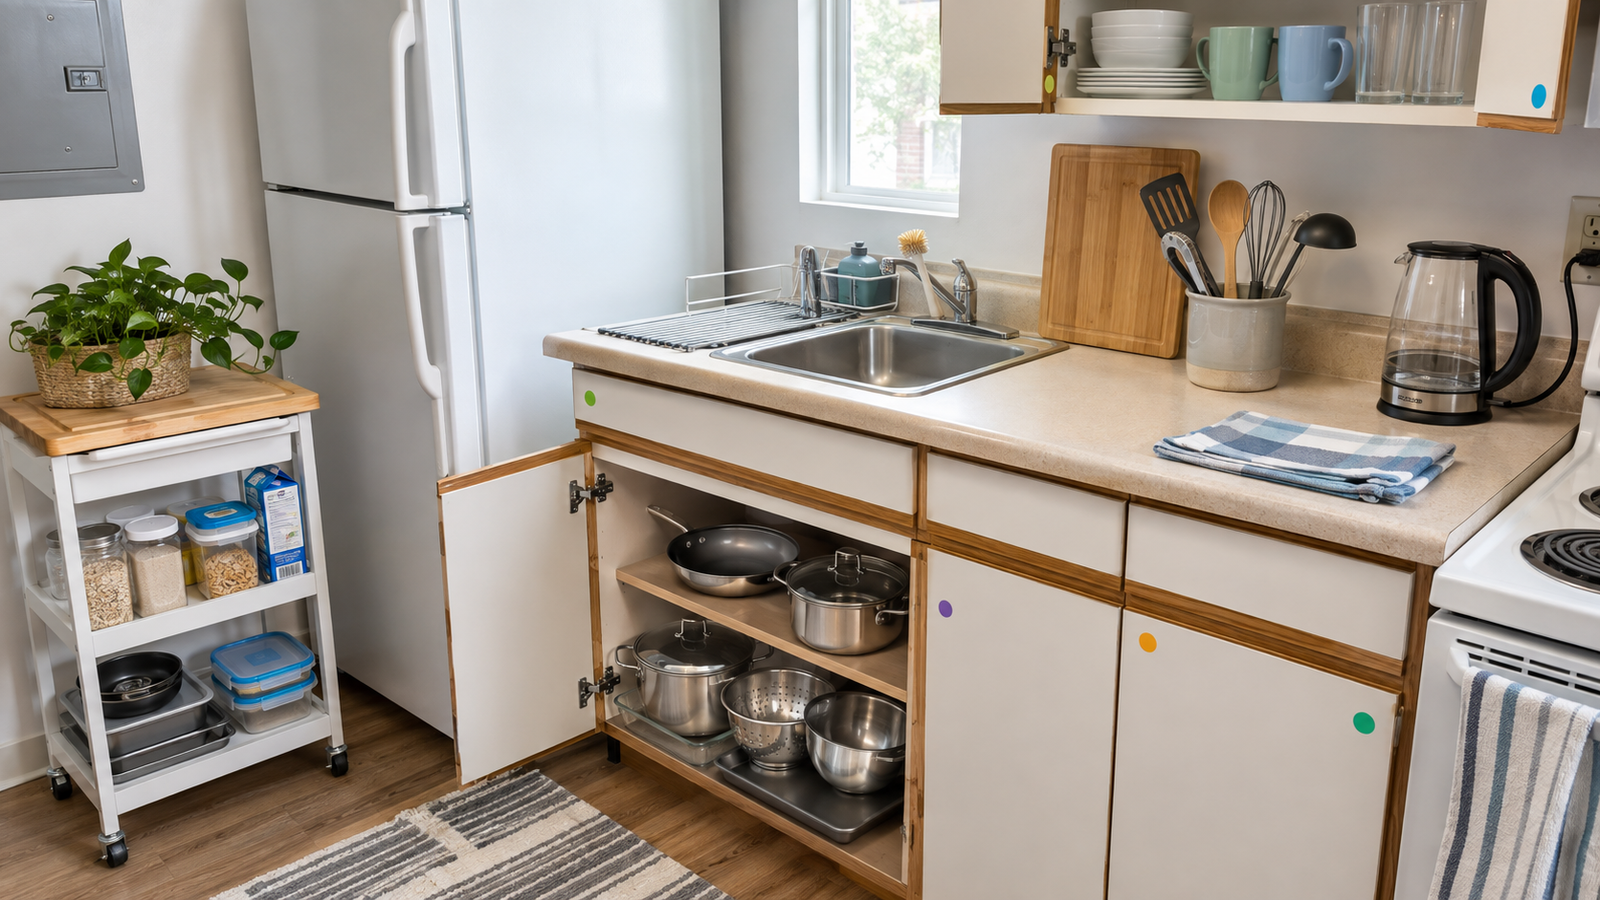
Begin with a 10-inch skillet, a 2- to 3-quart saucepan with a lid, a 5- to 6-quart pot, one rimmed sheet pan, a medium mixing bowl, a colander, and a rectangular baking dish. Together, these pieces cover eggs, pasta, soup, roasted vegetables, casseroles, and basic baking.
Choose stainless steel, tempered glass, or medium-weight aluminum in stackable shapes. Avoid cheap coated sets with loose handles and thin bases, which tend to heat unevenly and wear quickly. Before buying, make sure the entire collection fits inside one lower cabinet.
2. Turn a Removable Utility Cart Into a Moveable Prep and Breakfast Station
A narrow utility cart can provide extra storage when the apartment has one short counter and few cabinets. Look for a model approximately 12 to 16 inches deep with locking wheels. Place a washable cutting board or fitted tray on top, breakfast supplies in the middle, and lightweight cookware or food containers below.
Park it beside the refrigerator or along an unused wall without blocking appliance doors or the main walkway. A matte white, black, or muted-color cart visually recedes better than shiny plastic. After college, it can become bathroom, laundry, or office storage.
3. Choose Three Prep Tools That Replace an Entire Gadget Drawer
A sharp 8-inch chef’s knife, a small paring knife, and a large nonslip cutting board will handle most meal preparation. Add a manual can opener, vegetable peeler, box grater, kitchen scissors, measuring cups, measuring spoons, and a liquid measuring cup as supporting basics.
Skip large knife blocks and novelty slicing tools. Store knife blades inside protective drawer guards, especially in a shared kitchen. If counter space is tight, choose a sturdy cutting board wide enough to bridge part of the sink. It creates temporary prep space but should remain stable and leave room for the faucet.
4. Build a Heat-Safe Utensil Crock From Six Everyday Tools
Instead of buying a 20-piece utensil bundle, collect one silicone spatula, slotted turner, wooden spoon, whisk, ladle, and pair of locking tongs. These six tools cover stirring, flipping, serving, whisking, and handling hot food without filling every drawer.
Keep them beside the stove in a heavy, washable ceramic crock that won’t tip when you pull out the tongs. Wood and dark silicone look more composed than a jumble of bright plastic and won’t scratch nonstick cookware. Position the crock several inches from an active burner so handles don’t become hot or greasy.
5. Set Up Four Mix-and-Match Place Settings That Survive Roommates
Four dinner plates, four bowls, four short tumblers, two mugs, and four flatware settings are enough for most college apartments. If you live alone and rarely host, start with two of each and add matching or complementary pieces later.
White tempered-glass dishes are light, durable, and inexpensive to replace. Matte stoneware looks substantial but can chip during crowded sink cleanups, so inspect rims before buying it secondhand. Pair simple plates with thrifted mugs or softly colored tumblers. The slight variation feels collected while keeping the cabinet useful instead of overfilled with a formal dinnerware service.
6. Make Food Storage Stack Like a Filing System
Choose six to eight square or rectangular food containers in two or three sizes. Straight-sided containers use refrigerator shelves more efficiently than round bowls, and matching lids prevent the usual search through a pile of incompatible plastic.
Nest the empty containers and file their lids upright inside a narrow removable bin or dish organizer. Glass handles stains and reheating well but becomes heavy during a move; good-quality plastic is lighter but should be replaced once it warps or holds odors. Add two or three reusable silicone bags for sandwiches, chopped ingredients, or small snacks rather than saving endless takeout tubs.
7. Create a Shared Pantry With Individual Bins and One Communal Shelf
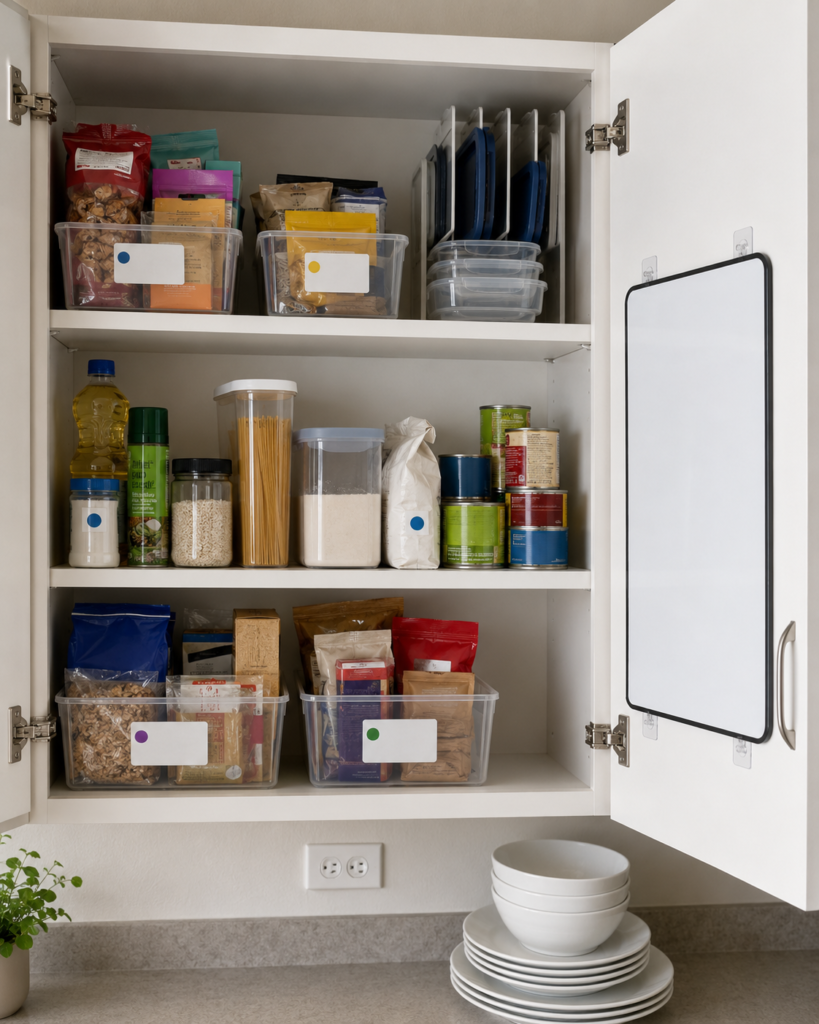
Give each roommate a removable bin for personal snacks, breakfast foods, and specialty ingredients. Reserve one clearly defined shelf for shared staples such as cooking oil, salt, flour, rice, and pasta. This keeps ownership clear without covering every package in large labels.
Clear plastic bins make inventory easy to see, while wire bins allow crumbs to fall through and require more cabinet cleaning. Use low bins on upper shelves so food doesn’t disappear behind tall sides. A small wipe-clean restocking list attached inside the cabinet door with removable strips can prevent duplicate purchases and arguments over who finished the olive oil.
8. Use a Countertop Appliance Rule: One Daily Workhorse, One Optional Extra
Check what the apartment already provides before buying a microwave or other appliance. Then choose one machine that matches your routine: perhaps a compact toaster, electric kettle, coffee maker, blender, or rice cooker. A second appliance should earn its space through frequent use and fit inside a cabinet or on the utility cart.
Leave ventilation space around heat-producing appliances and never run one inside a closed cabinet. Large matching appliance collections may photograph well, but they make small counters difficult to clean. Confirm the lease and building rules before bringing in hot plates, toaster ovens, or other restricted equipment.
9. Install a Renter-Safe Sink Station That Contains Wet Clutter
Keep the sink area simple with dish soap, a draining caddy, a sponge or dish brush, two or three cotton towels, and a compact drying rack. A roll-up over-sink rack is useful when counter space is scarce because it can be stored after the dishes dry.
Choose a caddy with drainage holes rather than a closed cup that holds dirty water. Store dishwasher detergent, cleaning cloths, trash bags, and multipurpose cleaner together in a removable under-sink bin. A small lidded trash can fits better than an oversized model, but it needs frequent emptying to control odors in a warm, shared kitchen.
10. Assemble a Small Safety Kit Before the First Meal Is Cooked
Confirm that the apartment has working smoke and carbon-monoxide detectors and an accessible fire extinguisher approved for kitchen use. Keep the extinguisher near the room’s exit, not directly above the stove where a fire could block access to it.
Add a compact first-aid kit, a food thermometer, a heat-safe trivet, and oven mitts that cover the hands and wrists. Thin decorative pot holders offer little protection once they become damp or worn. Store safety supplies away from steam and grease, and make sure every roommate knows where they are before anyone starts cooking.
11. Add a Small Laundry-and-Lunch Reset Zone Near the Door
Group reusable lunch bags, ice packs, water bottles, food wraps, and clean kitchen towels according to when you use them. A single drawer or lidded bin near the refrigerator or apartment entrance can make rushed mornings easier than storing each item in a separate kitchen category.
Stand water bottles upright in a divider so they don’t roll across a shelf. Fold towels vertically to keep every piece visible and remove damp cloths from the kitchen promptly. This compact reset zone should support packing and cleaning without spilling into the cooking area or creating a pile of bags on the counter.
12. Finish With a Color-Coded Roommate Inventory Before Shopping
Before move-in day, divide the college apartment kitchen essentials into four groups: bring from home, buy now, split the cost, and buy later. Assign each roommate a small color and place a removable dot beneath personally owned containers, appliances, or utensils.
Keep the labels discreet so the kitchen still feels coordinated rather than institutional. Ownership marks are especially useful for items that will leave with different people at the end of the lease. The inventory also reveals gaps before shopping—a household may already have three coffee makers but still need a colander, can opener, or safe pair of oven mitts.