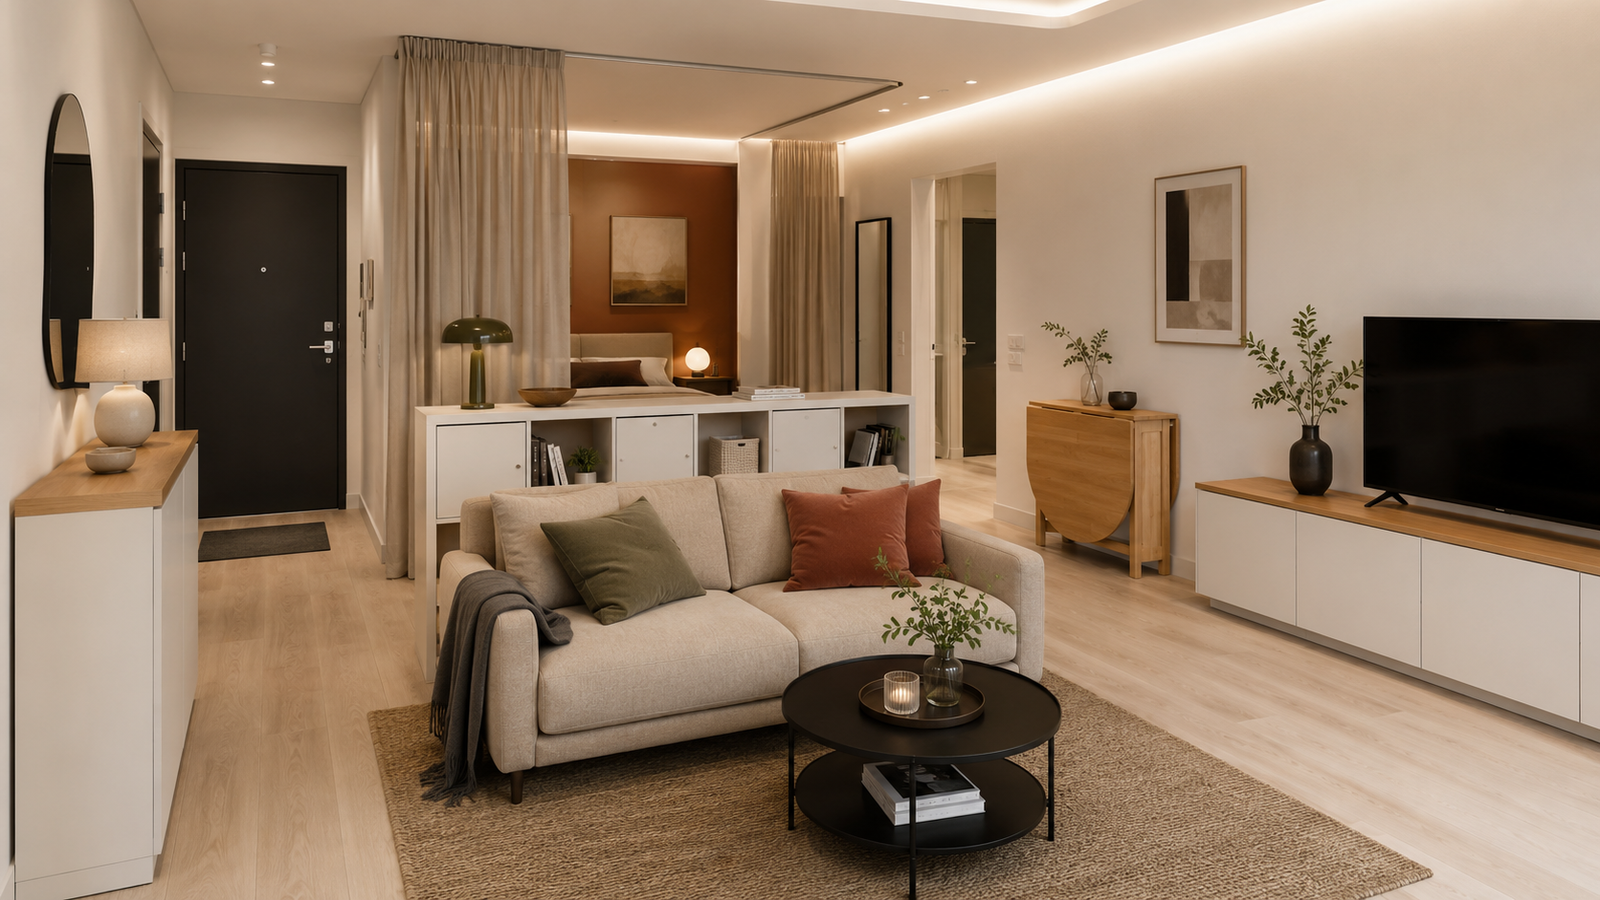
Small apartments rarely need more furniture. They need the furniture already there to store more, occupy less floor space, and disappear visually when it isn’t being used.
These IKEA hacks for small apartments focus on real pressure points: narrow entries, exposed workstations, missing closets, undersized kitchens, and rooms doing two or three jobs. Some require only paint or a new top, while the larger built-in projects need accurate measuring, solid wall anchors, and a free weekend.
Before You Start Hacking IKEA Furniture
Measure the room with cabinet doors, drawers, and dining leaves fully open. Preserve at least 30 inches for a secondary walkway and 36 inches for a main route whenever the layout allows it.
Keep radiators, vents, outlets, and appliance clearances accessible. These IKEA hacks for small apartments should improve daily movement, not exchange visible clutter for awkward doors, blocked airflow, or hard-to-reach storage.
1. Frame a Doorway With BILLY Bookcases for a Full Storage Wall
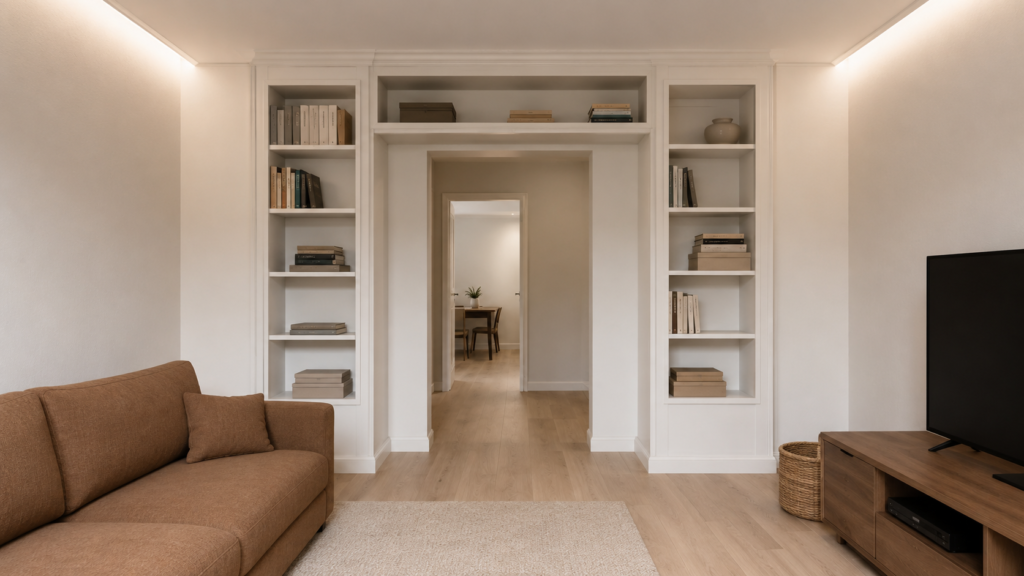
Place narrow BILLY bookcases on both sides of a doorway and bridge the gap with a shelf above. Add a recessed toe-kick, slim filler strips, and trim that follows the existing door casing.
The doorway becomes the center of an architectural storage wall rather than an interruption. Paint everything in the wall color to reduce visual weight, or use a muted contrasting shade to create a focal point. Anchor every section separately, especially the overhead shelf.
2. Turn STÄLL Cabinets Into a Wall-Hugging Entry Station
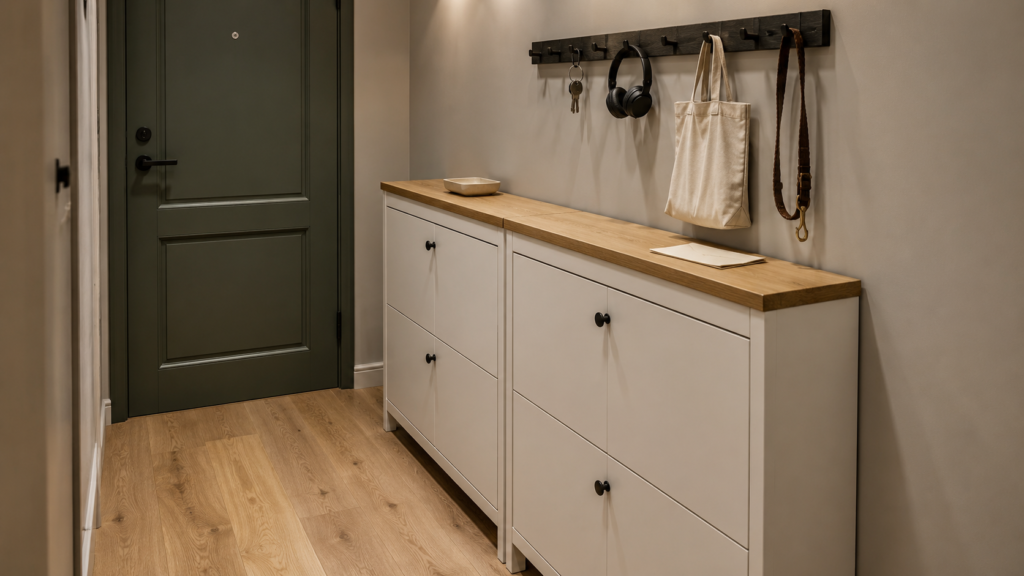
Run two STÄLL shoe cabinets side by side beneath one continuous wood top. Add a narrow peg rail 8–10 inches above the surface for keys, headphones, dog leads, and reusable bags.
The shallow cabinets store shoes without forcing people to turn sideways in the entry. A single top hides the join between units and makes them read as custom millwork. Keep the top mostly clear; filling it with decor defeats the clean sight line this hack creates.
3. Build a TRONES Headboard That Replaces Two Nightstands
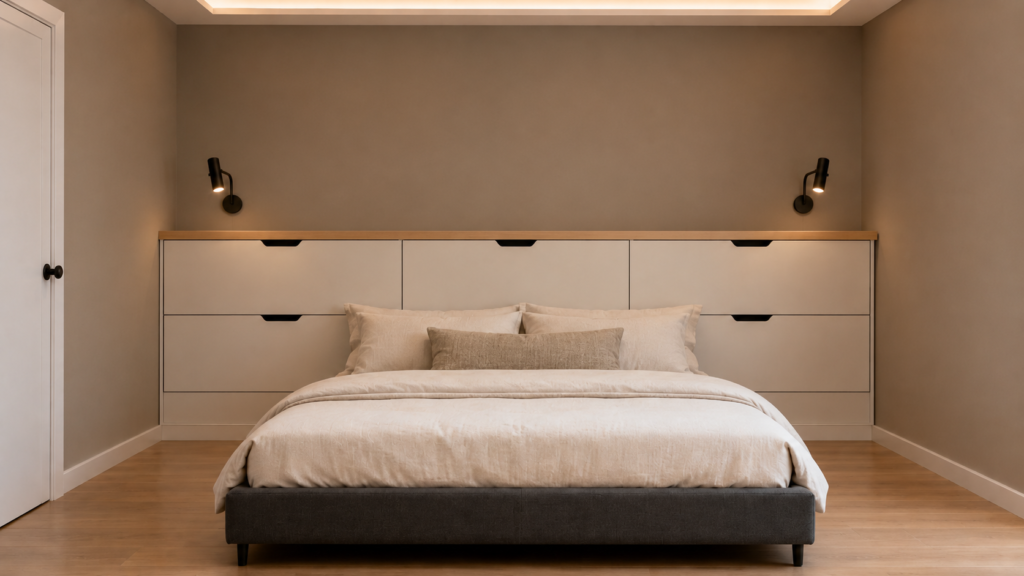
Mount four or six TRONES cabinets in a balanced grid behind the bed and cap them with an oak ledge. Position the top ledge roughly 28–32 inches above the mattress so you can reach a book or glass without sitting fully upright.
The storage stays within the bed’s footprint, which frees both sides for circulation. Use the cabinets for chargers, sleep masks, paperbacks, and spare pillowcases. Leave a small cable opening rather than trapping power cords behind the plastic.
4. Hide a SKÅDIS Utility Station Inside a Closet Door
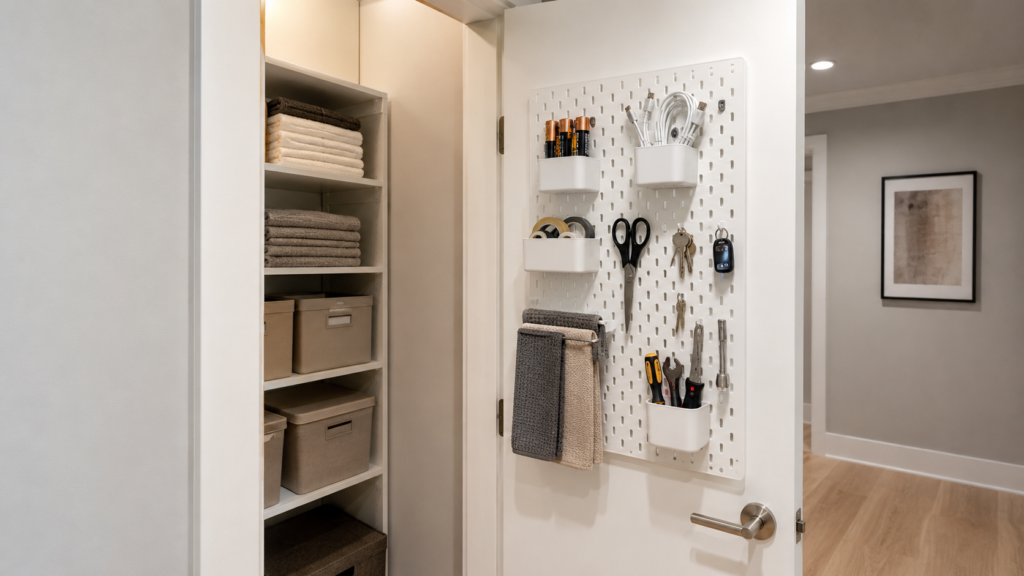
Mount a SKÅDIS pegboard inside a closet, pantry, or utility door. Use shallow cups and hooks for batteries, cleaning cloths, tape, small tools, hair accessories, or charging cables.
Moving these little items behind a door clears drawers and visible counters without adding another storage unit. Check that the organizers won’t hit shelves when the door closes. Renters can attach a narrow board to sturdy over-door brackets instead of drilling directly into the door.
5. Install EKET Cabinets Above an Interior Door
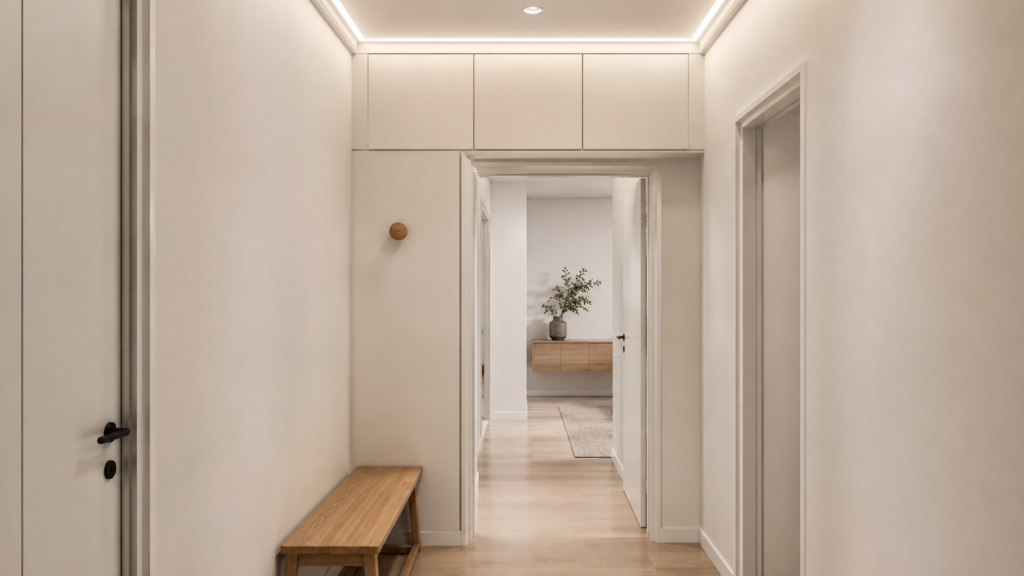
Use the wall above a doorway for a row of closed EKET cabinets. Align their lower edge with the top of the door trim so the installation looks deliberate rather than squeezed into leftover space.
This high zone works for luggage, seasonal bedding, serving pieces, and supplies you don’t need every week. Closed fronts keep the upper wall calm, while open cubes would make the ceiling area feel busy. Use fixings suited to the wall and the expected loaded weight.
6. Float an IVAR Cabinet and Paint It Into the Wall
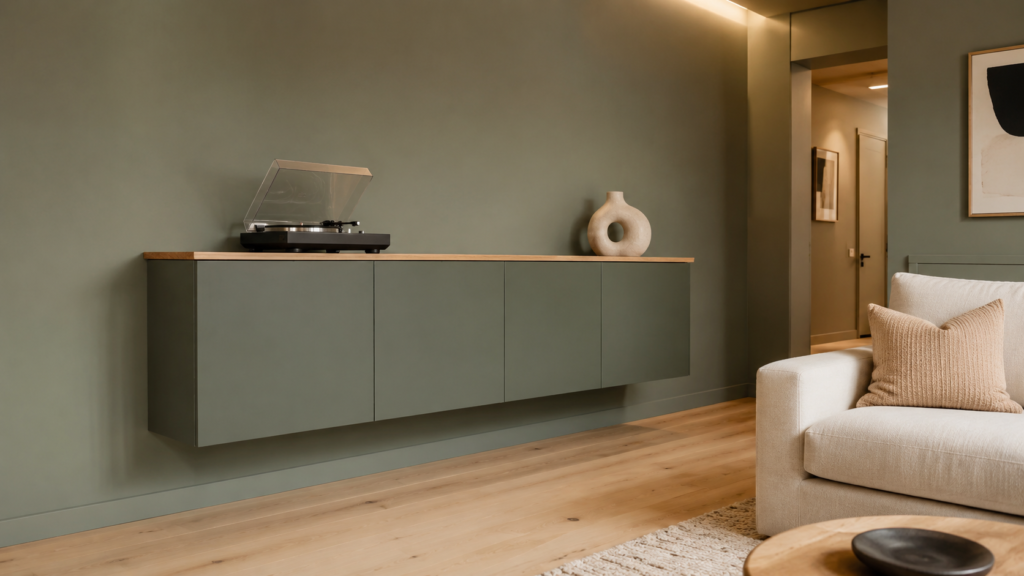
Wall-mount an IVAR cabinet 8–10 inches above the floor and paint it the exact color of the wall. Finish it with a slim stained-wood top for a quiet line of contrast.
The visible floor underneath makes the cabinet feel lighter and allows a small room’s flooring to continue uninterrupted. Matte paint hides minor surface flaws better than gloss, which catches every dent and brush mark. Use it as an entry cabinet, dining sideboard, or compact media unit.
7. Finish the Back of KALLAX and Float the Sofa in the Room
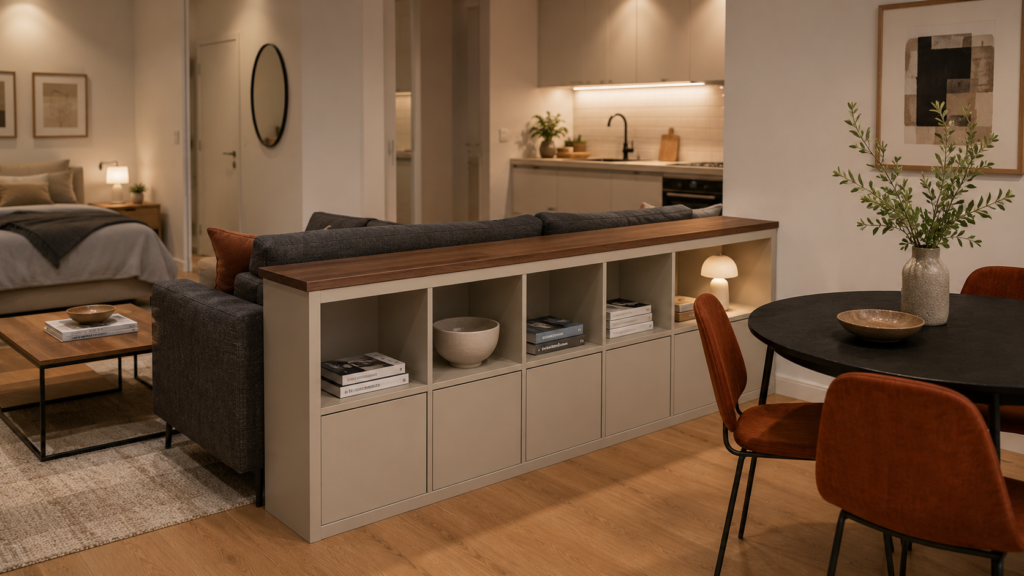
Place a horizontal KALLAX behind the sofa, then cover its unfinished-looking back with thin painted plywood. Add a narrow wood cap and use closed inserts on the side facing the dining or work zone.
This lets the sofa leave the wall without exposing an untidy furniture back. The low unit creates a soft boundary while borrowed light still moves across the room. Keep it close to sofa-back height; a taller divider will shorten the sight line and make the apartment feel boxed in.
8. Add a MOSSLANDA Power Ledge Behind the Sofa
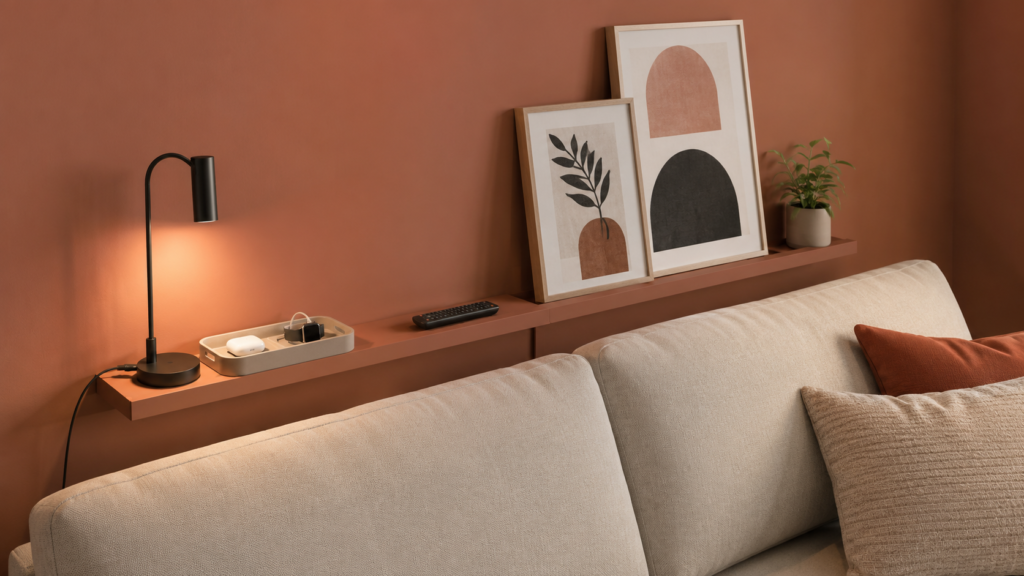
Mount a MOSSLANDA picture ledge 2–4 inches above the sofa back and use it as a slim power shelf. It can hold a compact reading lamp, remotes, charging cables, and one or two frames.
A normal console table may consume 12–16 inches of floor depth. The ledge provides the useful surface without narrowing the walkway behind or beside the sofa. Avoid mounting it where heads will hit the edge, and secure loose charging cords so they don’t disappear between the cushions.
9. Make BESTÅ Read as One Long, Low Architectural Line
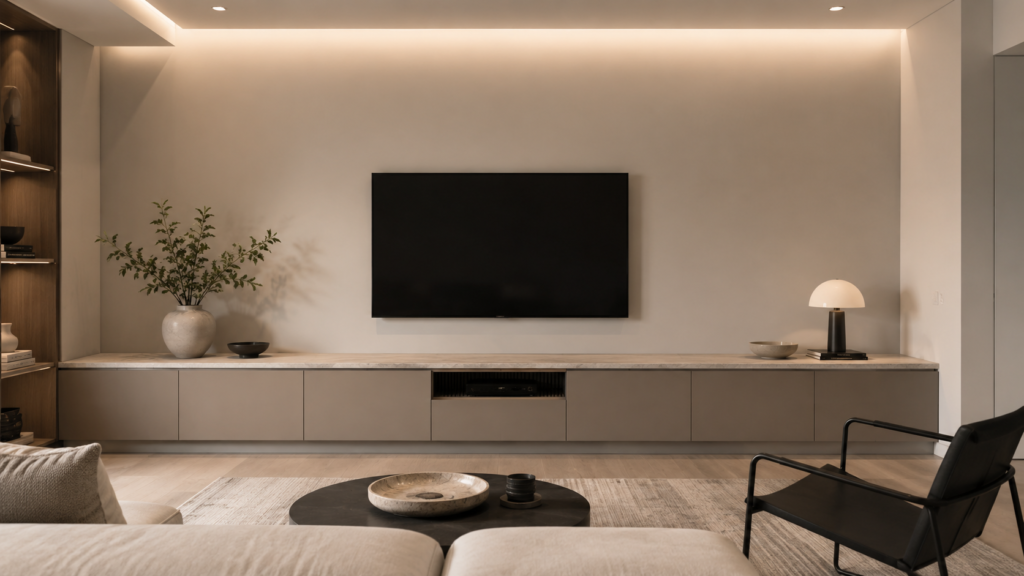
Join several low BESTÅ cabinets beneath one uninterrupted wood or stone-look top. Use matching doors, conceal the legs with a recessed plinth, and stop the display from becoming a row of unrelated boxes.
The long horizontal line visually widens a compact living room and keeps storage below eye level. Mount the television above with 6–10 inches of breathing room rather than crowding it against the top. Store unattractive electronics behind doors and provide ventilation around equipment that produces heat.
10. Hide an Entire Work Zone Behind a VIDGA Curtain
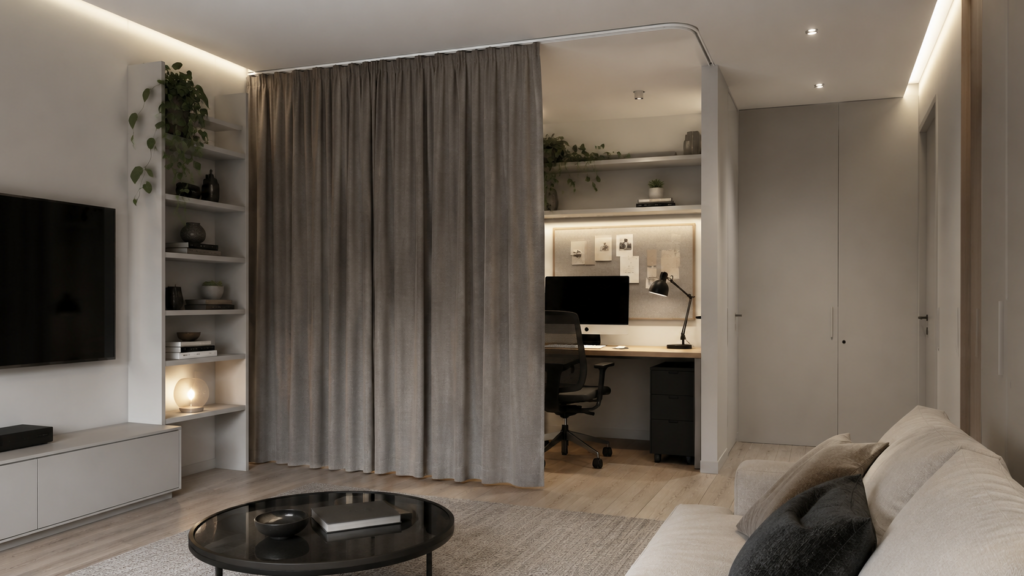
Install a ceiling-mounted VIDGA track 18–24 inches in front of a desk, open wardrobe, or storage wall. Hang a full-length matte curtain in a color close to the surrounding walls.
When closed, the fabric turns shelves, screens, cables, and supplies into one quiet surface. It also softens echo, which matters in apartments with hard floors and bare walls. Choose washable fabric with enough weight to hang cleanly; thin curtains often expose every shape behind them.
11. Keep NORDEN Folded Like a Console Until Dinner
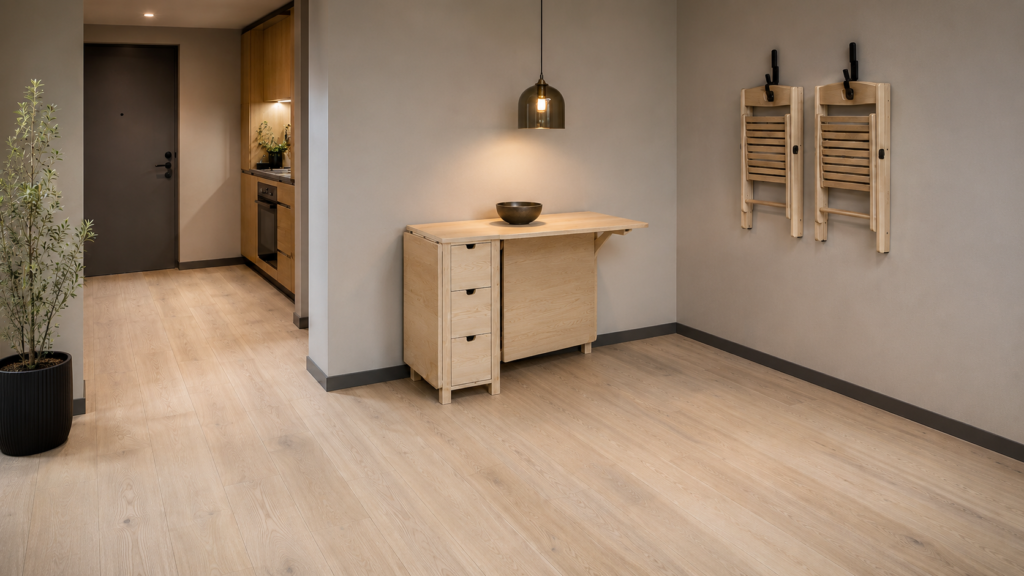
Place a NORDEN gateleg table against the wall with both leaves lowered. Use the drawers for flatware, placemats, office supplies, or charging accessories, then open only the amount of table you need.
One leaf works for everyday meals or laptop work. Both leaves handle guests without permanently filling the room with a large dining table. Leave enough clearance for chairs before buying; folding furniture saves space only when there’s room to use it comfortably after opening.
12. Give RÅSKOG a Removable Lid and a Second Job
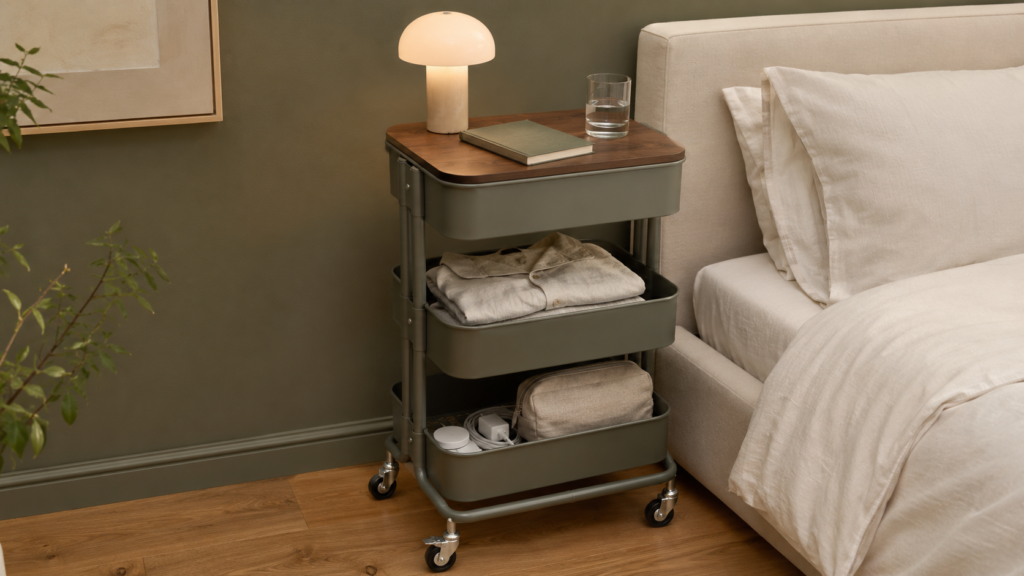
Cut a sealed plywood lid that rests securely over the top tier of a RÅSKOG cart. It can then work as a nightstand, printer table, drinks station, or compact side table while the lower tiers hold supplies.
The casters let one piece serve different zones throughout the day. A solid top also hides the visual clutter in the upper basket. Round the corners and use a wipeable finish, especially when the cart will hold drinks, cosmetics, or kitchen items.
13. Repurpose MALM as a Shallow Apartment Desk
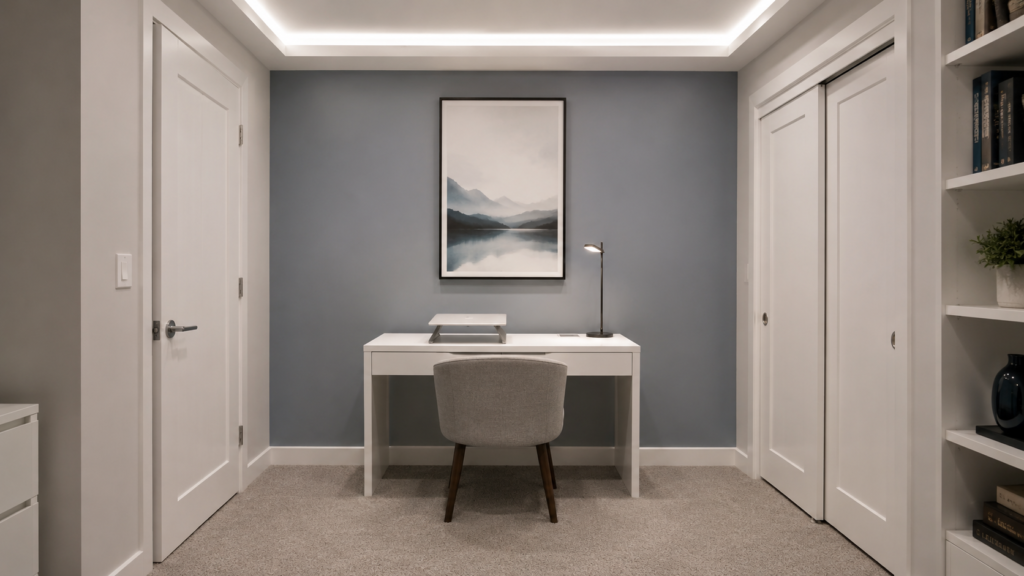
Use the MALM dressing table as a slim desk rather than buying a deep office setup. Add a monitor arm where the construction allows it, or place a laptop stand toward the back and keep the front clear for writing.
Its long drawer hides stationery and cables without adding upper cabinets. Position the work surface around 29–30 inches high and leave at least 36 inches behind the chair. The simple front also blends into a bedroom more quietly than bulky office furniture.
14. Make NORBERG a Fold-Down Breakfast Bar and Worktop
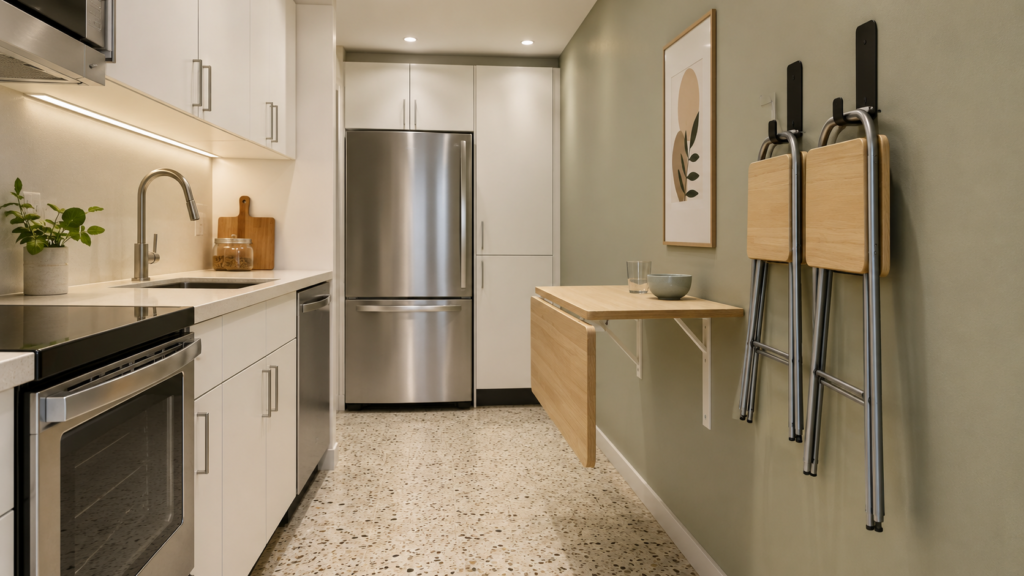
Mount a NORBERG drop-leaf table at counter height for standing meals or at desk height for seated work. Pair it with folding stools that can hang on wall hooks when they aren’t needed.
The tabletop disappears between uses, preserving the walkway through a narrow kitchen or studio. Mark its open footprint on the floor with painter’s tape before installation. This prevents the common mistake of discovering that the table blocks a cabinet, refrigerator door, or main route once lowered.
15. Roll TROFAST Storage Beneath a Desk
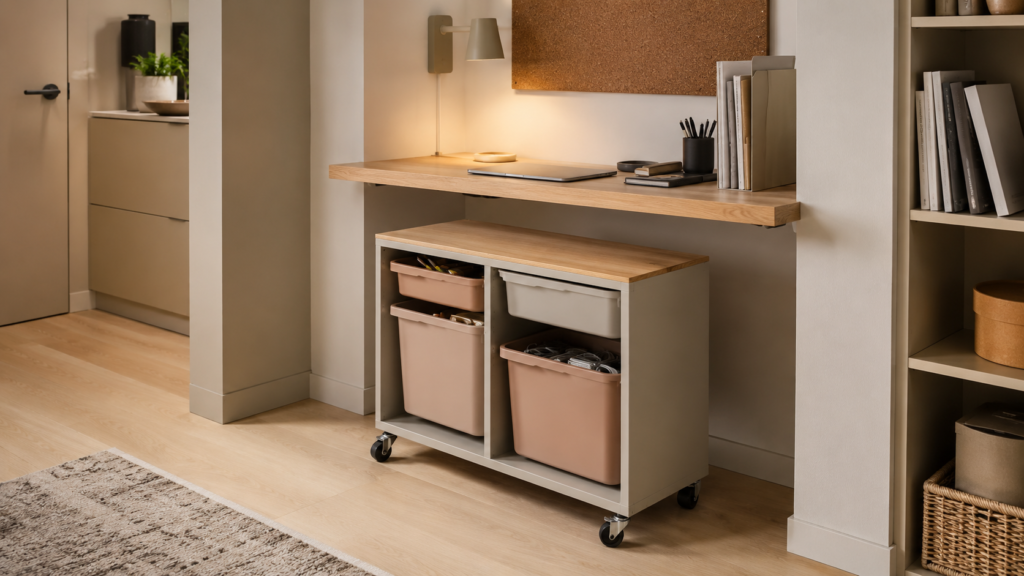
Add locking casters to a narrow TROFAST frame and finish the top with sealed plywood. Use shallow bins for paperwork, sewing tools, camera equipment, children’s art supplies, or pantry overflow.
The whole unit can park beneath a desk and roll beside you only when needed. Matching opaque bins calm the look, while mixed bright colors can make a shared living room feel like a playroom. Confirm the caster and base installation can handle the weight you plan to store.
16. Turn a BILLY Bookcase Into a Shallow Dry-Goods Pantry
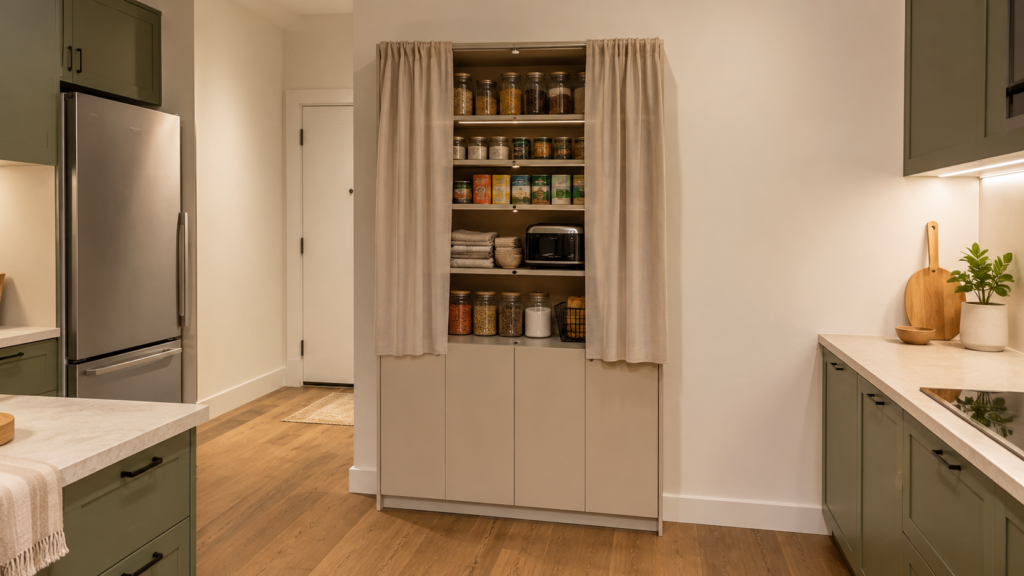
Place a BILLY on an empty kitchen or dining wall and adjust the shelves around jars, cans, and small appliances. Add doors or a washable curtain if packaging creates too much visual noise.
Its relatively shallow profile keeps food from disappearing in deep rows. Store heavy jars and appliances low, with lighter paper goods higher up. Don’t wedge the unit against a refrigerator or vent unless the appliance manufacturer’s required clearance remains completely open.
17. Use a KUNGSFORS Rail on the End of a Cabinet
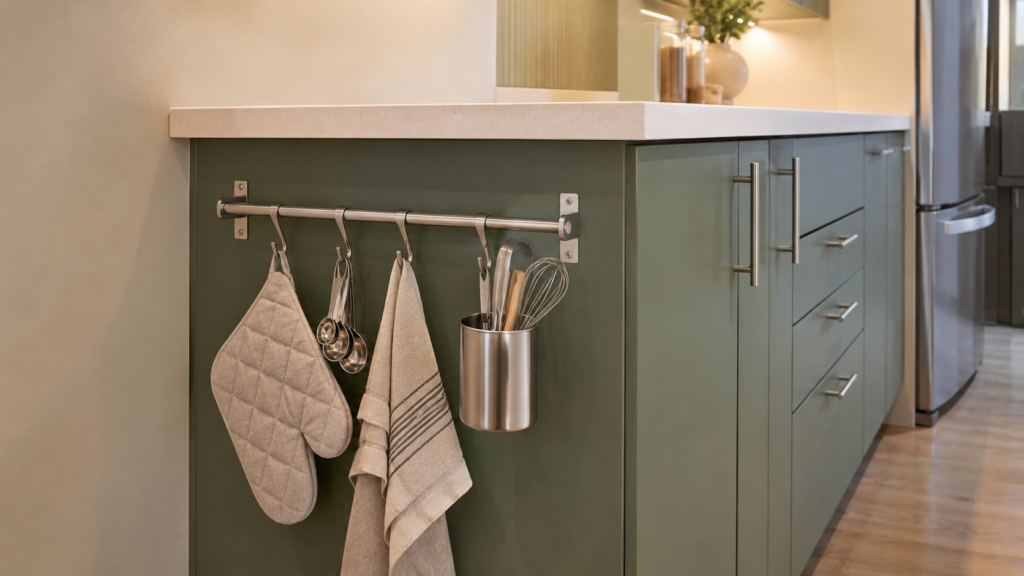
Mount a KUNGSFORS rail on the exposed side of a kitchen cabinet rather than crowding the backsplash. Use it for measuring spoons, oven gloves, a small utensil cup, or the towel you reach for constantly.
The cabinet end becomes useful without stealing countertop space. Keep hanging items flat and outside the main shoulder path. Avoid installing the rail beside an open flame or where fabric can catch on drawer handles each time someone walks past.
18. Put BEKVÄM Spice Racks Inside Pantry Doors
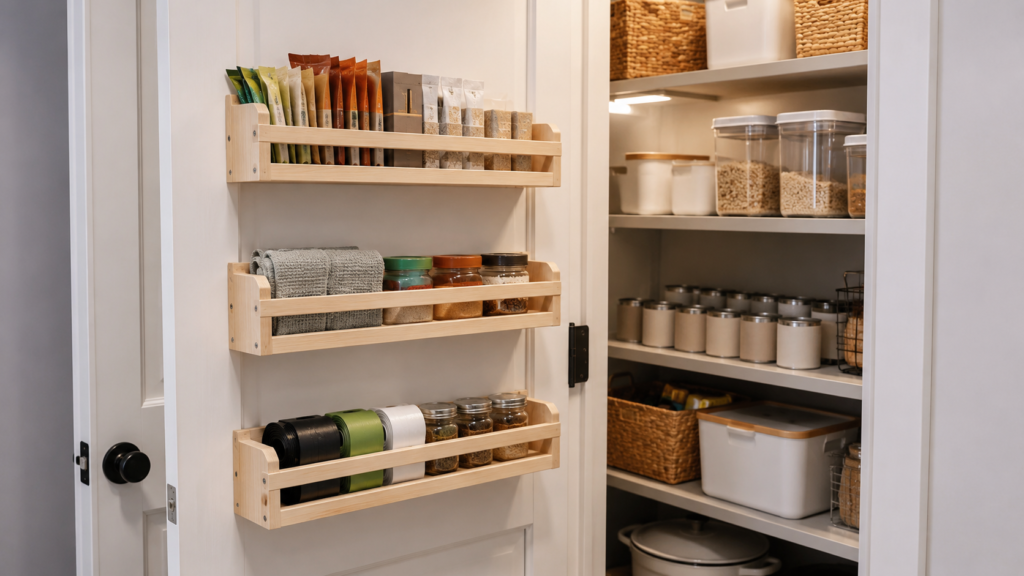
Mount BEKVÄM spice racks inside a pantry, broom closet, or freestanding cabinet door. They can hold seasoning packets, foil boxes, cleaning sprays, small jars, and rolls of bin liners.
This uses the shallow gap in front of existing shelves instead of adding another organizer to the room. Measure the space between the closed door and shelf contents first. Keep heavier bottles toward the hinge side, where their weight places less strain on the door.
19. Turn a BEKVÄM Cart Into a Compact Kitchen Island
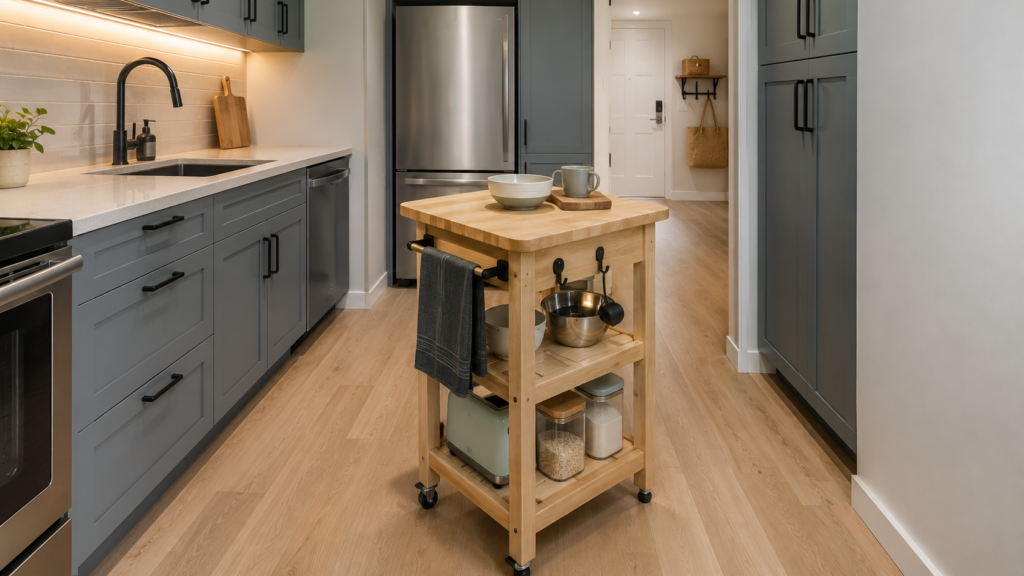
Upgrade a BEKVÄM cart with a removable butcher-block top, a towel rail, and two hooks. Use the lower shelves for mixing bowls, breakfast supplies, or one small appliance.
The cart adds preparation space without committing the kitchen to a full island. It can move aside when the floor needs to stay open. Leave 36 inches around the working side when possible, and avoid an oversized top that makes the cart unstable or prevents it from fitting through doorways.
20. Fit a BOAXEL Closet Into a Shallow Alcove
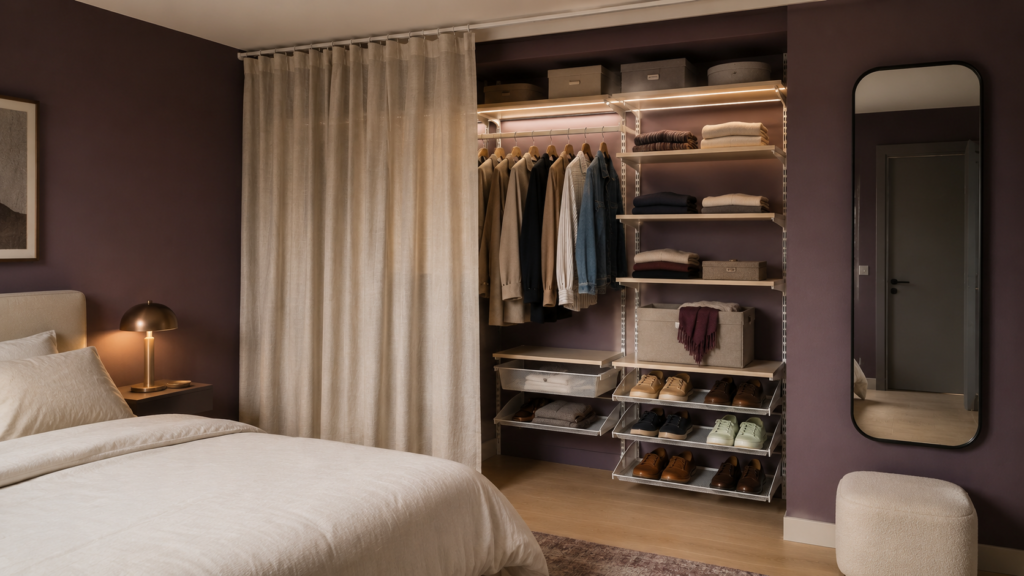
Use BOAXEL components to build an open closet inside an unused alcove, then conceal it with a ceiling-mounted curtain. Mix hanging rails with shelves rather than filling the whole width with standard clothes rods.
23. Hide a Pull-Out Vanity Inside PAX
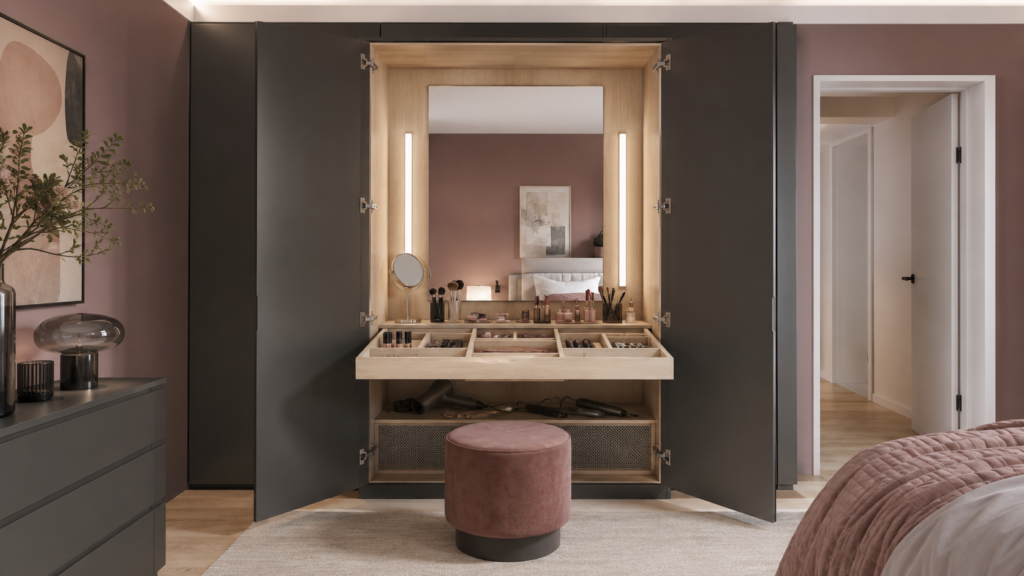
Install a KOMPLEMENT pull-out tray inside a PAX wardrobe at roughly 28–30 inches high. Place a mirror on the wardrobe’s interior back panel and use shallow organizers for makeup, jewelry, or grooming tools.
The tray becomes a vanity only when pulled forward, then disappears behind the wardrobe doors. Mount lighting near the mirror rather than overhead, which creates unhelpful shadows beneath the eyes. Avoid storing heat-producing hair tools until they’ve cooled completely.