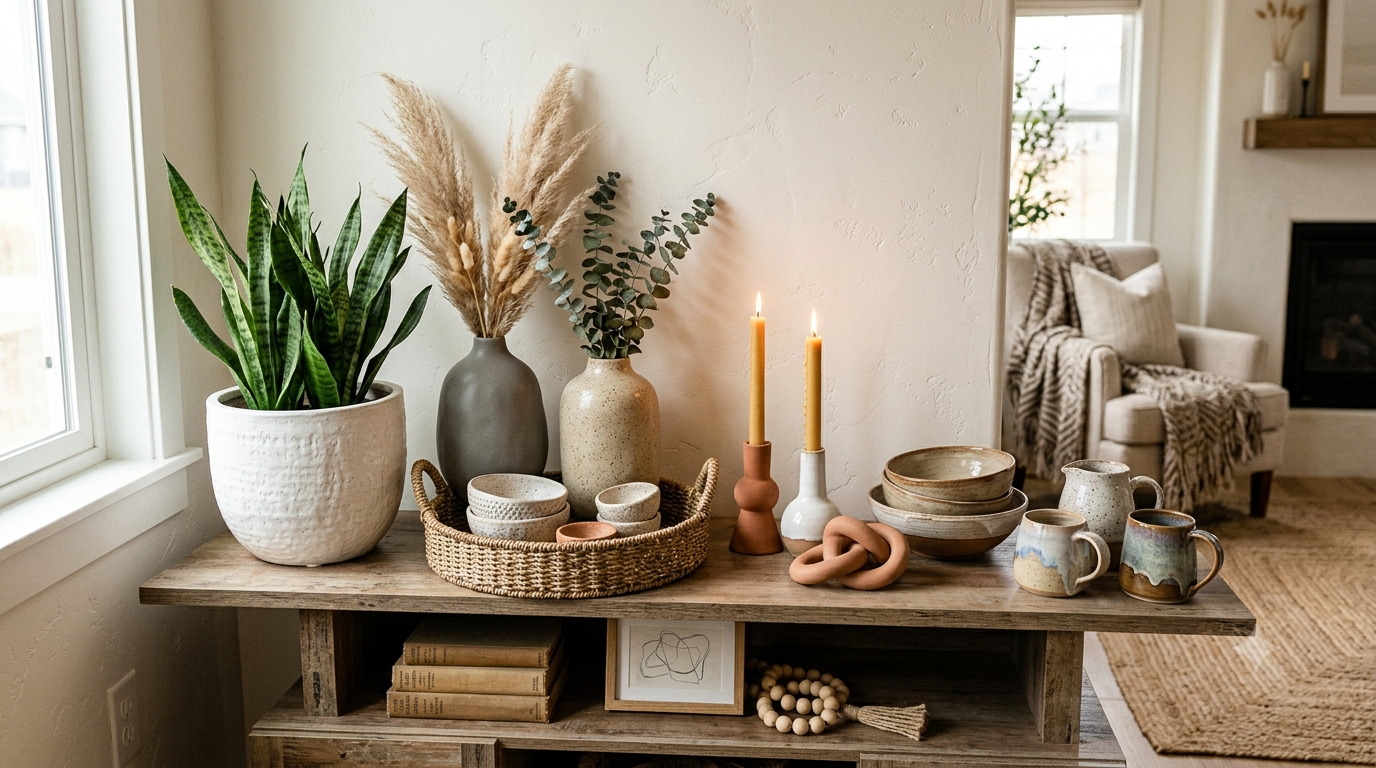
The difference between a convincing DIY and a project that looks homemade usually isn’t the budget. It’s proportion. Pottery Barn-style rooms rely on thick profiles, restrained finishes, substantial materials, and objects large enough to hold their own in the room.
These Pottery Barn dupes you can DIY at home recreate that visual weight without copying flimsy craft trends. Some start with secondhand furniture, while others use basic lumber, fabric, or hardware-store materials. The goal is a finished piece that looks believable from across the room and still holds up when you see it closely.
1. Build an Oversized Turned-Wood Lamp From Stacked Furniture Parts
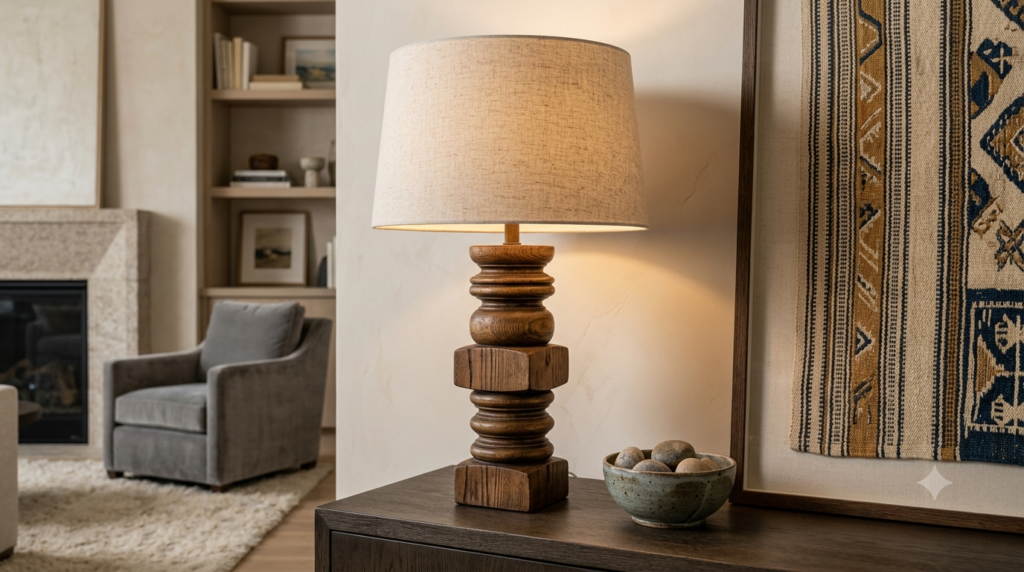
Create a substantial lamp base by stacking unfinished wooden bun feet, furniture legs, and round plaques over a lamp-making rod. Aim for a finished base between 20 and 25 inches tall before adding the shade.
Use medium walnut stain, then rub dark wax into the carved areas so the profile reads clearly. Pair it with a wide linen drum shade measuring roughly two-thirds of the total lamp height. The oversized scale gives a basic console or nightstand the same grounded look as expensive turned-wood lighting.
2. Make a Reclaimed-Beam Coffee Table With a Shadow-Line Base
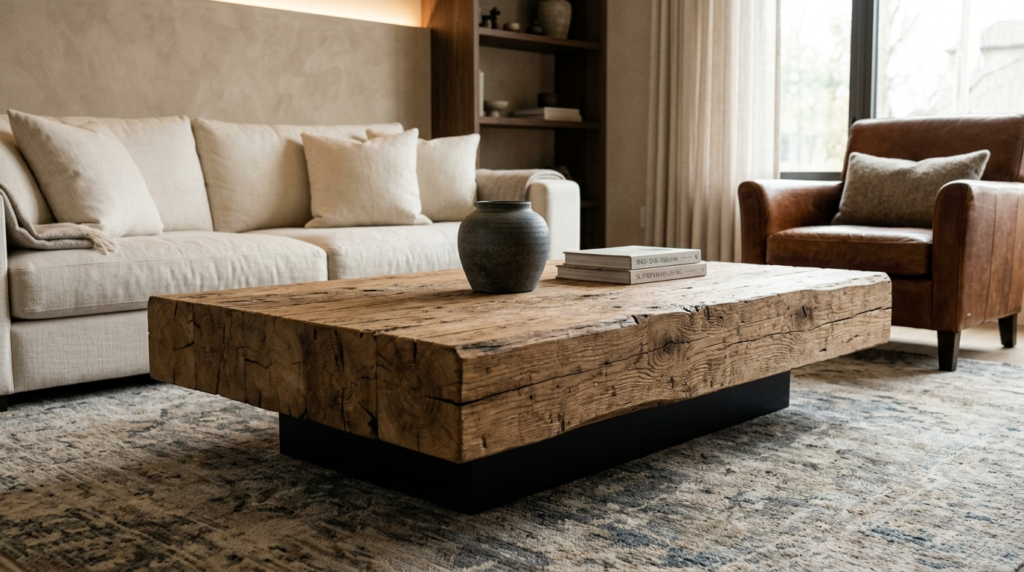
Build a low rectangular coffee table using thick construction lumber laminated together to resemble one solid beam. Recess the black-painted plywood base by 4 to 6 inches on every side so it disappears from normal sight lines.
That hidden support makes the top appear heavier and more architectural. Keep the table between 15 and 17 inches high, with 16 to 18 inches between it and the sofa. Use a wire brush before staining to soften fresh lumber, but avoid exaggerated dents that can make the finish look artificially distressed.
3. Turn a Plain Cabinet Into a Reeded Linen Storage Console
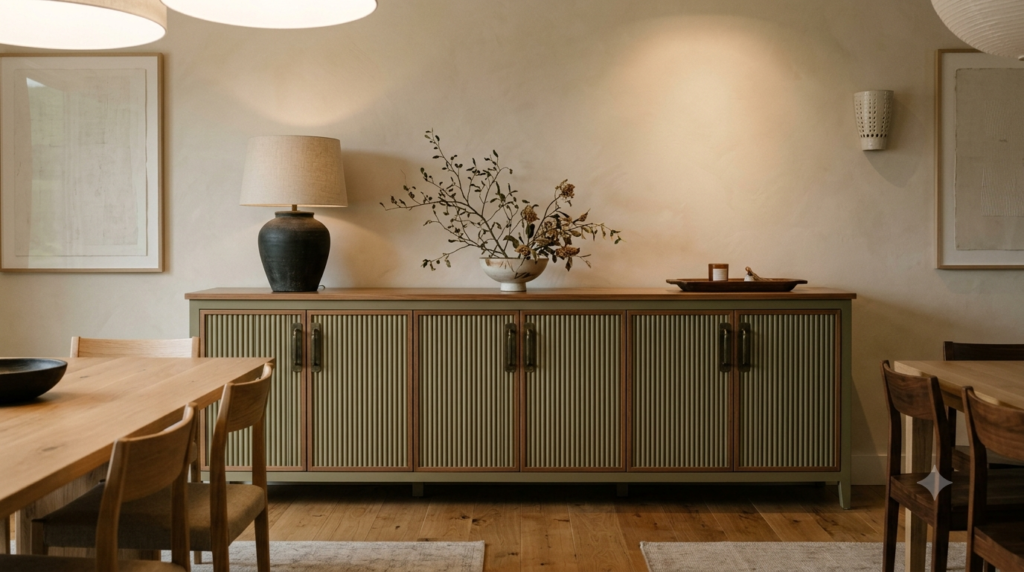
Cover flat cabinet doors with narrow half-round molding, then frame each door with a simple ¾-inch wood border. Paint the entire piece in mushroom, warm black, or muted olive using a durable satin finish.
Replace lightweight handles with solid aged-brass pulls that are at least 5 inches long. The vertical reeding adds rhythm, while the wide frame stops the pattern from becoming visually busy. Use this treatment on a low dresser, sideboard, or media cabinet, but check drawer and door clearance before attaching the molding.
4. Create a Giant Framed Textile From an Old Linen Tablecloth
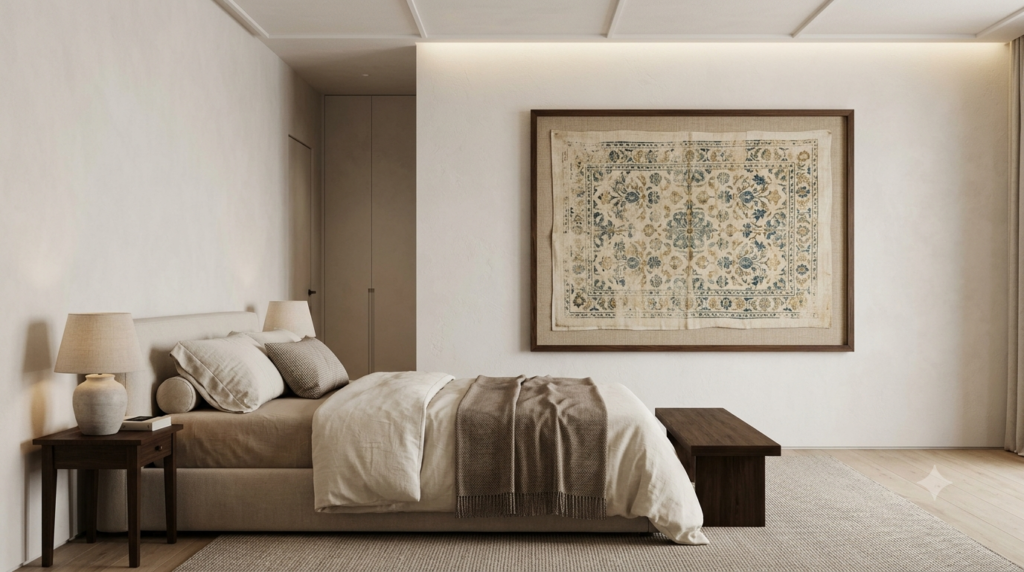
Stretch a vintage linen tablecloth, embroidered panel, or faded block-print fabric over a plywood backing and place it inside a simple oversized frame. A finished size around 36 by 48 inches gives the fabric enough scale to work above a sofa or bed.
Leave 2 to 3 inches of breathing room between the textile and frame instead of stretching it edge to edge. That negative space makes it feel curated rather than improvised. Hang the center at approximately 57 to 60 inches from the floor.
5. Build a Thick Plinth Side Table From a Damaged Nightstand
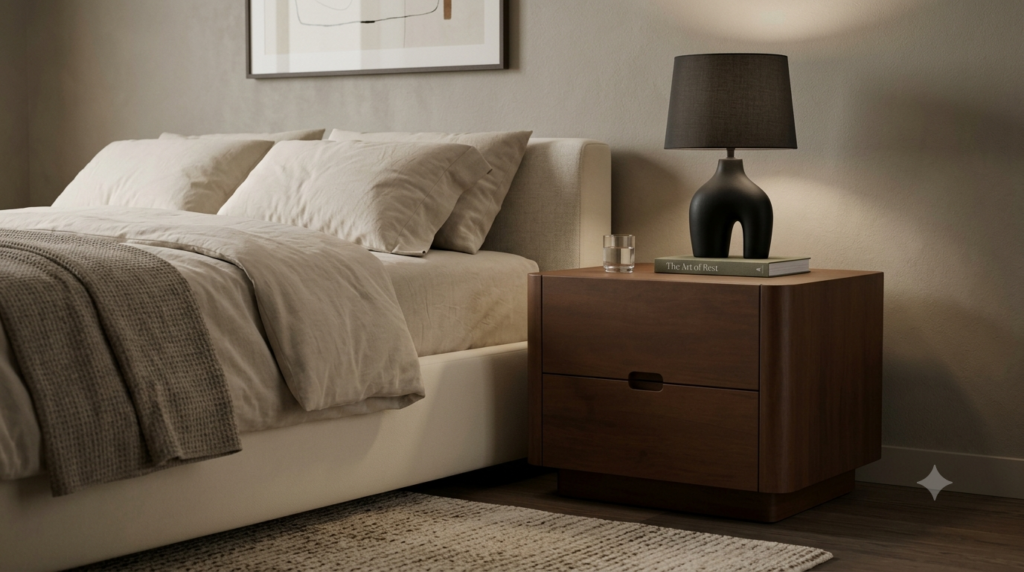
Remove the legs from a boxy secondhand nightstand, then wrap the base and top with thin plywood to create a clean, monolithic silhouette. Add a recessed toe kick underneath so the cabinet appears to sit directly on the floor.
Finish it in warm off-white, tobacco brown, or limewashed taupe. The uninterrupted shape gives the small piece more visual weight than exposed legs would. This works best beside a low upholstered bed or deep sofa, where a delicate table would look undersized.
6. Make a Leather-Wrapped Tray Table With Campaign Details
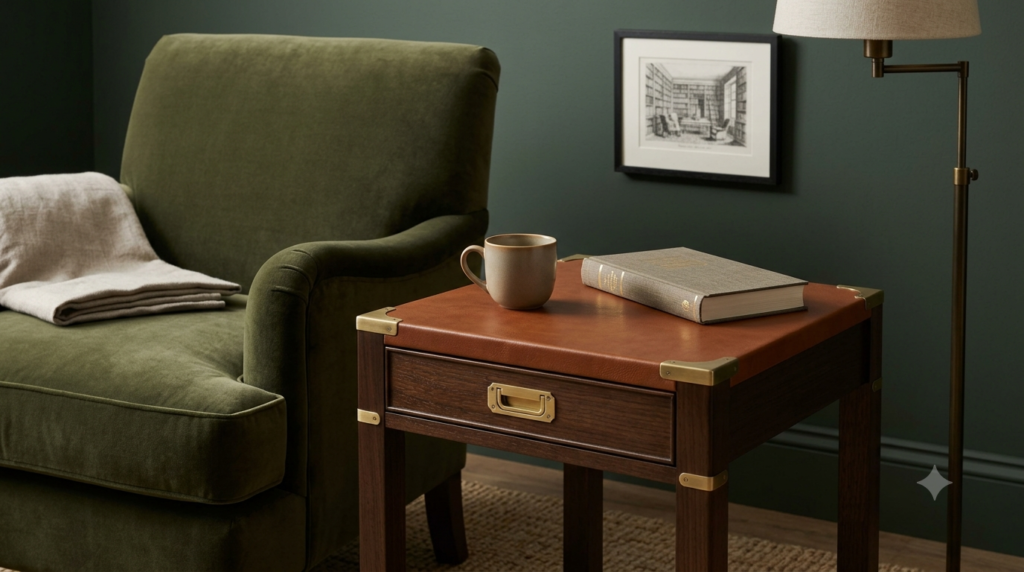
Start with a compact wood side table and wrap the top in genuine or high-quality bonded leather, securing the edges underneath. Add slim brass corner plates and darken the wood frame with walnut stain.
The contrast between smooth leather, warm metal, and visible wood creates the layered material mix associated with expensive campaign furniture. Keep the hardware restrained; too many brass details can push the table into costume territory. Use coasters because untreated leather will mark when exposed to condensation or hot mugs.
7. Sew a Slipcovered Dining Bench With a Weighted Skirt
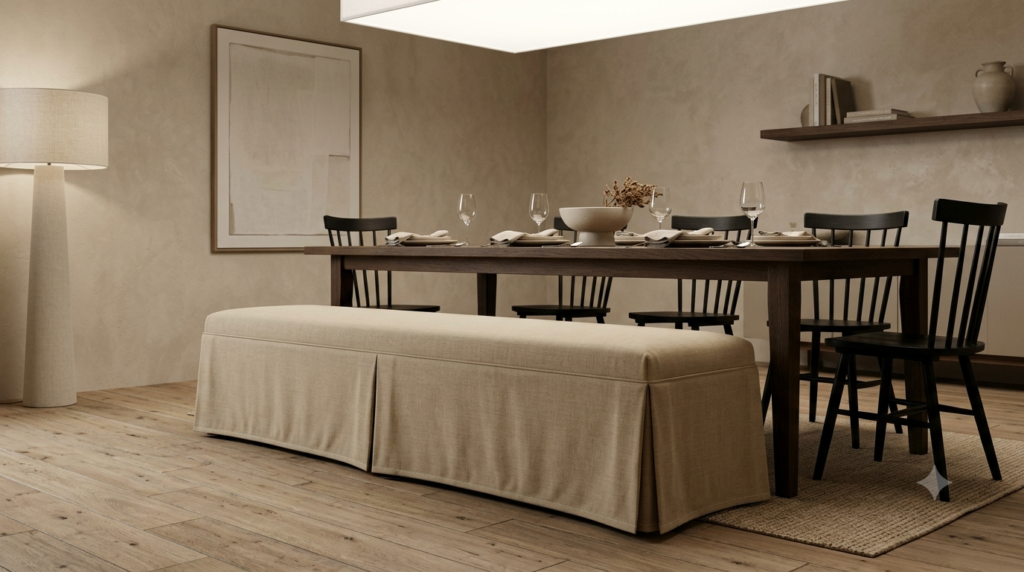
Build or reuse a simple upholstered bench, then sew a washable slipcover from heavyweight cotton or linen-blend fabric. Add small box pleats at the corners and sew drapery weights into the lower hem so the skirt hangs cleanly.
Let the fabric stop about ½ inch above the floor. The long, straight drop hides inexpensive legs and gives the bench a tailored, substantial shape. This is practical in dining spaces because the cover can be removed for cleaning, unlike fixed upholstery that quickly shows food stains.
8. Turn Basic Curtain Panels Into Pinch-Pleated Drapery
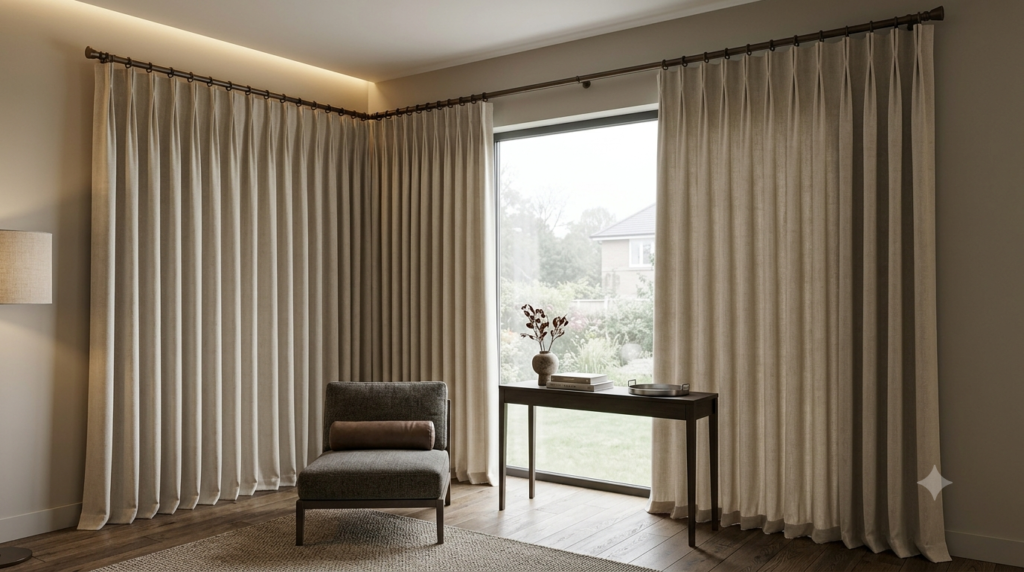
Add pleating tape to the back of extra-wide curtain panels and use metal pleater hooks to form evenly spaced folds. Mount them on rings attached to a rod installed high and 8 to 12 inches beyond each side of the window.
Each finished panel should contain roughly twice the fabric width needed to cover its half of the window. Fullness is what makes affordable curtains look custom. Choose lined cotton or linen-look fabric rather than thin polyester, which tends to glow unevenly and reveal every fold under artificial light.
9. Create an Aged-Stone Table Lamp Using a Matte Glaze Wash
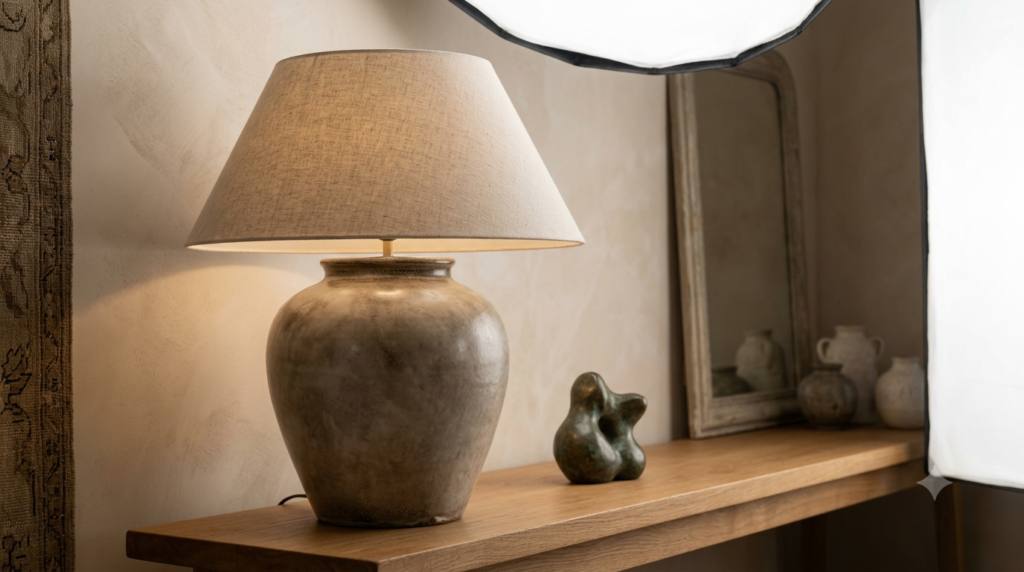
Choose a large ceramic lamp with a simple urn, jar, or bottle silhouette. Apply bonding primer, then layer two close shades of taupe, clay, or limestone paint with a natural sea sponge.
Brush a thin darker glaze around the base, neck, and recessed areas before wiping it back. The tonal variation creates depth without the rough, baking-soda texture that often looks crafty up close. Finish with a matte sealer and a generously sized linen shade so the lamp feels balanced rather than top-heavy.
10. Build a Paneled Console Table With Porch-Post Legs
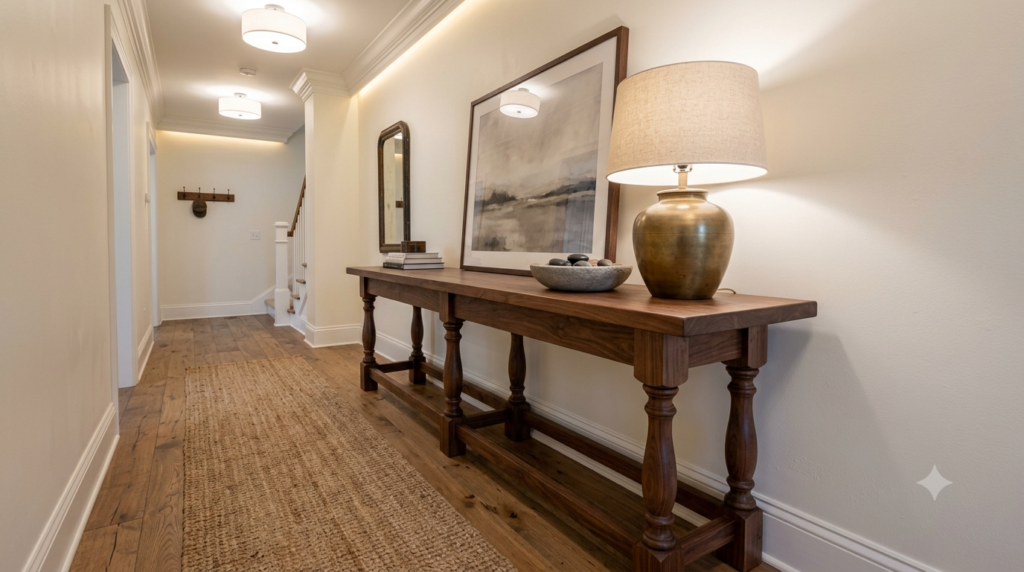
Use a thick wood plank for the top and connect two pairs of shortened porch posts with narrow lower stretchers. Add a recessed apron below the tabletop so the structure reads like a finished furniture piece instead of a board resting on legs.
Keep the console between 30 and 34 inches high and slightly narrower than the wall or sofa behind it. A deep brown stain gives turned details more depth, while warm black paint creates a quieter silhouette. Sand sharp edges lightly so the piece doesn’t look freshly assembled.
11. Make a Faux-Limestone Fireplace Surround With Skim-Coated Panels
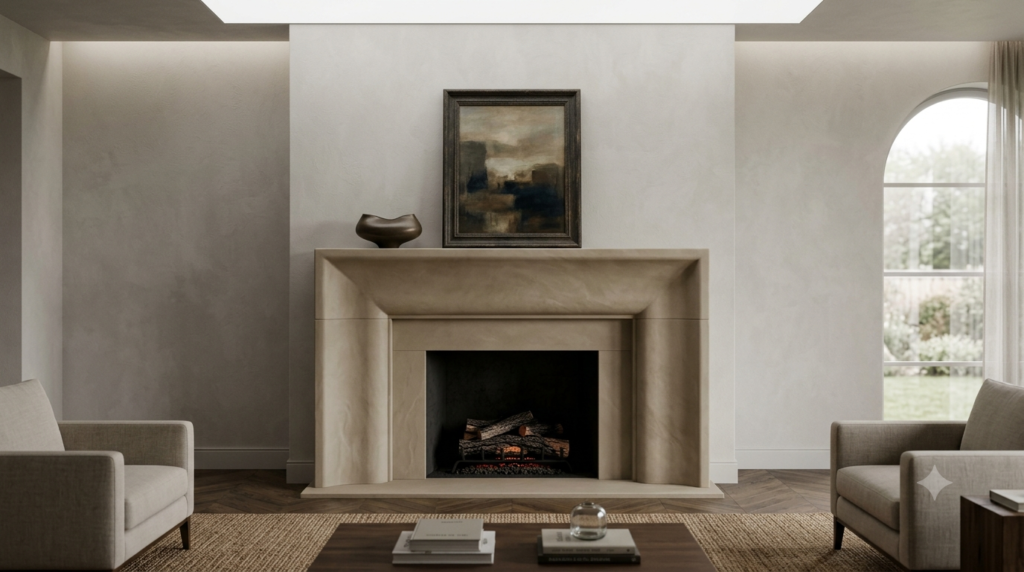
Build a removable three-sided fireplace surround from plywood or medium-density fiberboard, then coat it with mineral-based plaster or microcement in a warm limestone color. Use broad, irregular trowel strokes rather than trying to create a perfectly smooth finish.
Keep the opening proportionate: the mantel should extend 4 to 6 inches beyond each side of the firebox. The large continuous surface reflects light softly and gives the wall an architectural focal point. Use only noncombustible materials near working fireplaces and follow local clearance requirements.
12. Convert a Basic Mirror Into a Thick Oak-Ledge Mirror
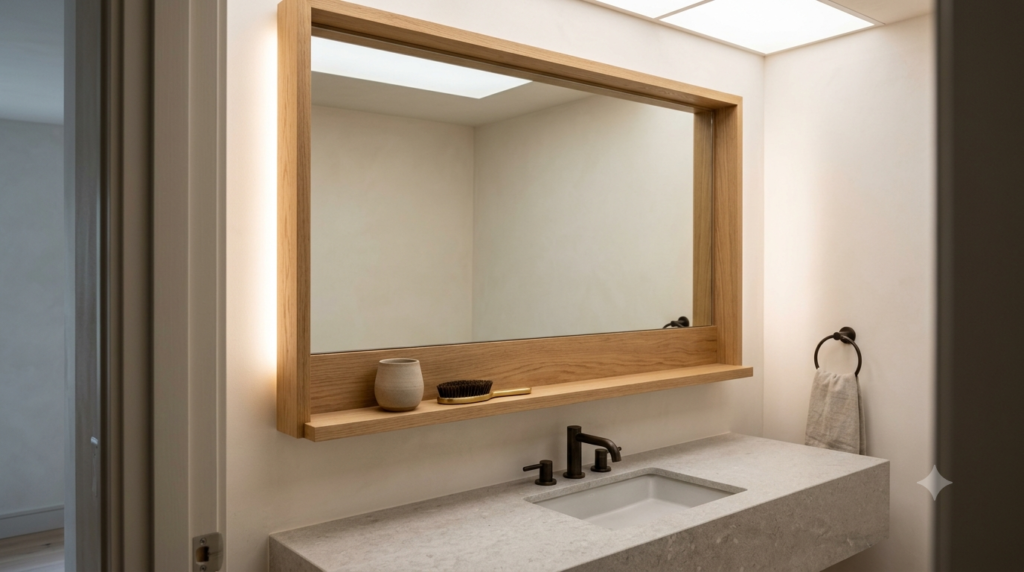
Frame a frameless mirror with 1-by-3 oak boards and extend the bottom board to a depth of 4 to 5 inches, creating a shallow ledge. Add concealed brackets underneath if the mirror is large.
The ledge gives the frame more visual weight and provides room for one small object, such as a ceramic vessel or brass brush. Keep the styling minimal so the shelf remains architectural. This works particularly well in bathrooms and entries, where standard flat mirrors often feel disconnected from the furniture beneath them.
13. Make a Carved-Wood Wall Panel From Ceiling Medallion Pieces
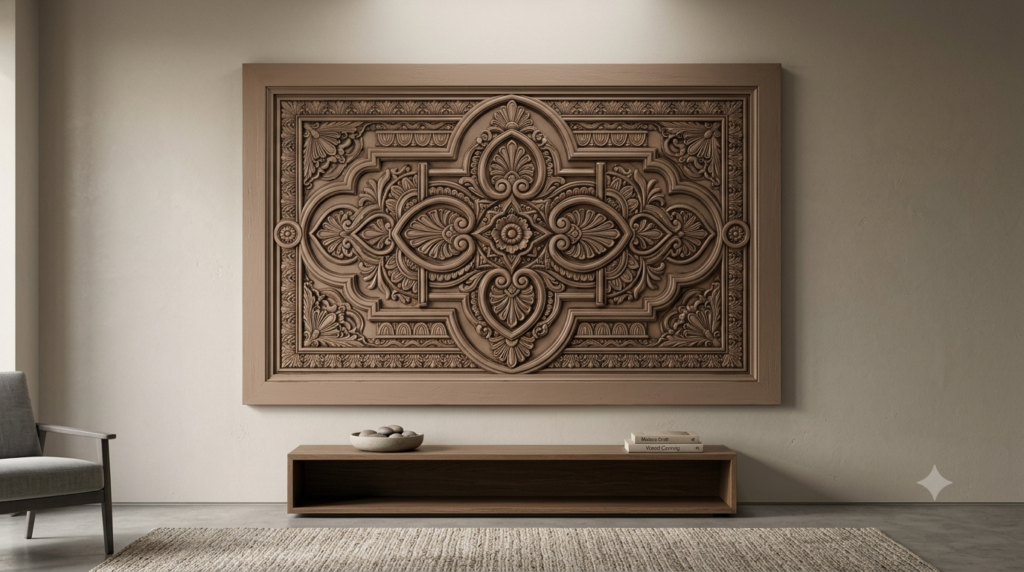
Arrange lightweight wood appliqués, carved trim offcuts, or sections of a ceiling medallion on a large plywood panel. Keep the pattern symmetrical but leave a wide plain border around the carved center.
Paint everything in one muted shade, then apply a thin brown glaze that settles into the recesses. The single-color finish turns inexpensive decorative parts into one cohesive object. At 30 inches wide or larger, the panel can replace several small artworks and create a stronger focal point with less visual clutter.
14. Refinish a Round Table With a Cerused Oak Effect
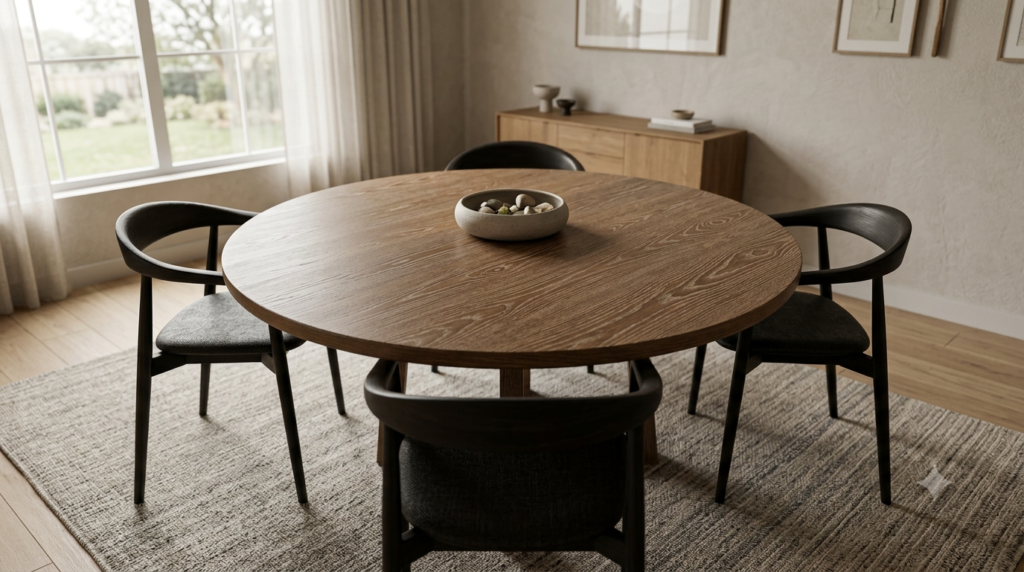
Strip or sand a round oak dining table, then brush the grain with a wire brush to open its texture. Apply a medium brown stain followed by white liming wax worked across the grain.
The pale wax catches inside the darker lines, making the wood pattern more visible without covering it. This material contrast looks richer than flat gray paint and disguises minor surface wear. Use the treatment only on open-grain woods such as oak or ash; smooth maple and pine won’t produce the same defined result.
15. Build a Tall Upholstered Headboard With a Wood Reveal
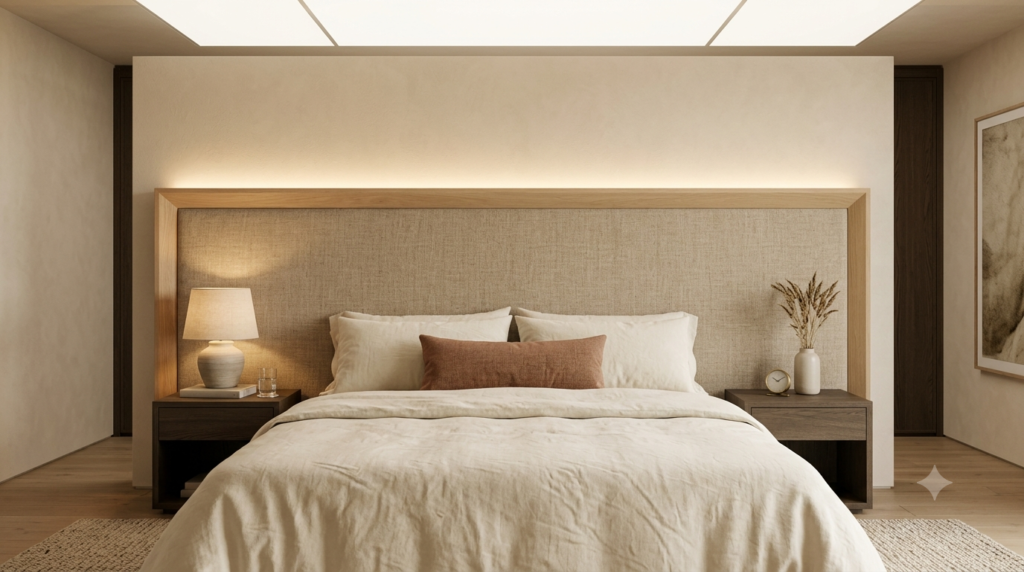
Cut a plywood headboard 48 to 60 inches high and slightly wider than the mattress. Upholster the center in textured flax-colored fabric, leaving a visible 2- to 3-inch wood border around the sides and top.
The exposed frame gives the fabric a crisp outline and stops the headboard from looking like a padded board attached to the wall. Use 2-inch foam for a substantial profile. In a small bedroom, choose a pale wood frame so the large shape feels lighter without losing its scale.
16. Turn Inexpensive Bookcases Into a Freestanding Library Cabinet
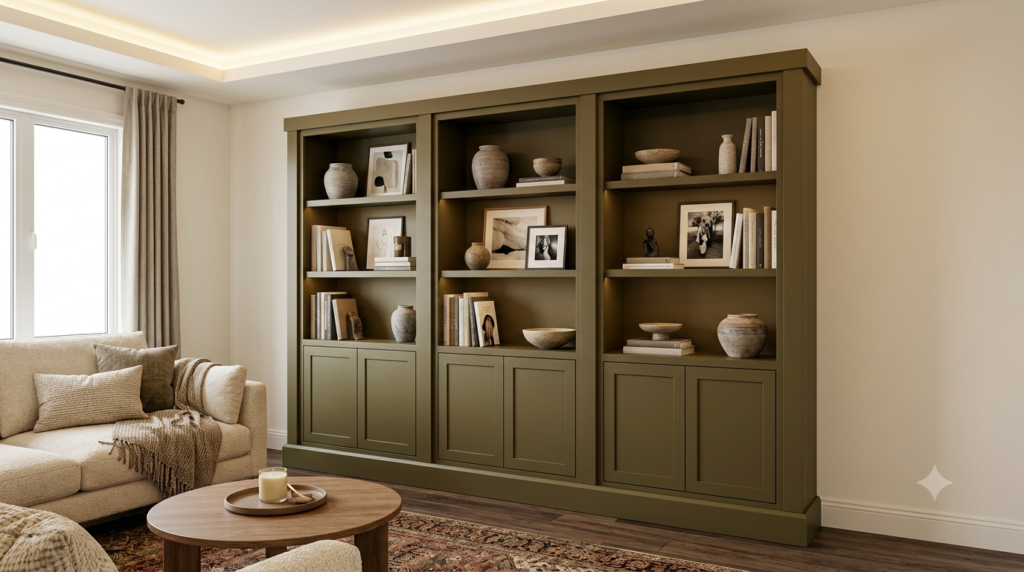
Place two or three matching bookcases together, then connect them with a shared plinth base, vertical face trim, and one continuous top board. Add simple cabinet doors to the lowest shelves to hide practical storage.
Paint every surface, including the backing panels, in one warm color. The uninterrupted trim makes separate units read as one furniture piece. Keep roughly 20 percent of the shelves empty and vary book orientation so the cabinet looks styled rather than packed. Anchor the finished unit securely to wall studs.
17. Build a Sculptural Pedestal Dining Table With a Faceted Base
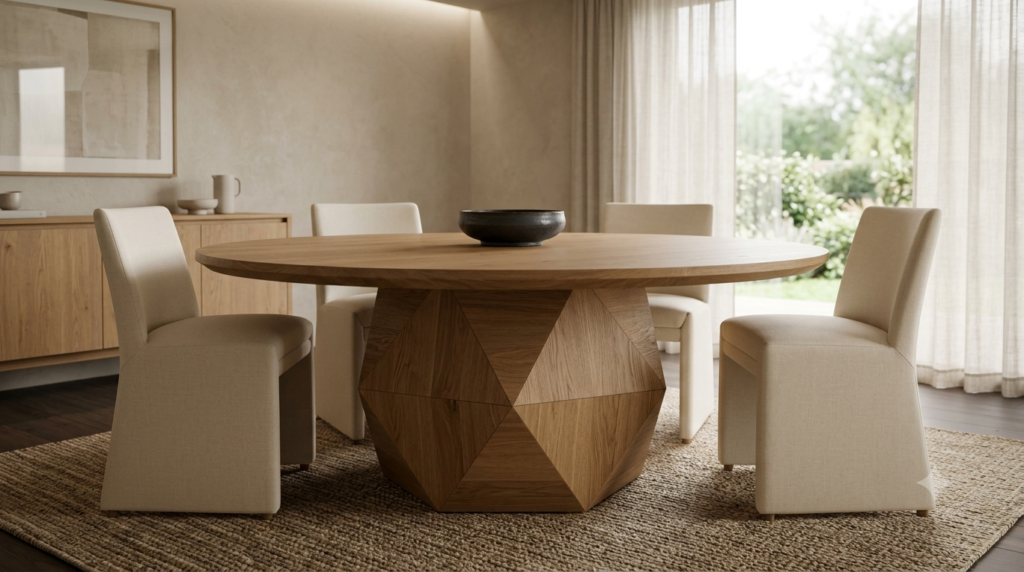
Construct an octagonal pedestal base from eight narrow plywood panels joined around an internal frame. Top it with a 48- to 54-inch round wood surface, depending on the number of seats required.
The angled base catches light differently on each face, creating depth without decorative carving. Finish the pedestal and top in the same medium wood tone for a monolithic look. Leave at least 36 inches between the table edge and surrounding walls or cabinets. Test the base for wobble before applying the final finish.
How to Make DIY Pottery Barn Dupes Look Believable
Good Pottery Barn dupes you can DIY rely more on silhouette than decoration. A thick tabletop, wide lamp shade, long hardware pull, or oversized frame can make a basic object feel expensive before you apply any special finish.
Use real materials where the eye naturally notices them. Solid wood edges, metal hardware, linen-blend fabric, and visible leather usually look more convincing than printed adhesive coverings. Faux finishes work best on large uninterrupted surfaces where texture matters more than close inspection.
Avoid making every project look aged. One weathered lamp can add character, but a distressed table beside a distressed cabinet and antiqued mirror starts to feel staged. Mix one worn surface with cleaner upholstery, smooth wood, or tailored drapery.
Common DIY Dupe Mistakes to Avoid
Using Furniture That’s Too Small
Many inexpensive furniture pieces have narrow tops, thin legs, and tiny hardware. Painting them won’t fix weak proportions. Add thicker trim, broader bases, longer handles, or larger shades so the finished piece can hold visual weight beside full-size furniture.
Choosing Cold Gray for Every Finish
Cool gray often turns blue under standard LED lighting and can make wood and beige textiles look dull. Warm taupe, mushroom, clay, tobacco, and soft black sit more naturally beside linen, brass, leather, and oak.
Overdoing Artificial Distressing
Heavy sanding, random dark streaks, and exaggerated chipped paint rarely resemble genuine age. Real wear appears around edges, handles, corners, and places touched frequently. Keep the center surfaces cleaner and let variation remain subtle.