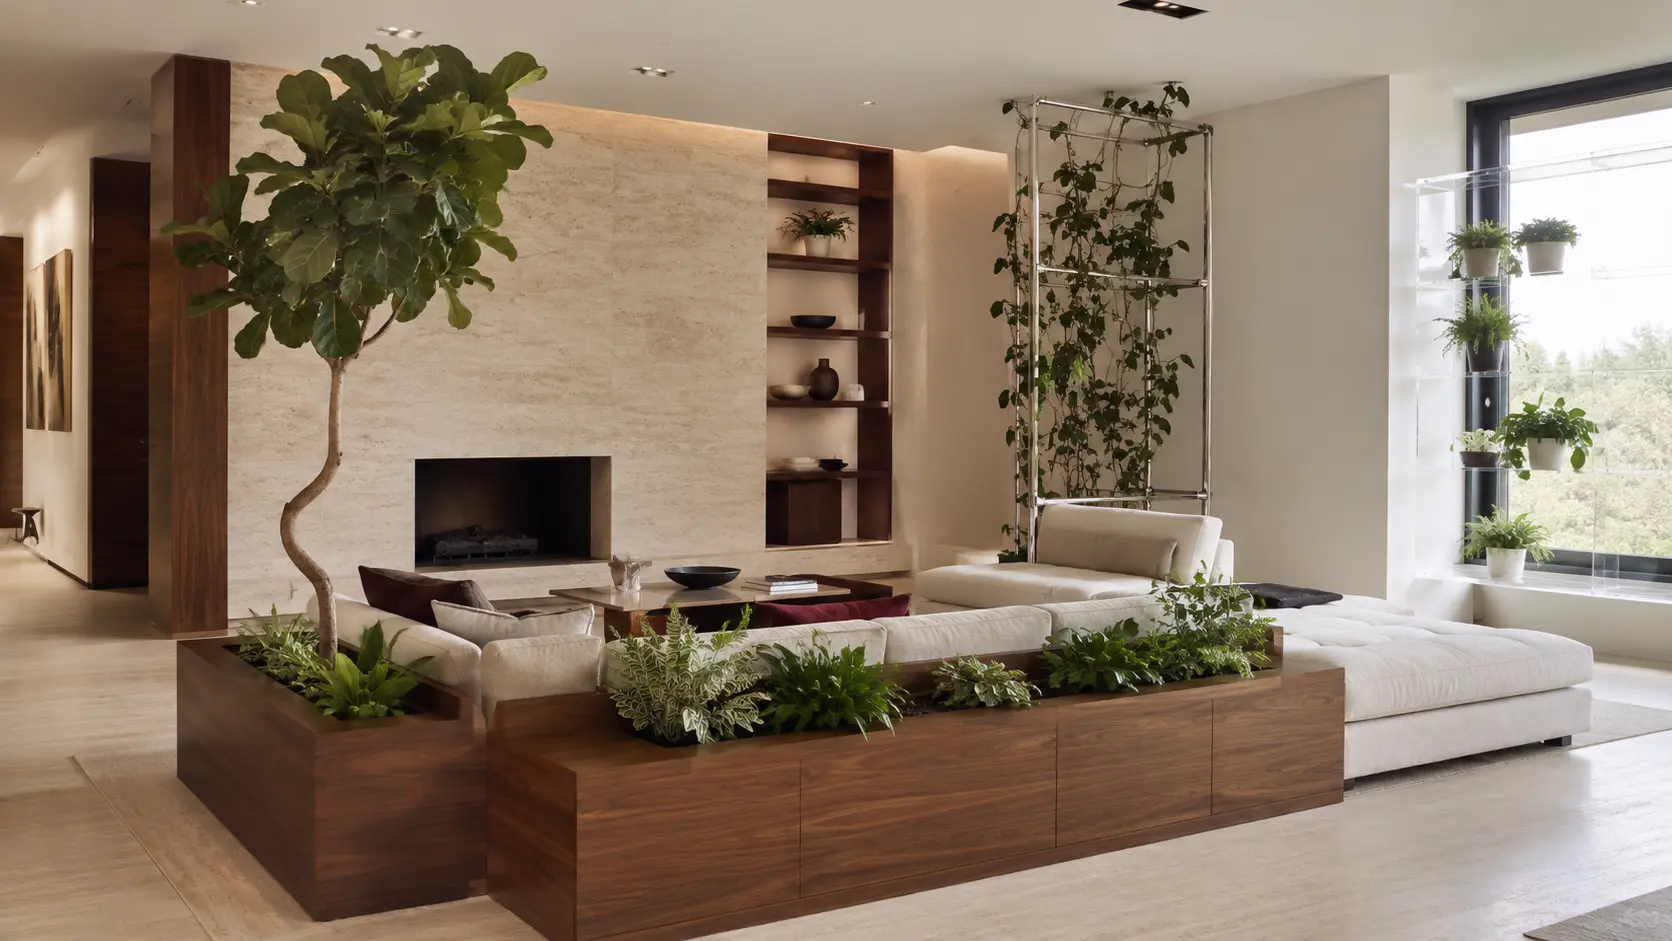
A room can have beautiful furniture and still feel oddly incomplete. Often, the missing layer isn’t another pillow, framed print, or decorative object. It’s a living element with enough height, shape, and visual weight to connect the furniture to the architecture.
These indoor plant decor ideas treat greenery as part of the room’s structure rather than an accessory added at the end. Plant size matters throughout: a six-foot tree can balance a long sofa, while that same plant may overwhelm a narrow bedroom. The goal is to choose foliage, planters, and placements that suit the room’s proportions, daylight, and daily use.
1. Create an Indoor Plant Courtyard
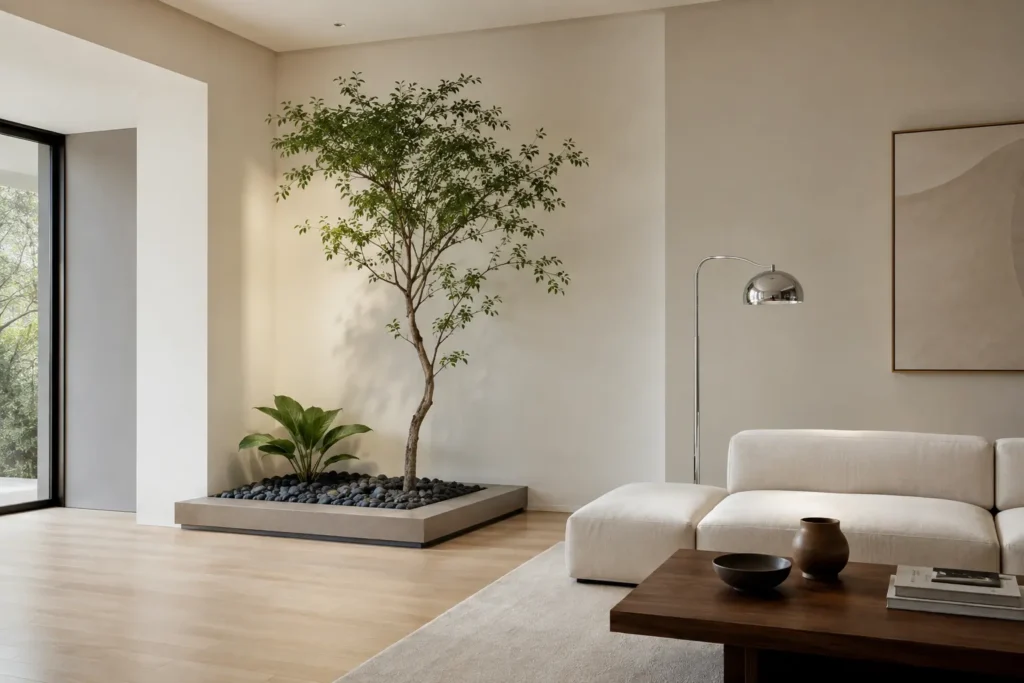
Set aside a defined section of the living room for a low, courtyard-style planting area. A raised platform between 6 and 10 inches high is more realistic than cutting into an existing floor and can be finished in honed stone, microcement, or dark-stained wood. Add one five- to seven-foot sculptural tree, a lower broad-leaf plant, and a restrained layer of pebbles.
Keep at least 36 inches of walking space around the platform. The mix of one dominant plant and low ground-level texture makes the installation feel architectural instead of looking like several pots collected in a corner.
2. Build a Botanical Sculpture
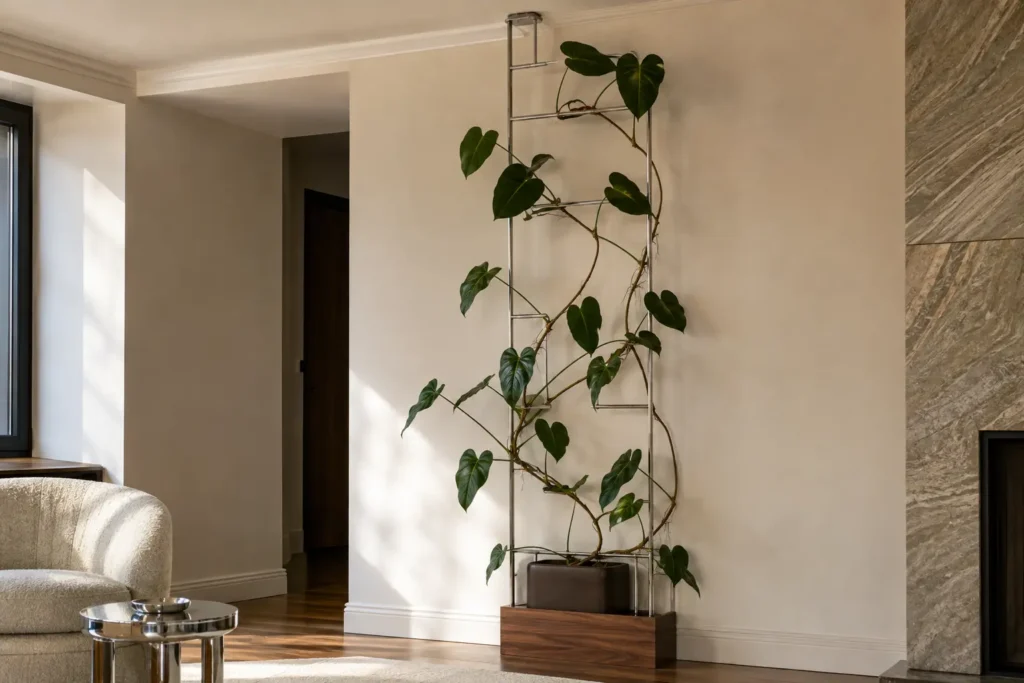
A slim metal framework can turn a climbing plant into an intentional vertical composition. Choose brushed steel, dark bronze, or powder-coated black, then train the foliage across the frame while leaving large sections open. In an eight-foot room, a frame approximately 18 to 24 inches wide usually creates enough presence without dominating the wall.
Use a climbing philodendron, pothos, or another plant suited to the room’s light. Avoid letting the growth become a solid green rectangle. The visible framework and negative space are what make the installation resemble sculpture rather than an overgrown trellis.
3. Wrap the Sofa With Greenery
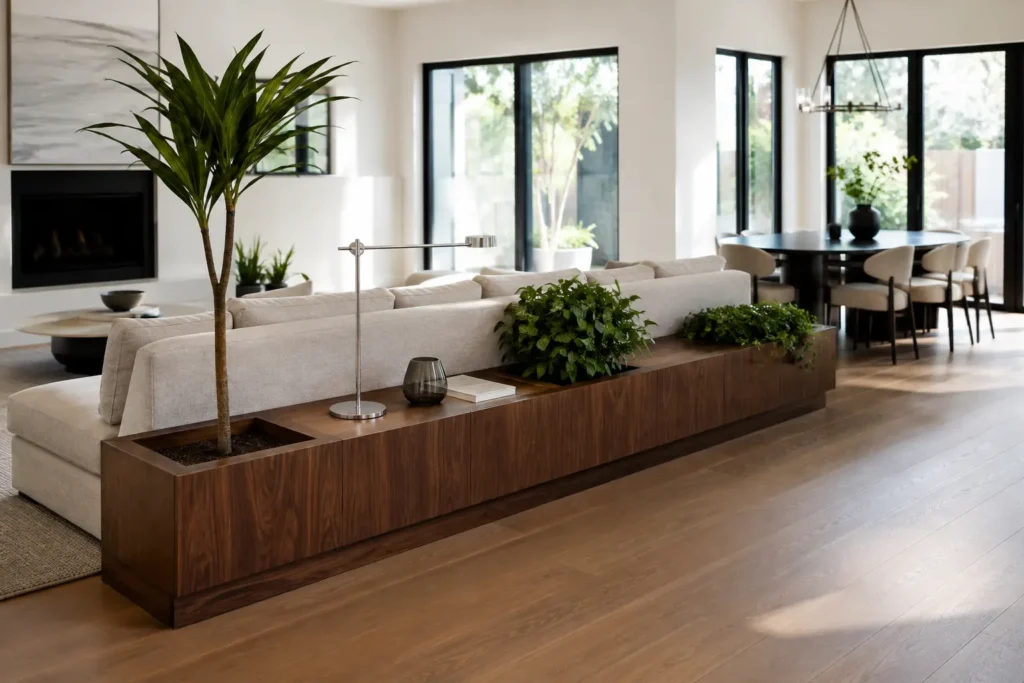
A sofa placed away from the wall often looks unfinished from the dining room or entry. Wrap its back and one side with a narrow L-shaped console, approximately 10 to 14 inches deep, and integrate sealed planter inserts into selected sections. Keep the foliage 8 to 18 inches above the sofa back so it softens the outline without leaning over seated guests.
Walnut, pale oak, or dark lacquer makes the unit feel like furniture rather than a garden bed. Leave part of the console solid for a lamp, books, or drinks, which keeps the feature useful in everyday life.
4. Create a Floating Window Garden
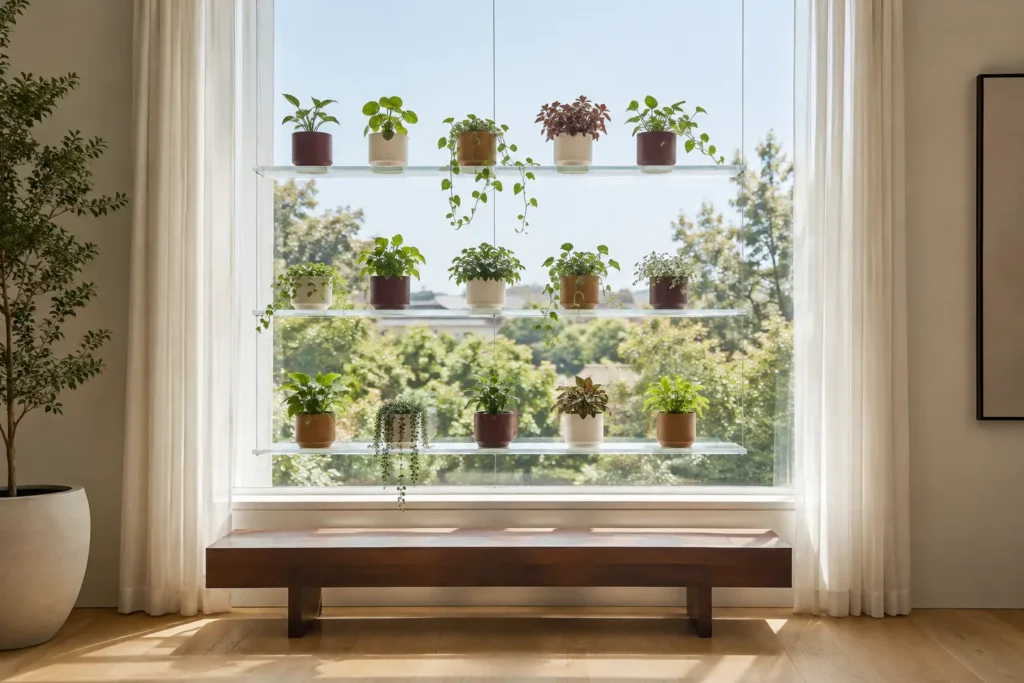
Create a floating window garden using clear acrylic shelves, tension cables, or slim glass ledges. Compact plants in 4- to 6-inch pots work best because larger containers quickly block the view and place too much weight on the structure. Position the shelves so at least half of the glass remains visually open.
Repeat one planter color, such as warm white, smoky brown, or glossy burgundy, to prevent the display from feeling busy. Clear supports allow daylight to pass through, while the leaves cast shifting shadows that change as the sun moves across the room.
5. Use a Planter Table
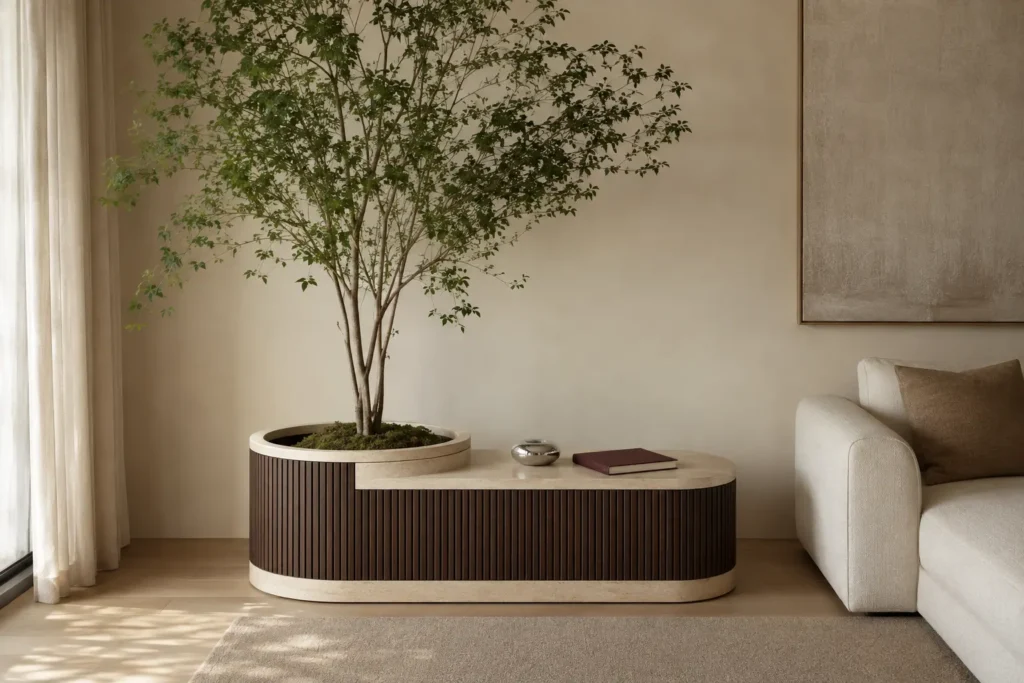
Instead of placing a planter beside a table, combine both functions in one substantial form. A monolithic base in travertine, fluted wood, brushed metal, or high-quality lacquer can hold a large plant at one end and provide a usable ledge at the other. The solid section should be wide enough for a drink or book but separated from wet soil by a sealed insert.
This works best with a five- to seven-foot plant whose canopy rises above nearby seating. Lightweight fiberglass with a convincing stone finish is easier to move than solid stone and often looks better than thin plastic molded to imitate concrete.
6. Frame a Reading Nook With Plants
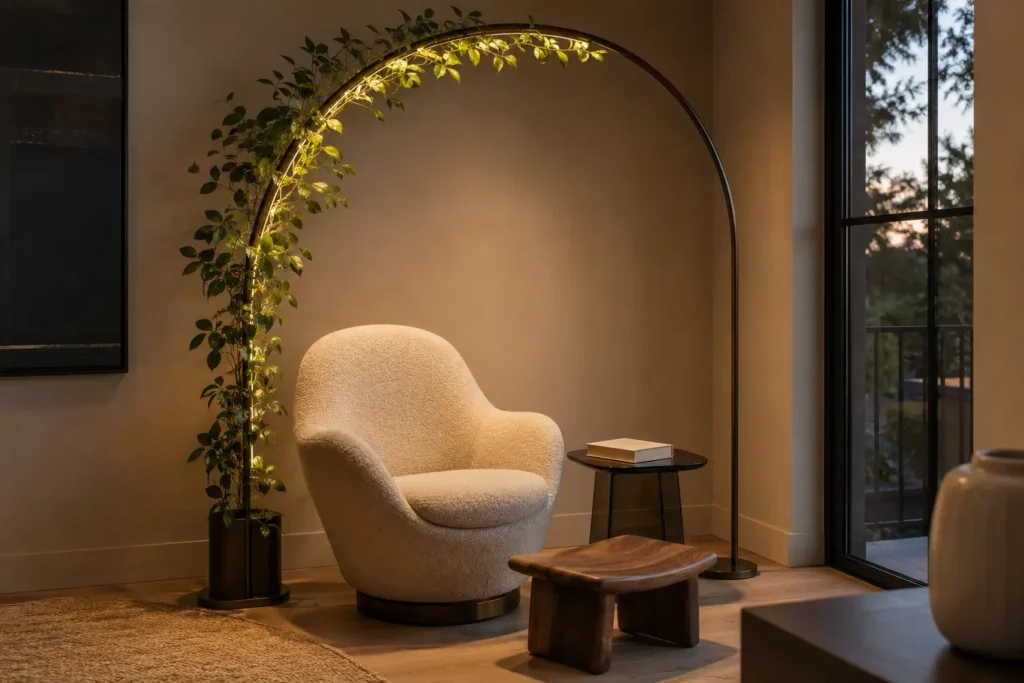
Install a slim curved frame around one side and above a reading chair, then train light foliage along the outer edge. Concealed full-spectrum lighting can sit inside the upper curve, giving the plant adequate light without introducing a visibly technical grow lamp. Keep the lowest overhead point at least 72 inches from the floor.
The plant should outline the chair rather than hang heavily above it. An open frame preserves headroom and prevents fallen leaves from landing constantly on the seat. Dark bronze, polished chrome, or warm oak can connect the arch to the room’s lighting and furniture finishes.
7. Add a Movable Plant Divider
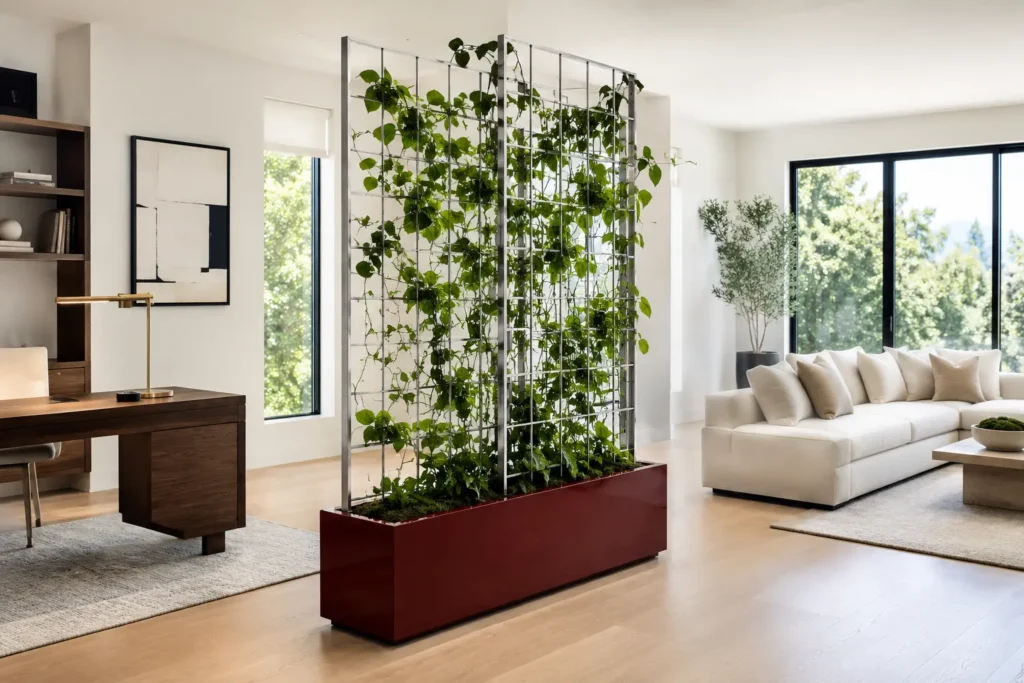
Use a long planter, approximately 12 to 16 inches deep, with two slim trellis panels positioned at slightly different depths. Train foliage across both layers so the screen filters the view between a home office, dining area, or sleeping zone without becoming an opaque green wall.
A planter on concealed locking casters can move when the layout changes or when the plants need stronger light. Keep the total depth below 20 inches in compact rooms and maintain a walkway of at least 30 inches. The layered leaves create privacy while allowing daylight and conversation to pass through.
8. Build a Botanical Fireplace Plinth
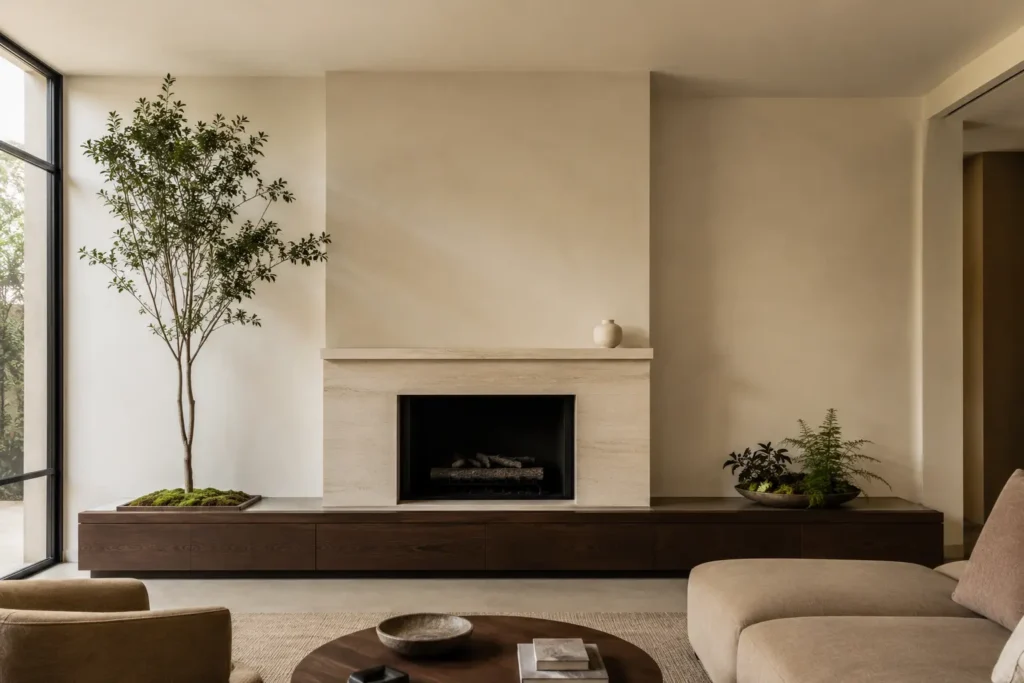
Run a low plinth along all or most of the fireplace wall instead of treating the mantel as the only decorating surface. A long base in stone, dark wood, or plaster can hold one tall plant at the wider end of the wall and a low planted composition at the opposite side.
The tall plant should relate to the ceiling height: approximately five feet for a standard eight-foot room and six to eight feet in taller spaces. Keep all foliage outside the fireplace manufacturer’s required heat clearance. This arrangement corrects uneven wall proportions while leaving the mantel calm and uncluttered.
9. Display Plants on Sculptural Pedestals
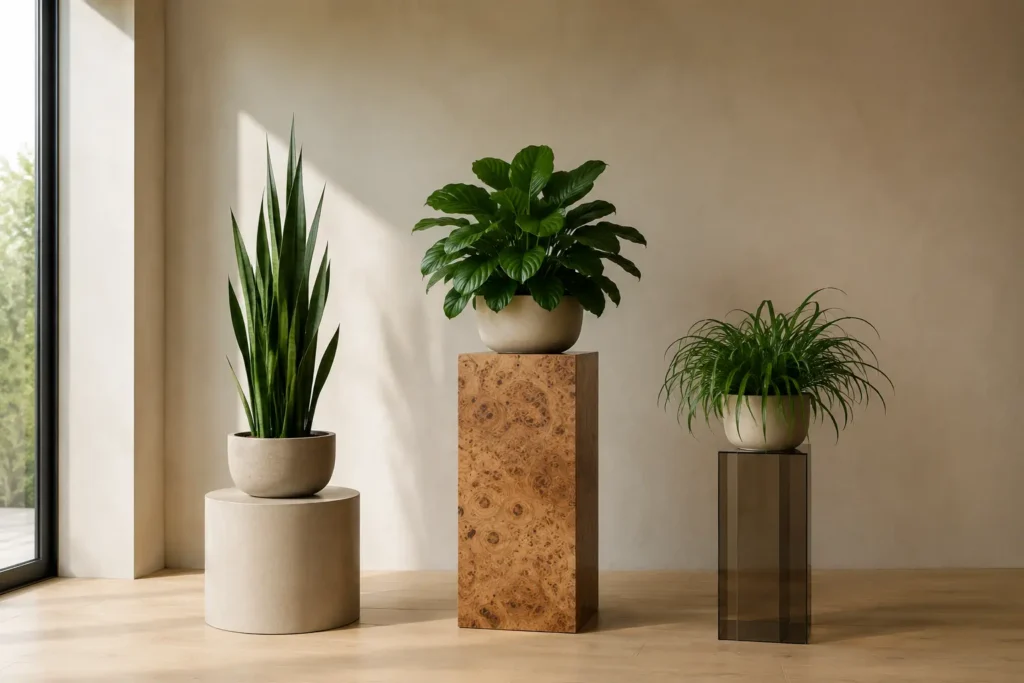
Arrange two or three plants on substantial plinths rather than standard plant stands. Combine distinct shapes, such as a low cylinder, a tall rectangular block, and one transparent acrylic column. Vary the foliage as carefully as the bases: one upright plant, one rounded form, and one plant with a loose, arching habit.
Avoid using three plants of identical height. The tallest overall plant-and-pedestal combination should lead the composition, while the remaining two step down gradually. Plaster, burl wood, smoked acrylic, and deep lacquer create a gallery-like result when the surrounding floor and wall remain mostly empty.
10. Install a Hanging Herb Rail
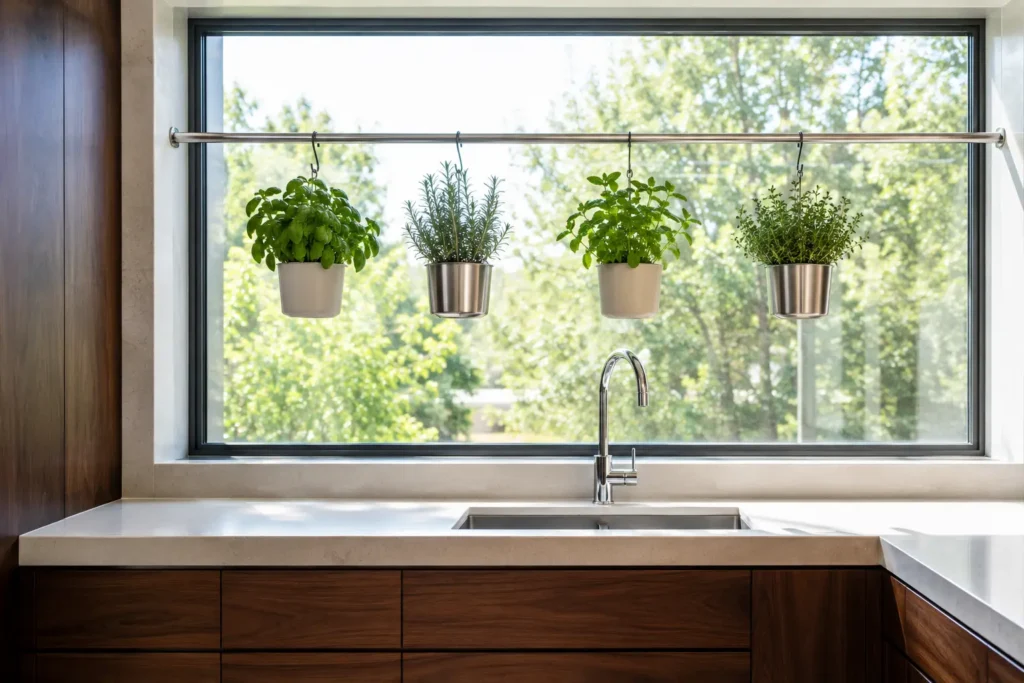
Hang a slim architectural rail above a kitchen island or inside a bright window, then attach a limited number of small metal herb containers at measured intervals. Leave 12 to 18 inches between pots so the installation feels light rather than crowded. Above an island, the lowest leaves should remain well above head height and away from pendant lights.
Stainless steel, matte cream, or dark bronze suits a modern kitchen better than rustic buckets. Use removable inner pots for watering and cleaning. The herbs become a functional design feature while countertops remain clear for food preparation.
11. Weave Plants Through Open Shelving
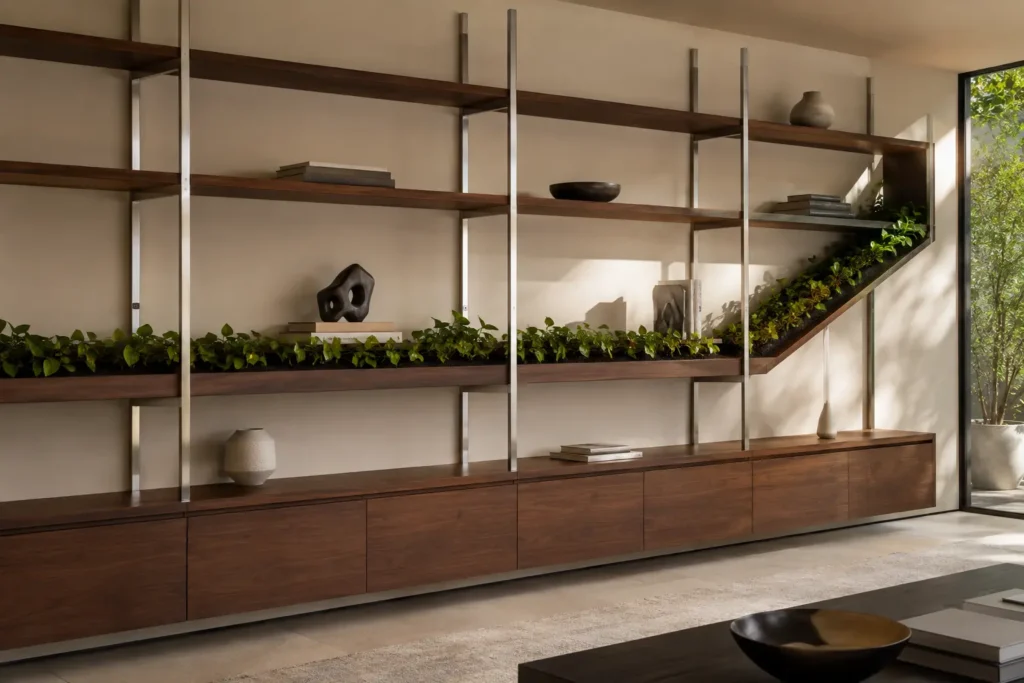
Integrate a continuous planter channel into an open shelving system so greenery appears to travel through the furniture. The channel might run across one long shelf, turn a corner, or rise diagonally between two sections. Keep the planting controlled and repeat one variety rather than filling it with unrelated foliage.
The planter should occupy only part of the shelving depth, leaving space for books and objects without leaves constantly brushing against them. A removable waterproof liner is essential. The result connects separate shelving bays and gives the entire unit a stronger visual rhythm.
12. Add a Living Dining Table Channel
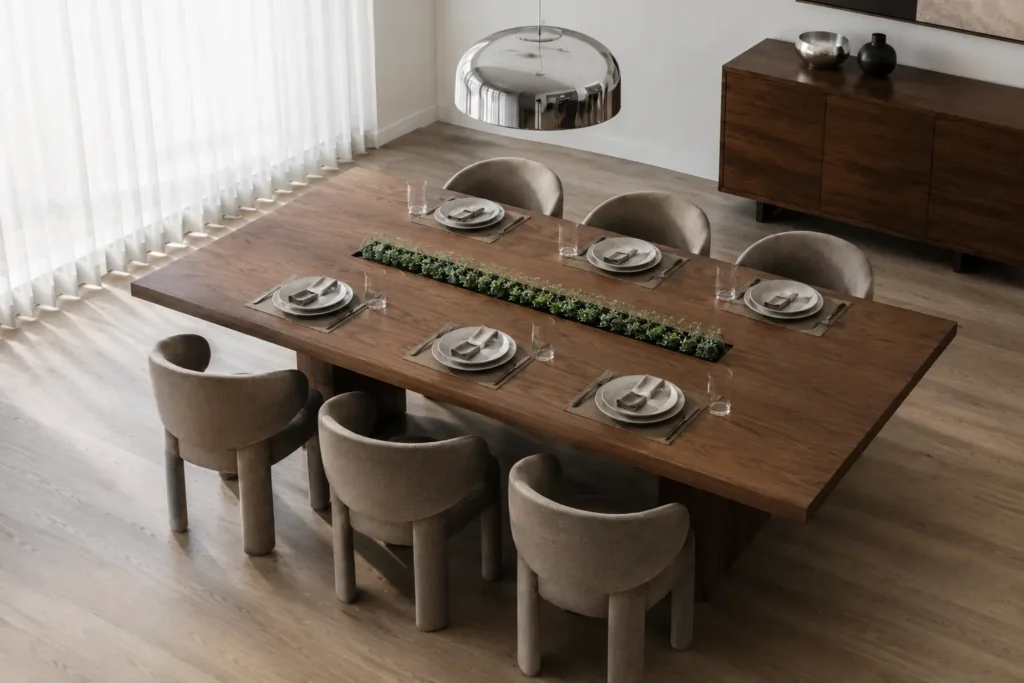
A recessed planting channel can run through the center of a custom dining table, creating a permanent low-profile centerpiece. Keep the opening approximately 6 to 8 inches wide so standard place settings still fit comfortably. Choose foliage that stays below seated eye level and use a fully removable insert for watering and cleaning.
The strongest version uses one repeated plant or a simple moss-like composition rather than a miniature mixed garden. Leave at least 12 inches of clear table space at both ends for serving dishes. The linear greenery emphasizes the table’s length without interrupting conversation across it.
13. Create a Bathroom Plant Monolith
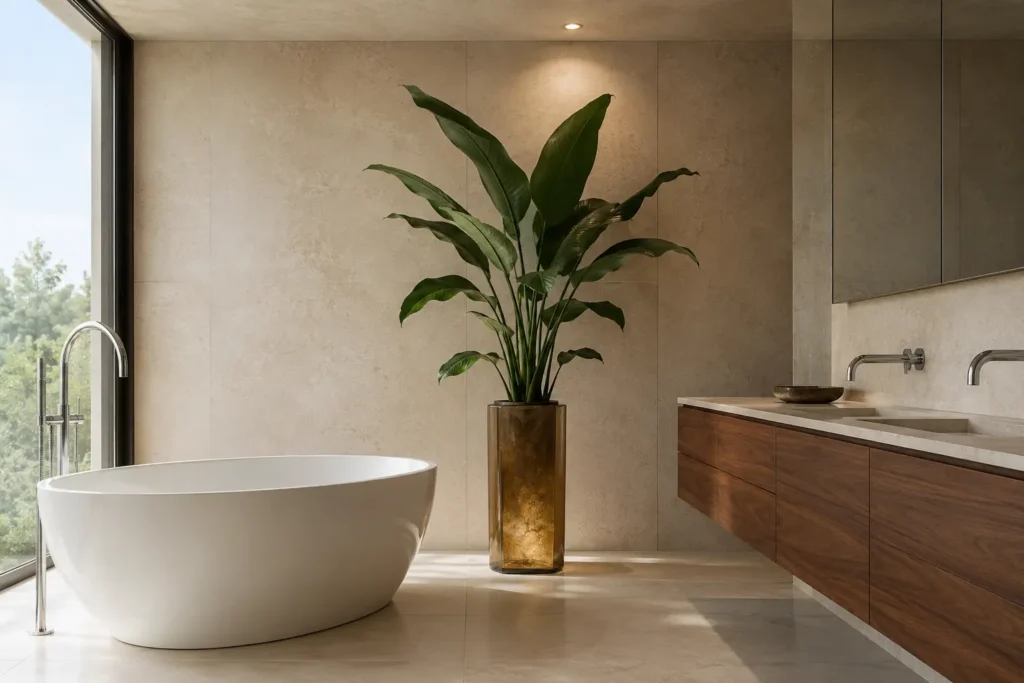
Give one bathroom plant enough scale and structure to stand alone. Place a broad-leaf plant on or within a tall monolithic base made from fluted glass, translucent resin, sealed stone, or moisture-resistant composite. In a standard bathroom, a 30- to 36-inch base paired with a plant reaching approximately five feet creates presence without crowding the fixtures.
Position it beside a tub, between double vanities, or at the end of a long wall, but keep it outside splash-heavy areas. A focused ceiling light can highlight the leaves and translucent base, especially in bathrooms with limited natural light.
14. Frame the Window With Plants
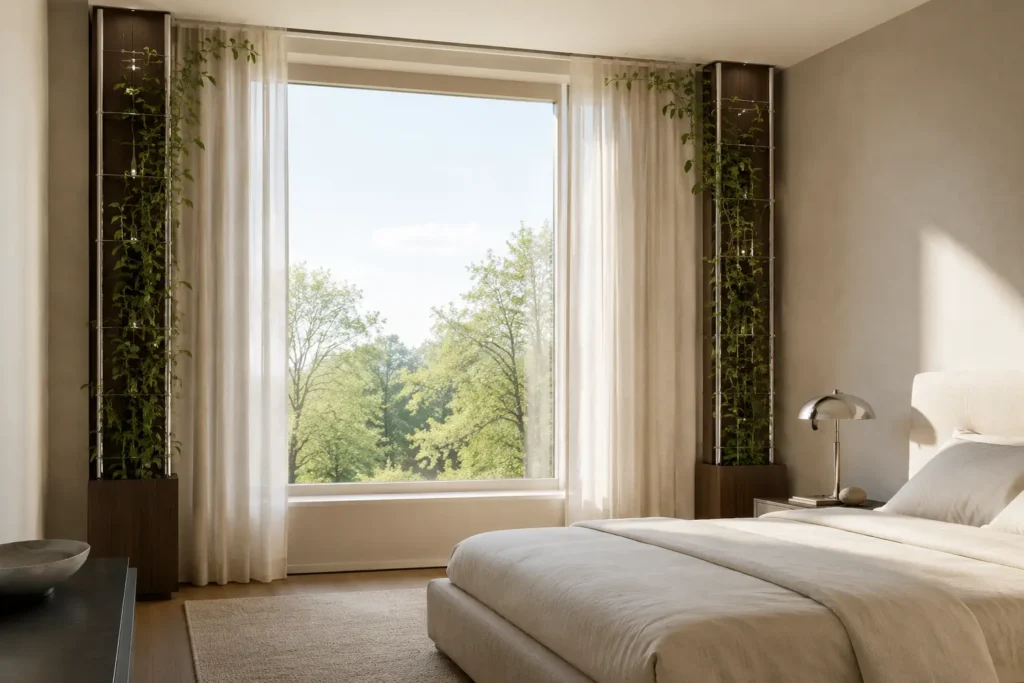
Frame a bedroom window with two narrow vertical planting columns, then guide light foliage toward the top without fully joining it into a dense arch. Each side should remain slim enough for curtains to move freely, with at least 4 to 6 inches between the leaves and fabric.
Match the plant scale to the window. A wide window can support taller, fuller growth, while a narrow opening needs upright plants with small or medium leaves. Keep the sill and center glass mostly open so morning light still reaches the room and the outdoor view remains part of the composition.
15. Build a Botanical Office Canopy
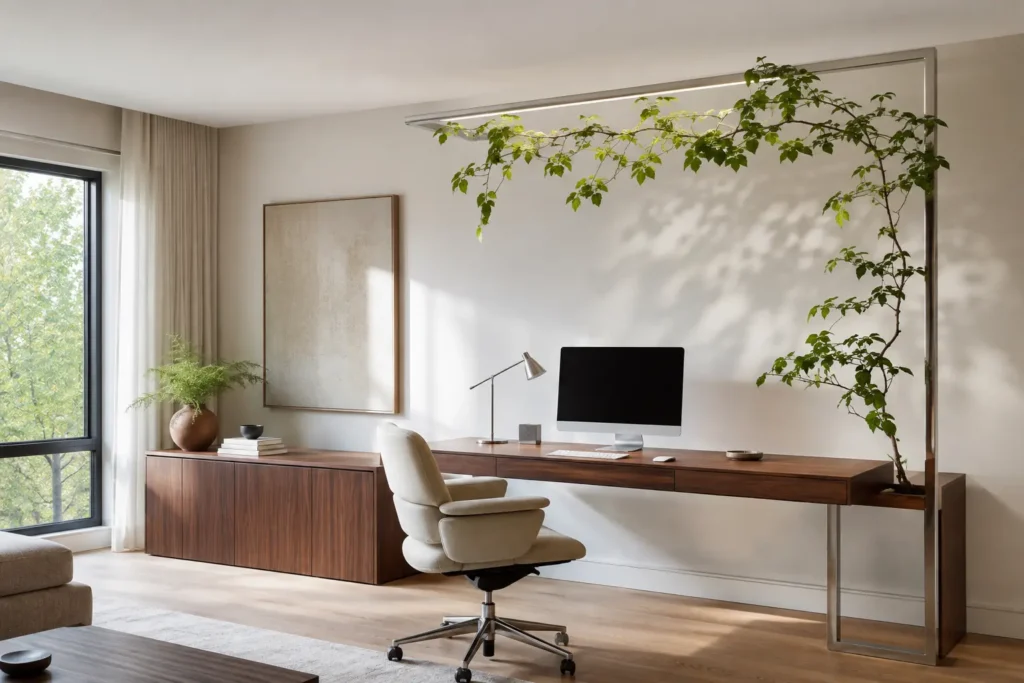
Extend a cantilevered metal frame from the rear corner of the desk and train climbing foliage along an open, asymmetrical curve. The frame should sit high enough that the lowest leaves remain above the monitor and outside the reach of the desk chair. Concealed grow lighting can follow the upper edge when daylight is limited.
Keep the canopy airy rather than dense. A heavy mass of leaves may cast distracting shadows, collect dust above equipment, and make the workspace feel enclosed. With careful pruning, the foliage frames the desk and separates it visually from the rest of the room.