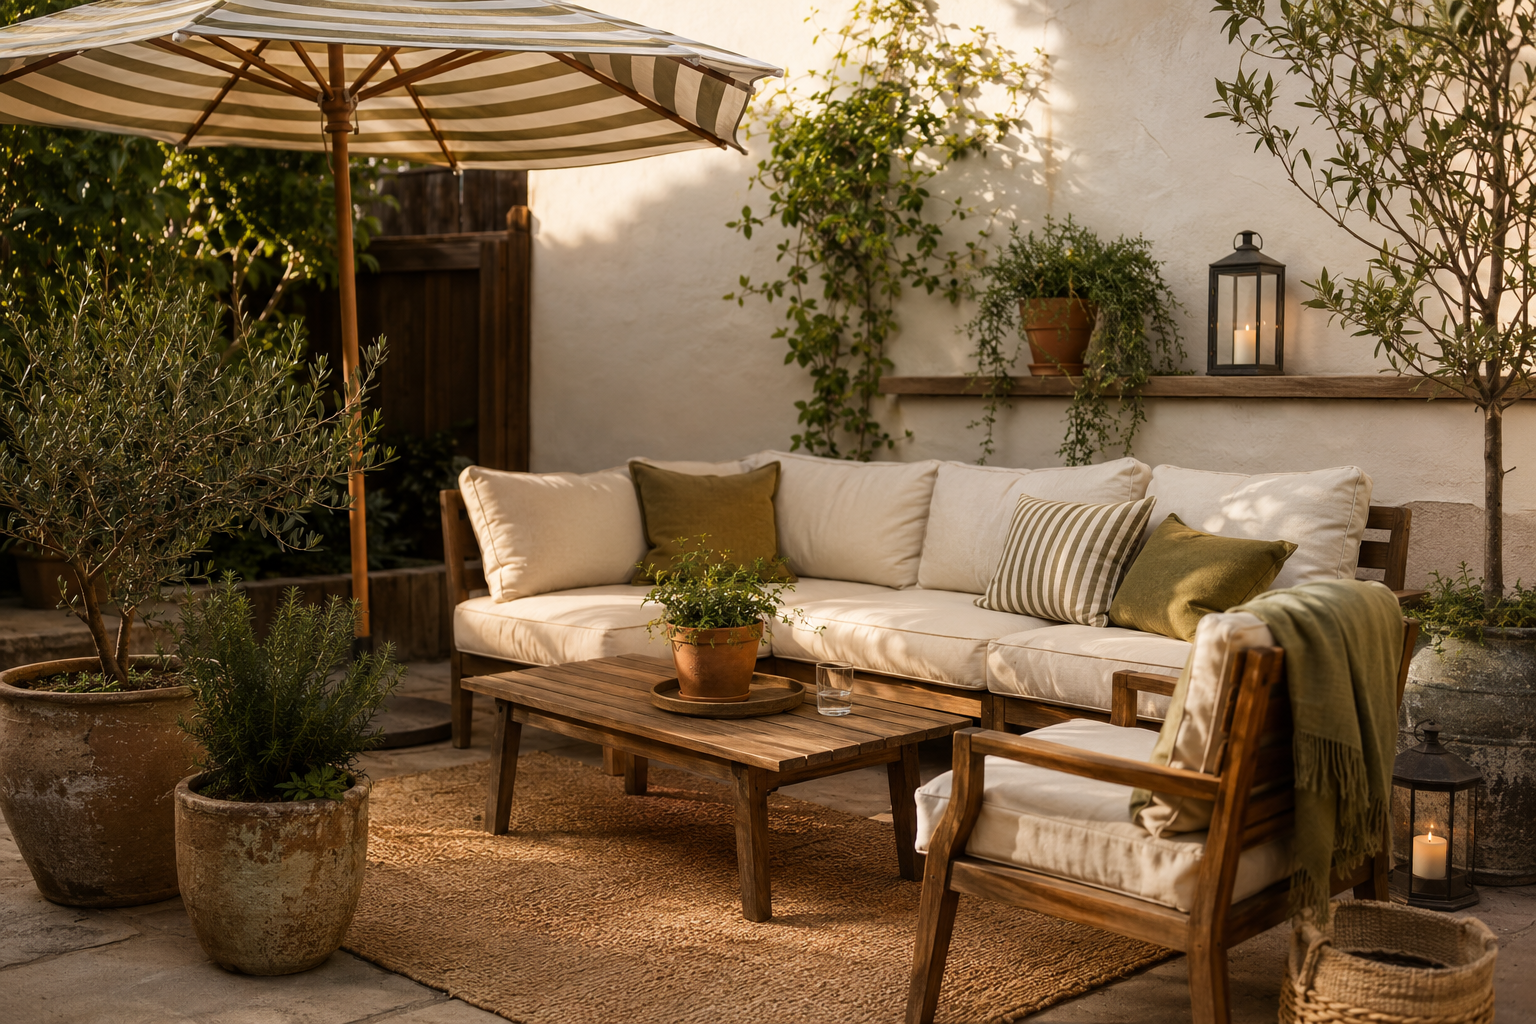
A patio can have decent furniture and still look unfinished. Usually, the problem isn’t the price of what’s there. It’s the scale, placement, and mix of materials.
These summer patio decorating ideas on a budget focus on the details that make outdoor spaces feel intentional: substantial planters, warm lighting, tailored fabric, balanced furniture placement, and finishes that don’t immediately announce their price.
1. Wrap Basic Planters in Fluted Wood for a Custom Look
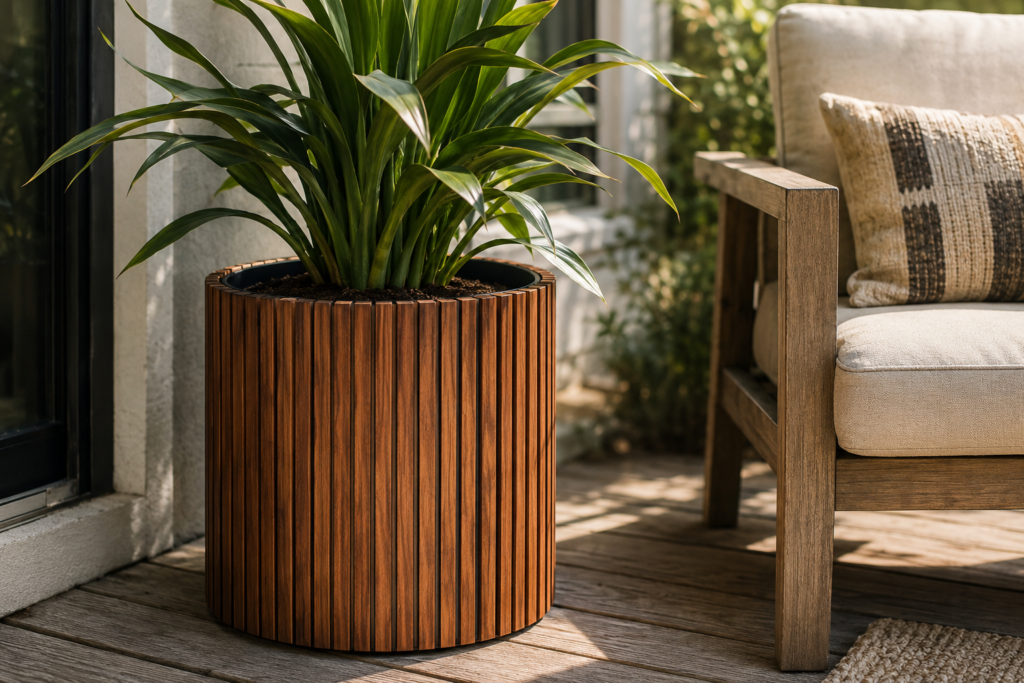
Turn inexpensive plastic pots into architectural planters by wrapping their straight sides with narrow wood half-rounds or exterior-grade slats. Stain everything a medium walnut or paint it matte charcoal, then leave the top rim exposed for a clean finish.
The vertical lines add height and visual weight, making small plants look more substantial. Use removable construction tape instead of adhesive if you want to reuse the original pots later.
2. Build a Slim Drink Ledge Along the Patio Railing
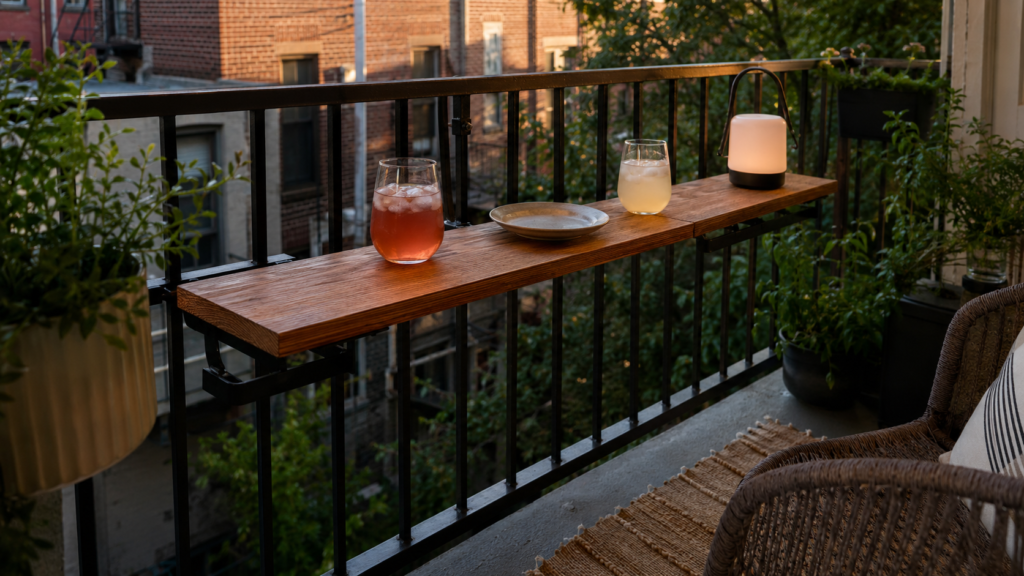
Add a narrow counter-height ledge to an underused railing using a sealed board and removable railing brackets. A depth of 10–12 inches provides enough room for glasses, small plates, and a tabletop lantern without stealing valuable floor space.
This works especially well on apartment balconies. Match the ledge color to the railing so it reads as part of the architecture rather than an extra piece of furniture.
3. Paint the Patio Floor in an Oversized Checkerboard
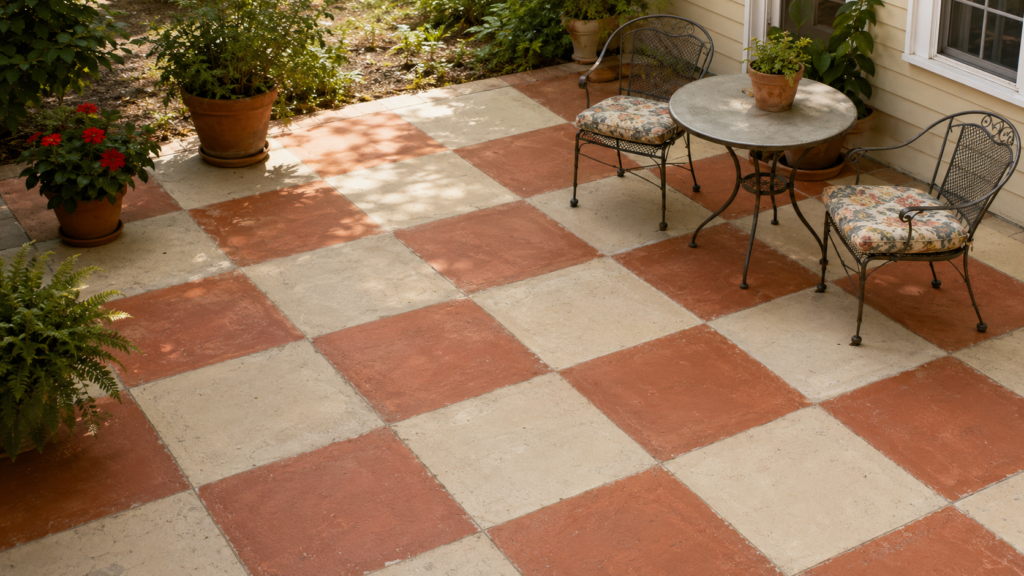
Create a large-scale checkerboard with porch paint instead of buying another outdoor rug. Squares measuring 18–24 inches feel relaxed and European, while tiny checks can make a small patio look busy.
Try warm ivory with faded terracotta, putty, or muted olive. Matte and low-sheen finishes disguise surface flaws better than gloss. Renters can recreate the effect on a large sheet of exterior plywood.
4. Give Mismatched Chairs One Unifying Color
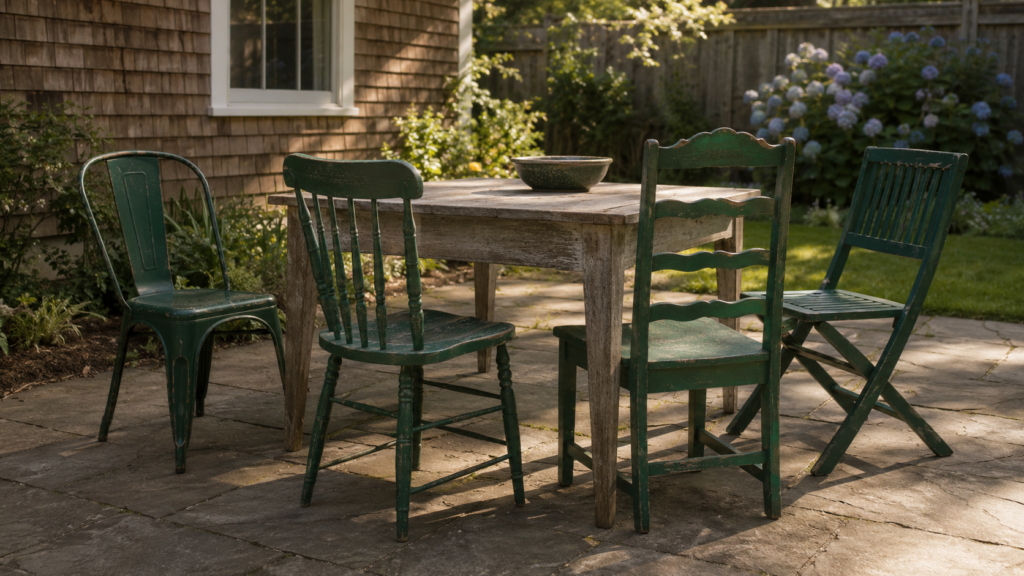
Paint thrifted patio chairs in a single deep color so their different shapes feel collected rather than accidental. Forest green, near-black, clay red, and smoky navy carry more visual weight than bright primary colors.
Keep the seat heights within two inches of one another for comfort around a dining table. Use paint made for each chair’s material, and allow the full curing time before placing cushions or sitting down.
5. Hang Outdoor Curtains from Tension-Mounted Hardware
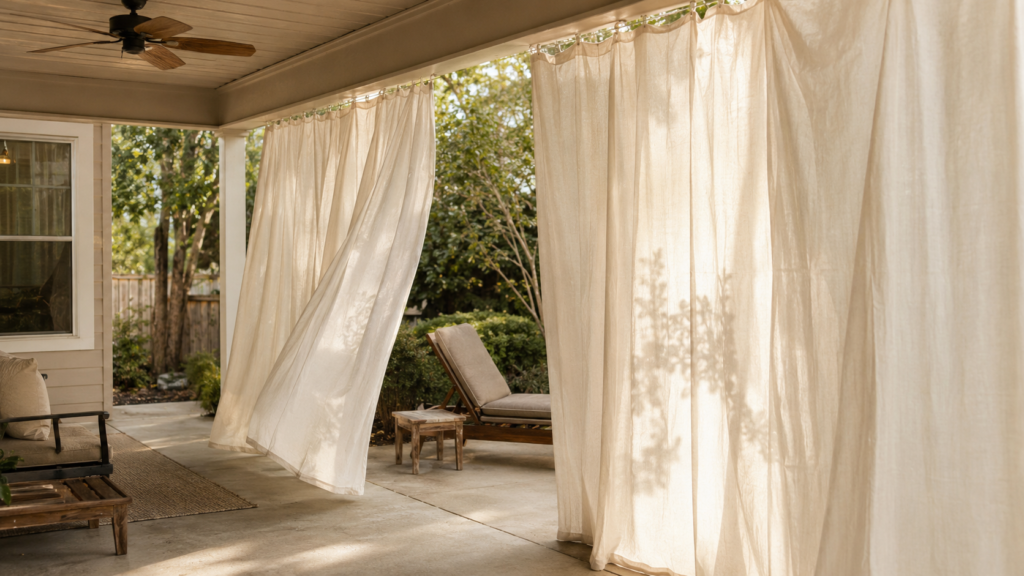
Frame one side of the patio with weather-resistant curtains to soften hard railings, hide an unattractive view, or block late-afternoon glare. Hang them close to the ceiling and let the hems barely clear the floor.
Choose canvas drop cloths or washable outdoor panels in warm white. Cool white fabric can look harsh under evening LEDs. No-drill tension rods work in covered patios with two opposing walls.
6. Use One Oversized Lantern Instead of Several Tiny Ones
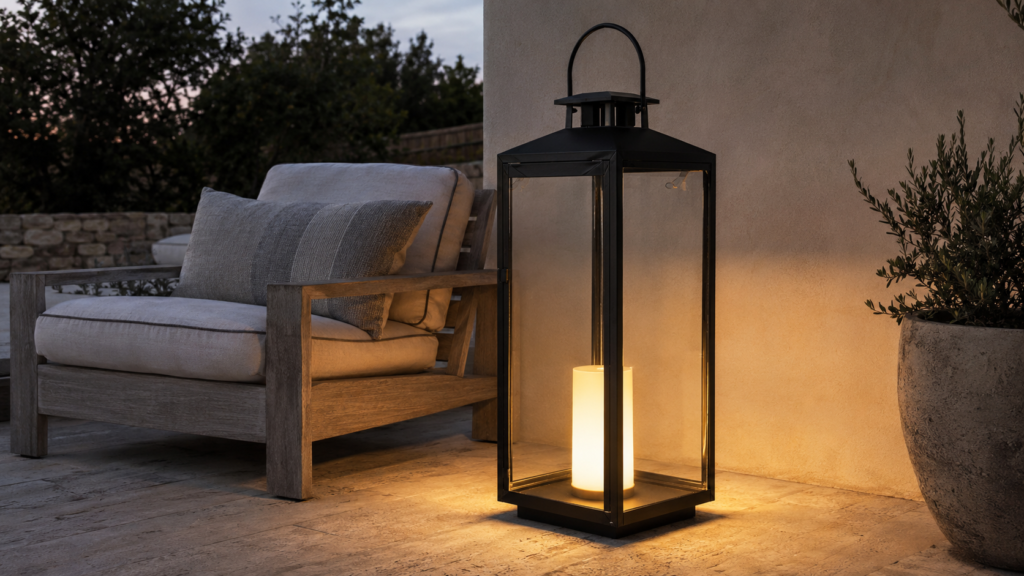
Place a single 24–30-inch lantern beside the seating area rather than scattering small lanterns across every surface. Larger scale creates a stronger focal point and makes modest furniture feel more grounded.
Look for secondhand metal lanterns with simple frames. Add a rechargeable outdoor-safe lamp instead of an exposed candle. The light should sit below eye level, where it casts a flattering pool without shining directly into anyone’s face.
7. Turn a Salvaged Door into a Narrow Outdoor Table
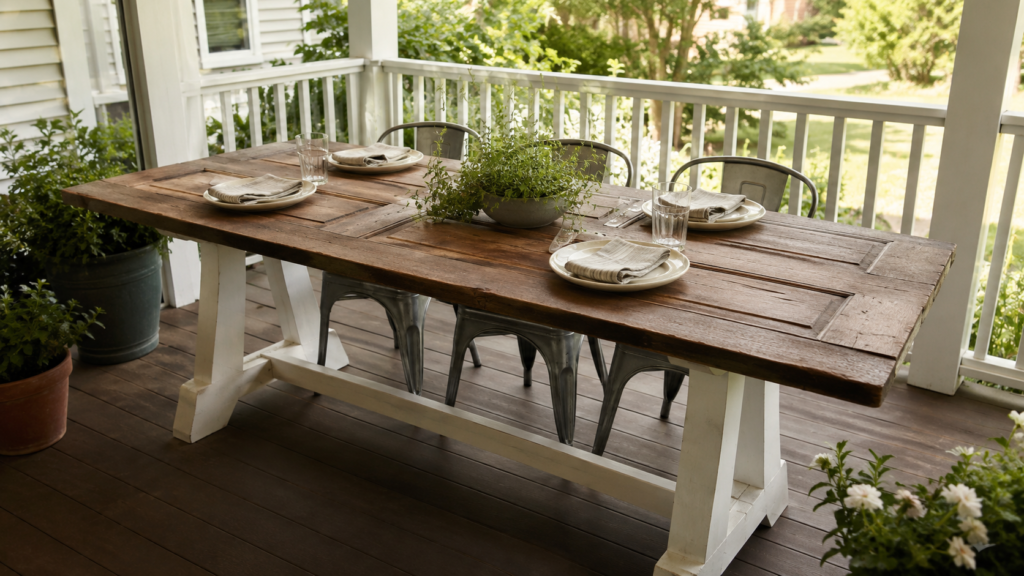
Convert a solid old door into a communal patio table by sealing it thoroughly and attaching sturdy trestle legs. A width of 30–36 inches leaves enough room for place settings while still fitting a narrow yard or covered porch.
Paint the base one color and keep the top natural for contrast. Avoid hollow-core doors; they won’t tolerate moisture or securely hold screws.
8. Add Tailored Stripes with Removable Cushion Covers
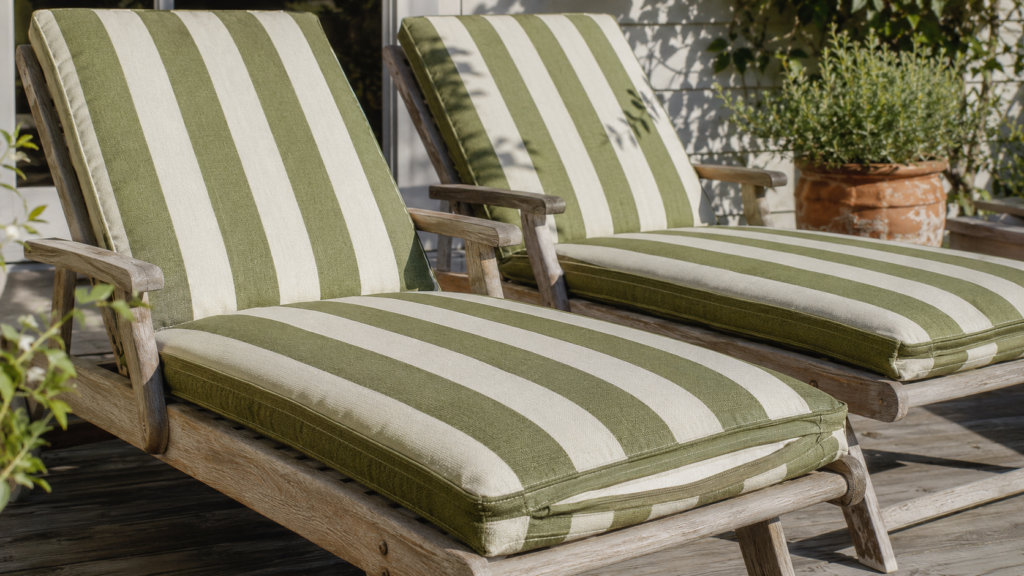
Cover worn seat cushions in wide cabana stripes instead of replacing the inserts. Stripes measuring 2–4 inches wide look more tailored than narrow, busy patterns and visually widen compact chairs.
Black and warm white feel crisp, while olive and cream look softer in bright sun. Envelope-style covers require minimal sewing and come off easily for washing. Choose solution-dyed outdoor fabric if the seats receive direct sunlight.
9. Create a Low Centerpiece with Potted Herbs
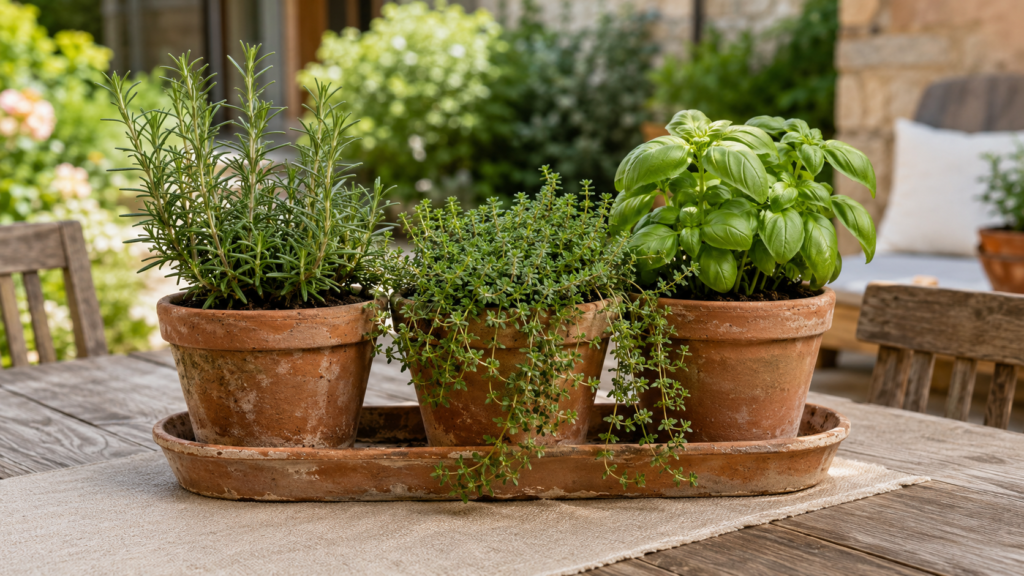
Group three useful herbs in shallow terracotta pots at the center of an outdoor dining table. Rosemary supplies height, thyme trails over the edge, and basil adds broad leaves and a fresh scent.
Keeping the arrangement below 12 inches preserves conversation sight lines. Use separate pots inside one long tray so each herb can be watered correctly. Unglazed terracotta develops a softer, aged finish outdoors.
10. Disguise a Plain Wall with a Reed Screening Panel
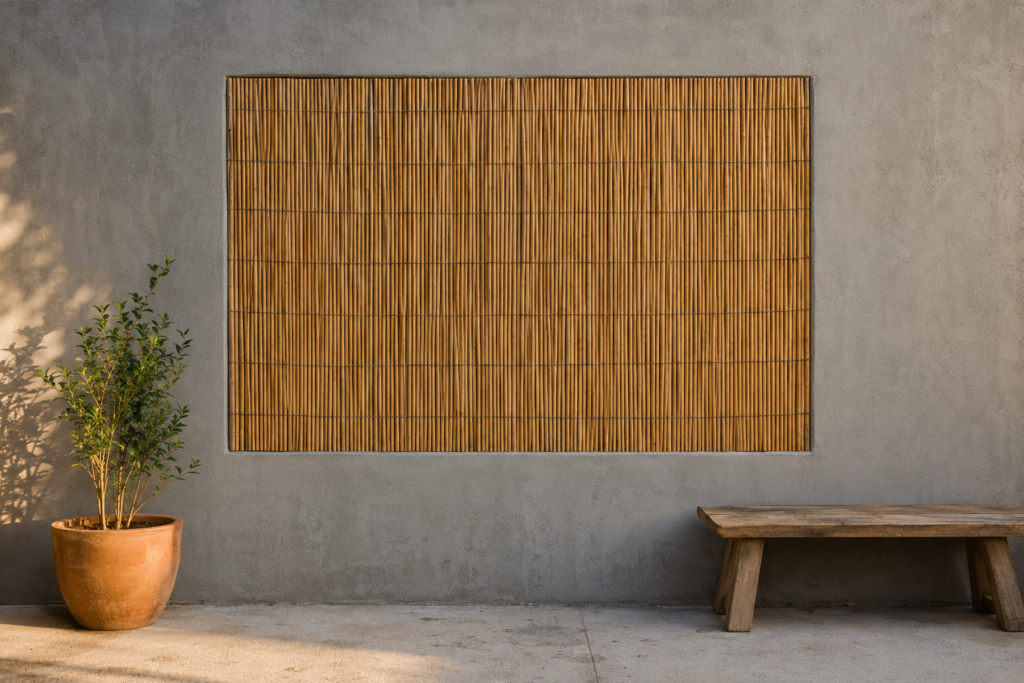
Mount one broad panel of natural reed or split bamboo against a blank fence or concrete wall. Stop it several inches short of every edge rather than covering the entire surface; that negative space makes it look like an intentional inset.
Secure it to a removable timber frame for a renter-friendly installation. Natural material warms cool gray concrete, but it needs airflow behind it to dry properly after rain.
11. Swap a Plastic Side Table for a Stone-Topped Stool
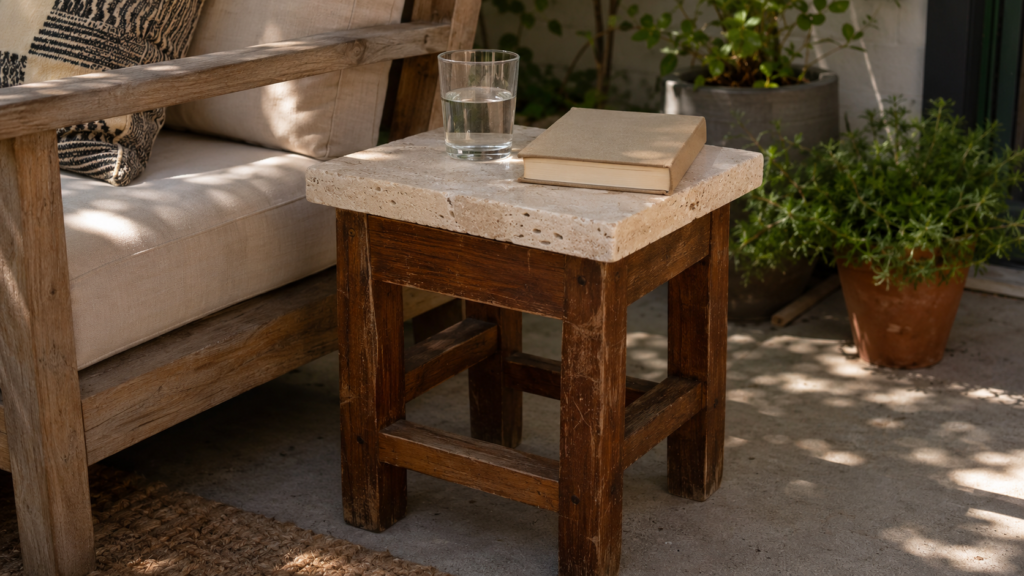
Top a sturdy thrifted stool with a remnant of stone or tile to create a compact drinks table. Stone yards often sell small offcuts cheaply, and a 16–18-inch square is enough beside a lounge chair.
Keep the finished top within two inches of the chair’s arm height. Travertine adds warmth, while dark slate creates sharper contrast. Seal porous stone so spilled citrus drinks don’t leave permanent marks.
12. Make a Tablecloth Look Tailored with Weighted Corners
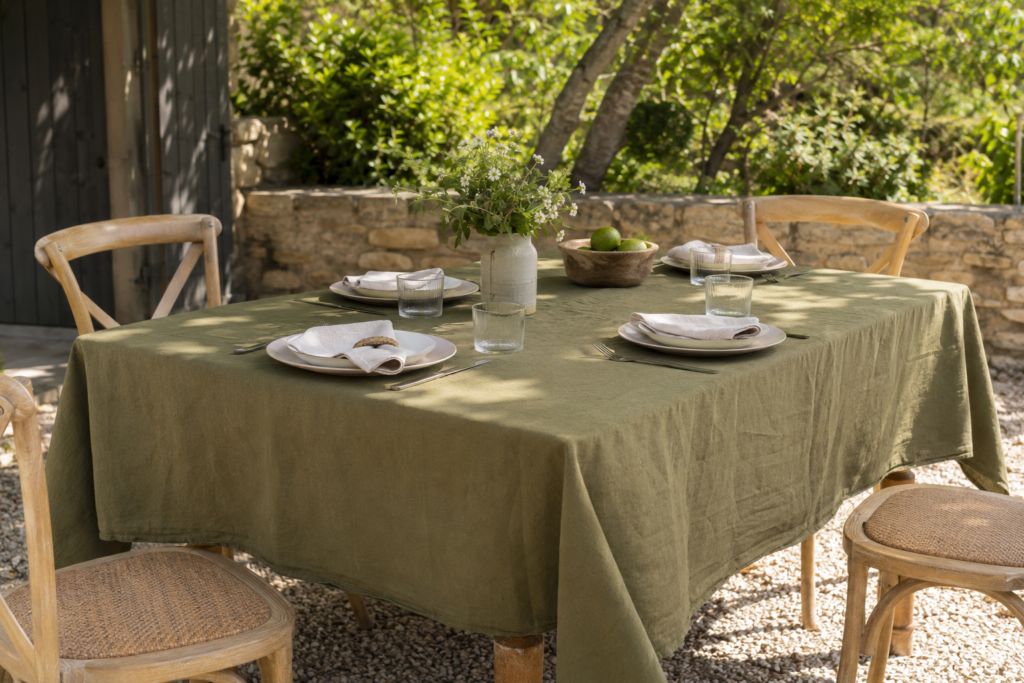
Use a full-length tablecloth with hidden corner weights to make a basic patio table feel ready for dinner. Fabric should fall 8–12 inches below the tabletop; a floor-length drop becomes awkward around outdoor chairs.
Choose washed cotton or linen-look fabric in tobacco, olive, or warm cream. Sew metal washers into the hems so wind doesn’t expose the table legs or send the cloth into serving dishes.
13. Arrange Planters as One Asymmetrical Composition
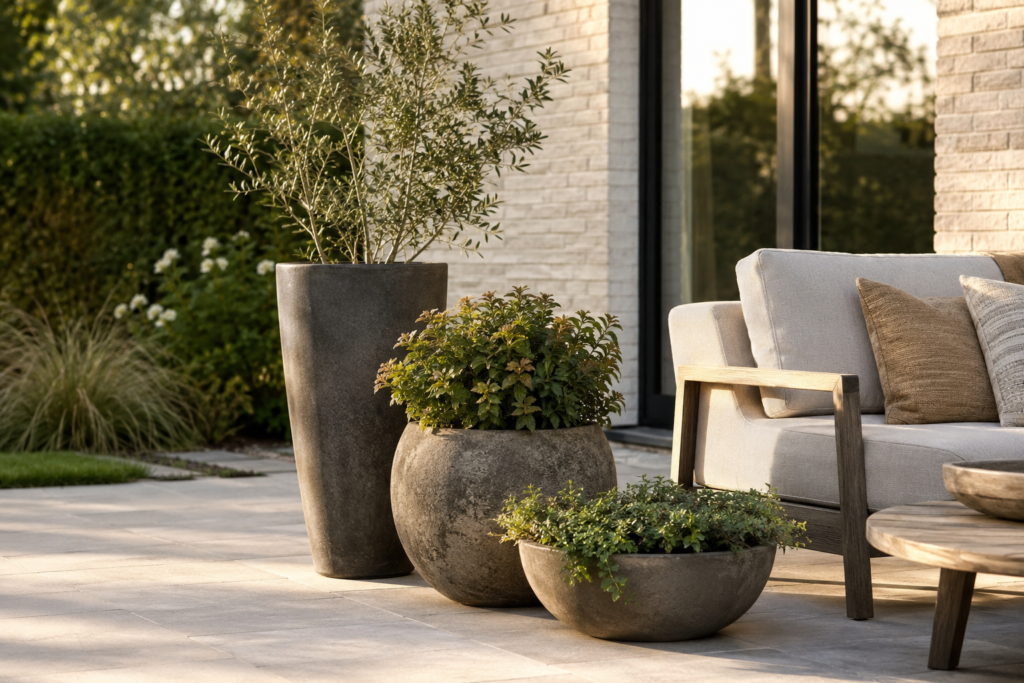
Build a single planter cluster using three different heights rather than lining identical pots around the patio edge. Place the tallest pot at the back, a rounded medium pot slightly forward, and a low bowl near the seating area.
This creates a clear visual hierarchy. Keep the pots within one color family so the plants supply variation. Leave open floor around the grouping to avoid a crowded garden-center effect.
14. Install a Fabric Shade Sail with Deliberate Angles
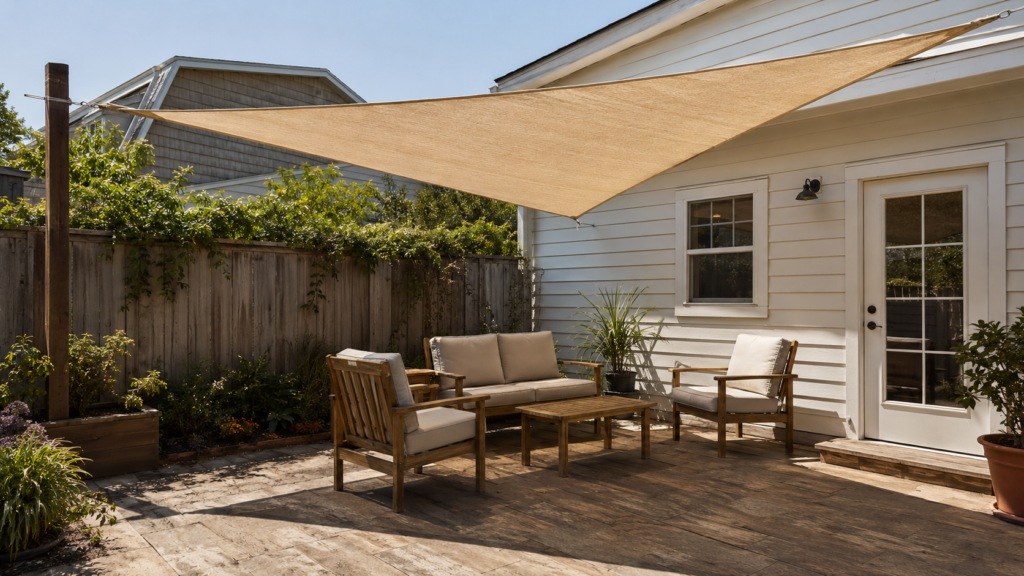
Stretch a neutral shade sail diagonally over the hottest seating zone instead of centering it mechanically above the entire patio. The angled line gives the ceiling plane more energy while protecting the place where people actually sit.
Mount the corners at alternating heights so rainwater runs off. Sand, flax, and muted clay filter sunlight more softly than bright white, which can produce glare around midday.
15. Use a Bench as a Styled Patio Perimeter
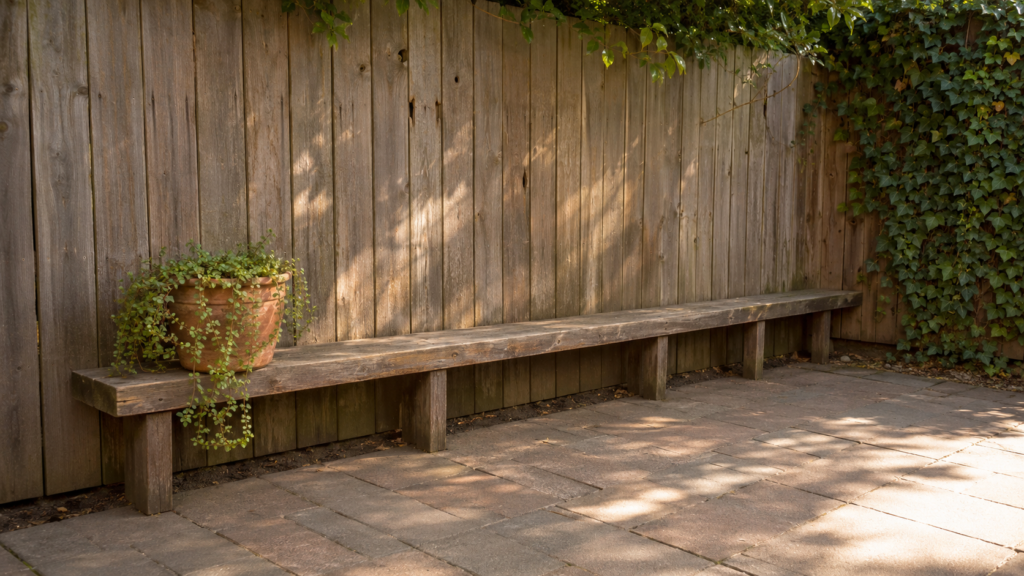
Place a narrow backless bench against the least attractive boundary and treat it as both seating and a display surface. A 14–18-inch depth is comfortable without blocking circulation.
Set one large planter at one end and leave the rest mostly open for guests. The long horizontal line calms a busy fence. A sealed secondhand dining bench often costs less than furniture sold specifically for outdoor use.
16. Replace Tiny Accessories with One Sculptural Bowl
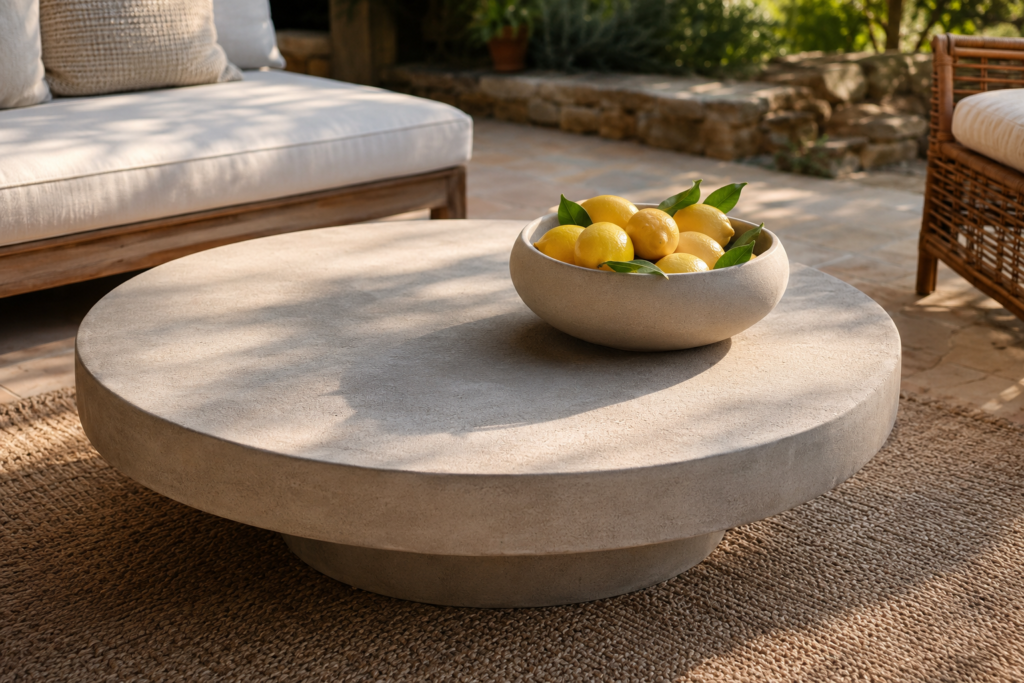
Center a wide, low bowl on the coffee table and remove the collection of small decorative objects. Fill it with lemons, smooth stones, or water and floating garden leaves.
A bowl around one-third the table’s width will look proportional without consuming the surface. Matte ceramic hides dust better than dark glossy finishes. In exposed spaces, choose a weighty material that won’t shift when the wind picks up.
17. Hide Utility Items Behind a Hinged Slatted Screen
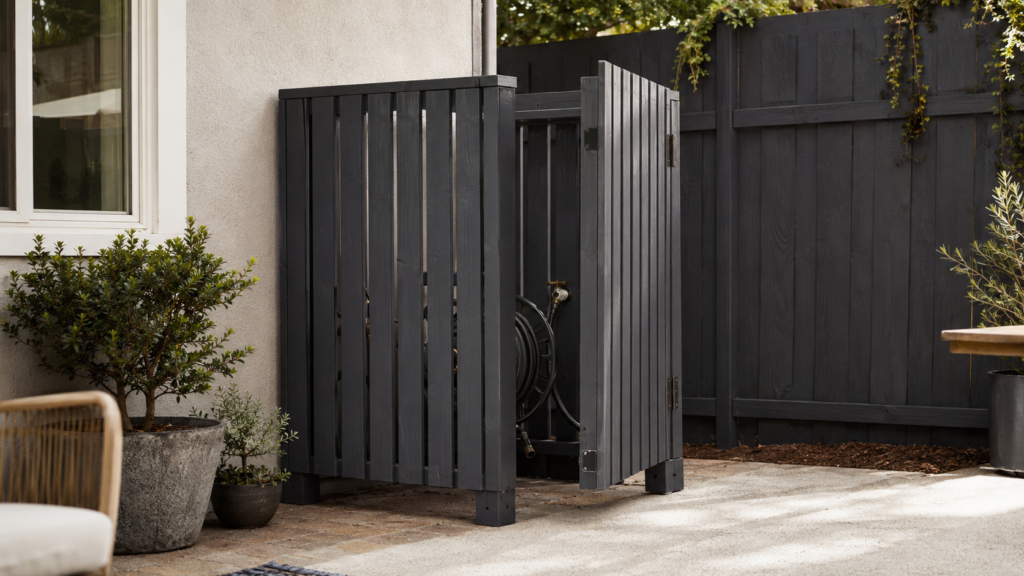
Build a freestanding slatted screen around bins, hoses, or an air-conditioning unit while preserving the airflow required by the equipment. Space the slats 1–2 inches apart and keep the screen at least the manufacturer’s recommended distance away.
Painting it the same color as the fence reduces its visual weight. Add hinges to one side so maintenance remains easy; a beautiful enclosure becomes frustrating if it blocks daily access.
18. Bring Warm Light Down to Seated Eye Level
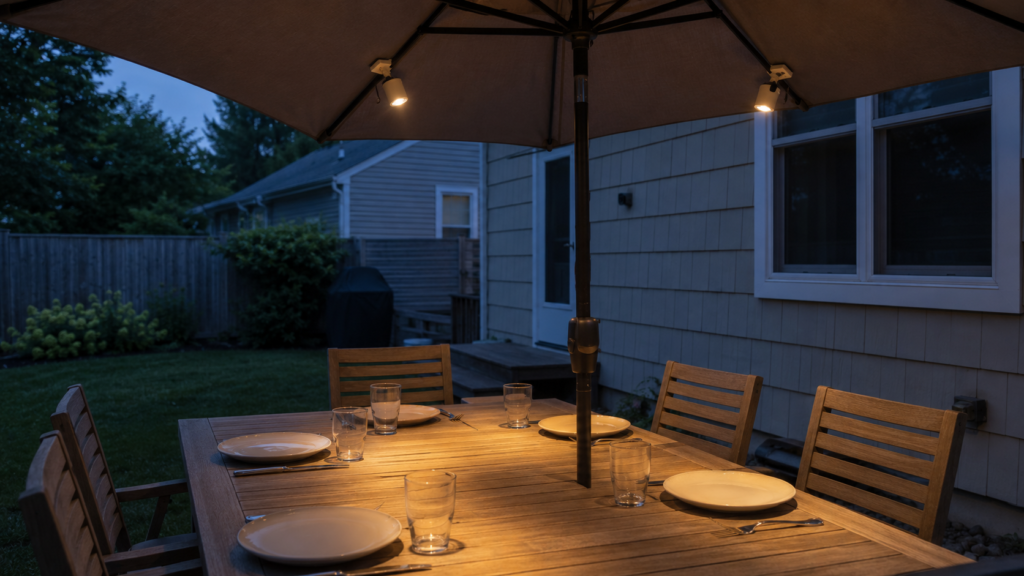
Clip two rechargeable lamps beneath a patio umbrella or overhead beam so the light lands on the table rather than disappearing above it. Aim for warm bulbs around 2200–2700K; cooler light can make food and skin tones look flat.
Position the lamps slightly above seated eye level and angle them downward. This creates useful lighting layers without relying on the harsh wall-mounted fixture near the door.
19. Edge a Basic Outdoor Rug with Canvas Webbing
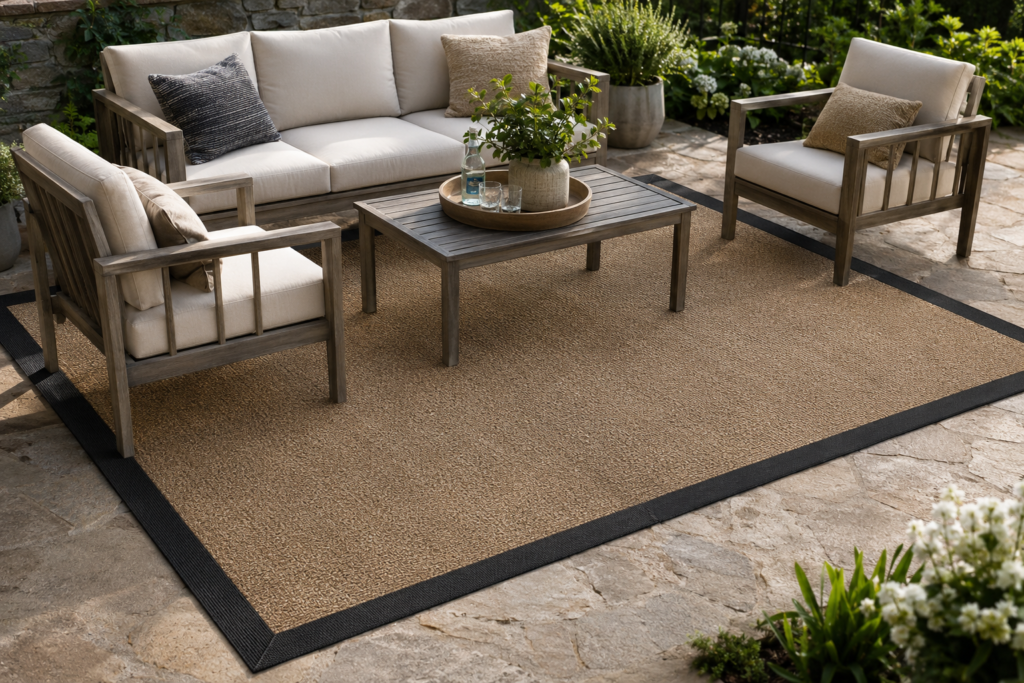
Give an inexpensive flat-weave rug a wide contrasting border using outdoor canvas tape or UV-resistant webbing. A 2–3-inch black, tobacco, or olive edge gives the rug a more finished, tailored outline.
Size matters more than price: at least the front legs of every seat should rest on it. Leave 12–18 inches of visible flooring around the rug so the patio doesn’t feel carpeted wall to wall.
20. Create a Serving Station from a Metal Utility Cart
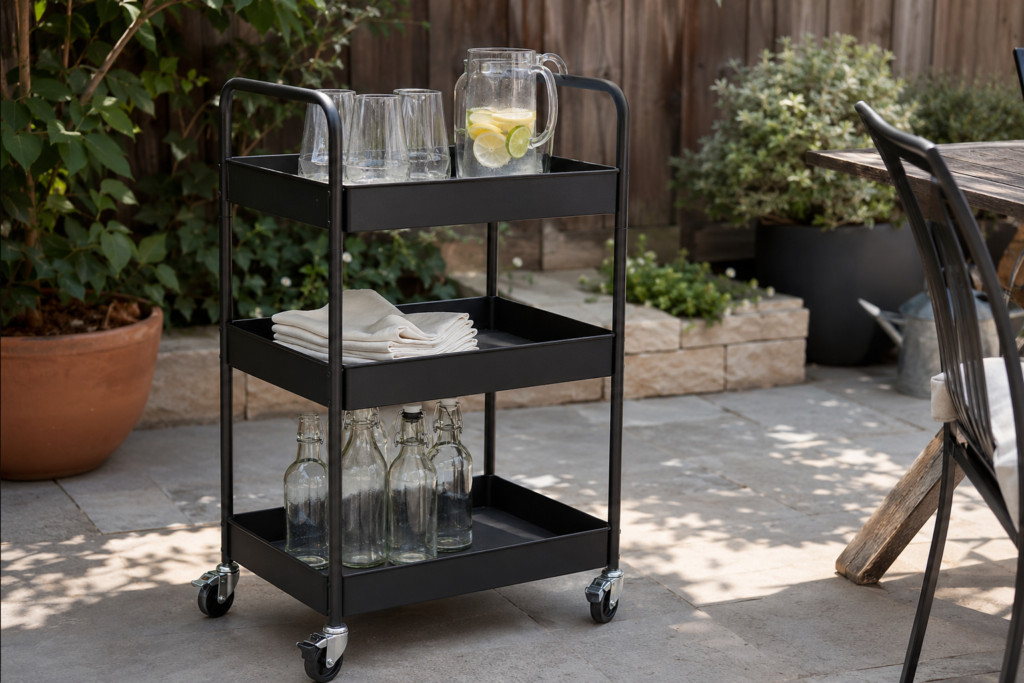
Style a simple rolling cart as a permanent outdoor serving station with glassware on top, folded napkins in the middle, and heavier drink bottles below. Restrict the palette to two or three materials, such as black metal, clear glass, and natural wood.
The organized repetition looks polished and keeps the dining table clear. Choose locking casters and roll the cart indoors when storms are expected.
21. Line an Umbrella with a Contrasting Fabric Band
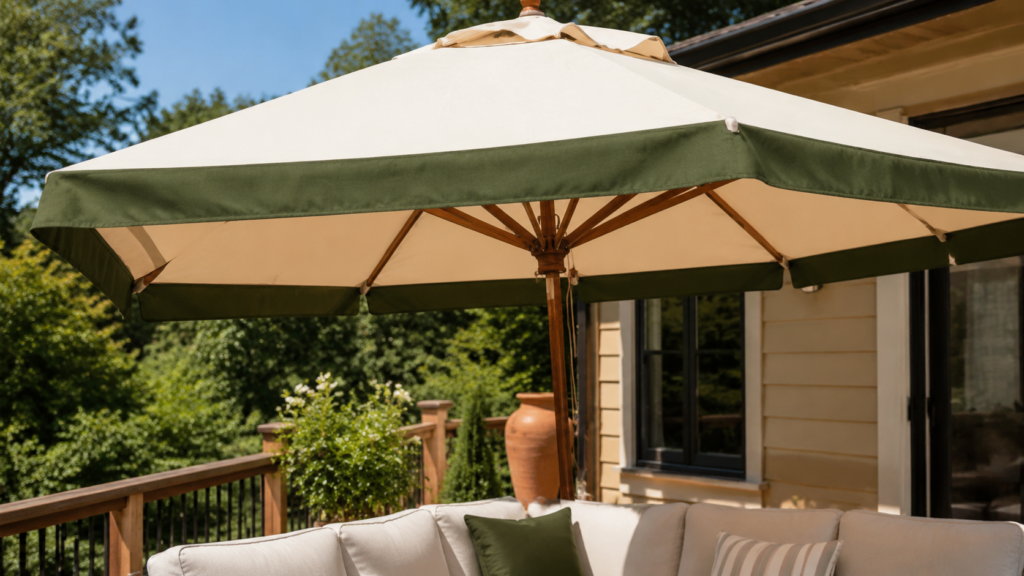
Add a 3–4-inch fabric border around a plain market umbrella using exterior fabric adhesive or simple hand stitching. A dark olive, rust, or black band sharpens the umbrella’s outline and connects it visually to nearby furniture.
This small change works because contrast defines shape from across the yard. Keep the trim flat and simple; dangling fringe can tangle in wind and quickly appear worn.
22. Float a Narrow Console Behind the Outdoor Sofa
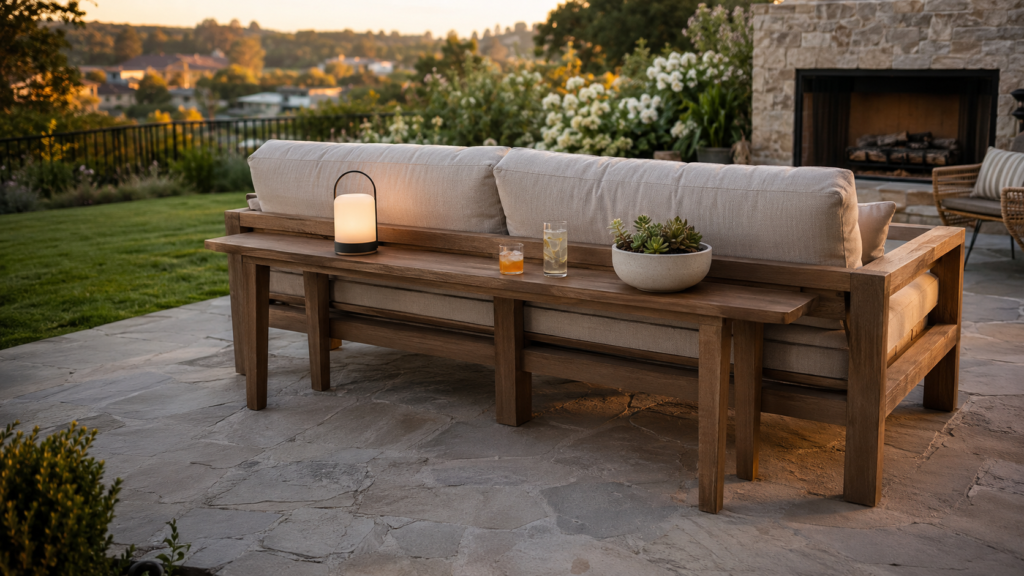
Place a slim console directly behind a freestanding patio sofa to make the seating arrangement feel complete from every angle. Keep it level with or slightly below the sofa back, with a depth of 8–12 inches.
Use it for drinks, a rechargeable lamp, or one planted bowl. The console also prevents the sofa from appearing stranded in the middle of a large patio. Seal all sides, including underneath.
23. Repeat One Finish in Three Different Zones
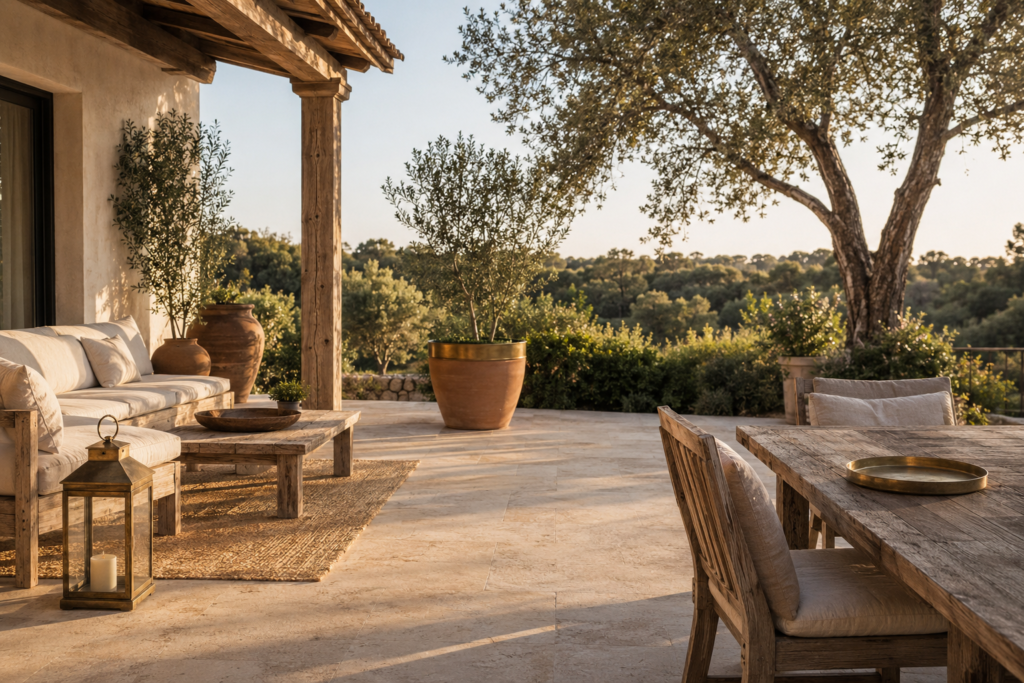
Choose one finish and repeat it exactly three times across the patio: perhaps aged brass on a lantern, serving tray, and planter rim. Repetition moves the eye through the space and makes unrelated budget pieces feel connected.
Keep the repeated accents separated rather than grouped together. Brass warms terracotta and wood, while black metal adds definition to pale stone. Mixing too many metallic finishes weakens the effect.
24. Frame the Doorway with Tall, Narrow Planters
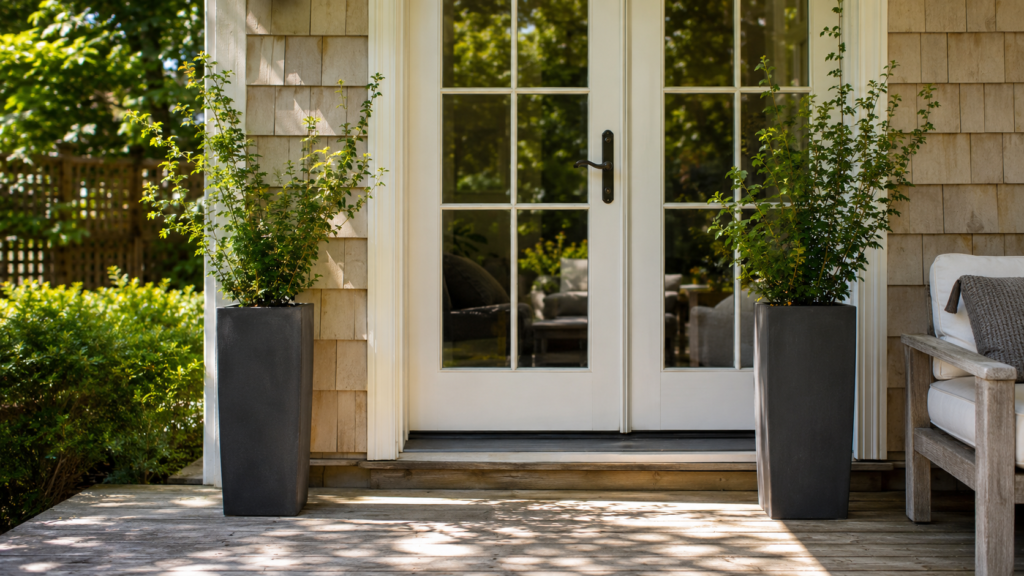
Position matching column-shaped planters on both sides of the patio door to give the entrance more presence. Choose containers at least one-third the height of the door; undersized pots disappear beside large architecture.
Narrow forms preserve the walking path, which should remain at least 36 inches wide. Fill the lower half with lightweight filler before adding soil, but keep enough weight at the base to prevent tipping.
25. Build a Sunset Seat That Faces Away from the House
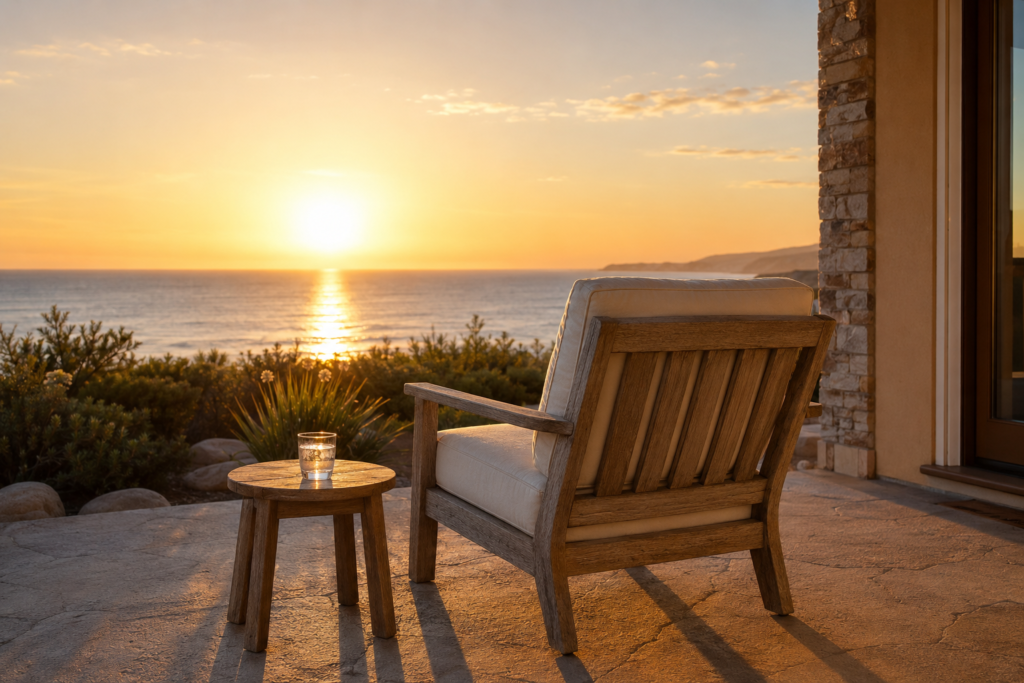
Turn one chair toward the best view instead of forcing every seat to face the patio table. Pair it with a small drinks perch and place it where evening light reaches the floor or fence.
This final move costs almost nothing, yet it changes how the patio is used. Good outdoor styling isn’t only about appearance; it should encourage you to notice the breeze, changing light, and quieter edge of the yard.
How to Make Budget Patio Decor Look More Expensive
Choose fewer pieces at a larger scale. One substantial lantern, planter, or serving bowl usually looks more considered than six tiny accessories competing for attention.
Limit the main palette to three colors and repeat one finish throughout the space. Also check the practical details: straighten furniture, hide cords, remove peeling labels, and repair loose cushion seams. Cheap materials usually reveal themselves first through messy edges and weak proportions.