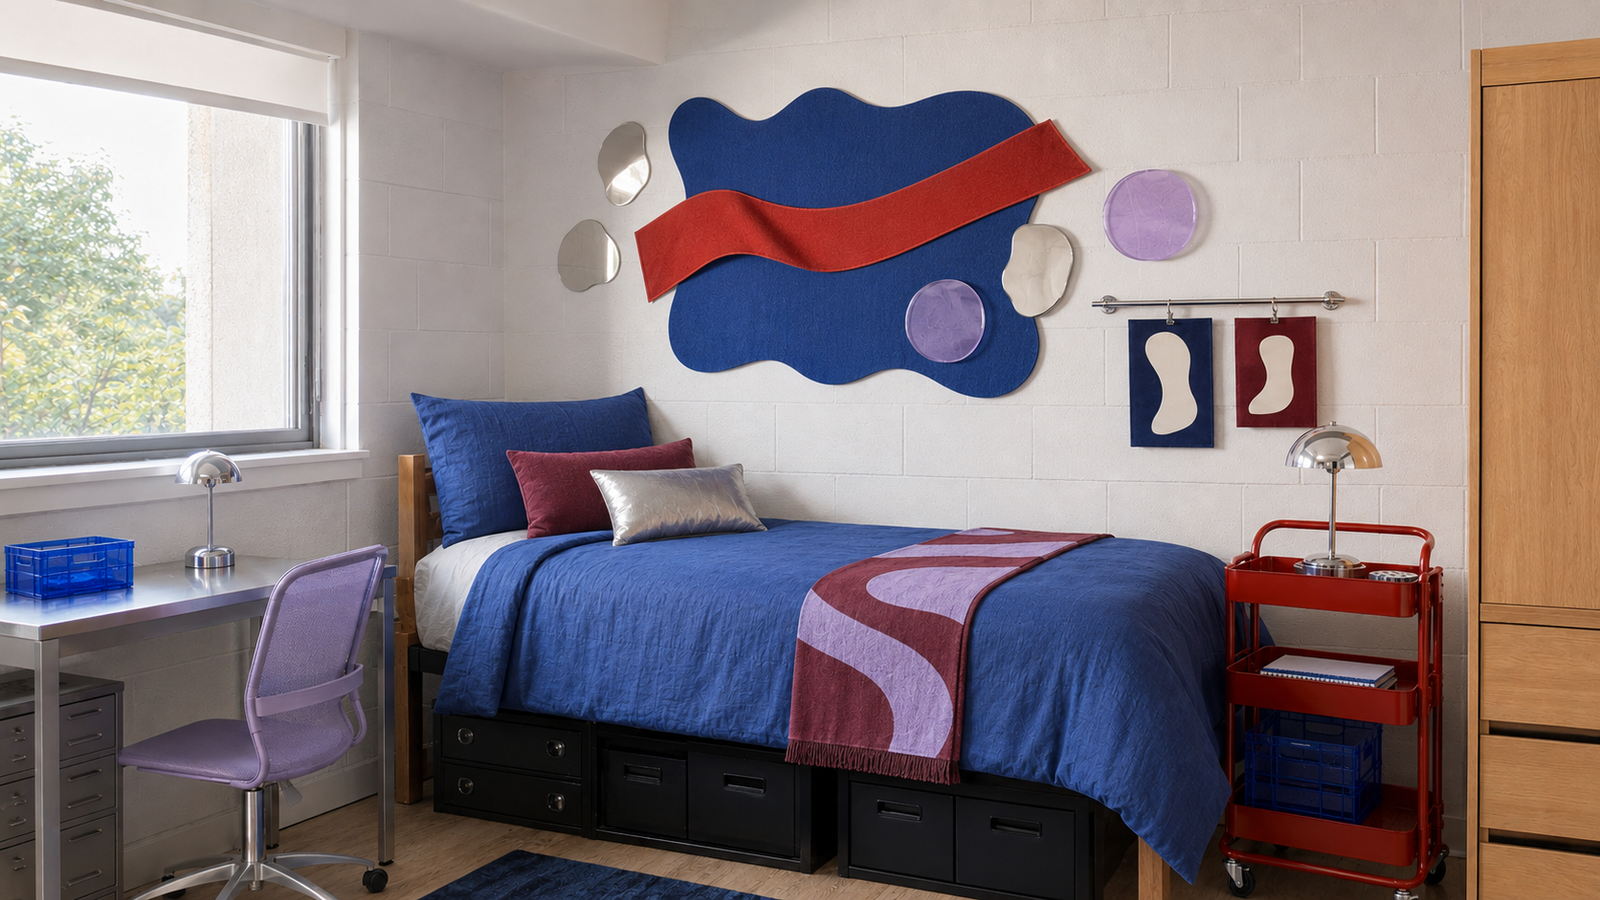
Blank dorm walls can make even colorful bedding and carefully chosen accessories feel unfinished. The challenge is decorating around institutional paint, cinder block, limited floor space, and residence hall rules without creating a wall that looks like a scattered collection of posters.
These dorm room wall decor ideas use lightweight, removable materials to create stronger focal points, useful displays, and unexpected texture. Each design keeps the wall as the main feature, while compact Gen Z furniture, saturated color, and practical storage help the full room feel stylish and connected.
What to Consider Before Decorating Dorm Walls
Check your residence hall policy before buying mounting supplies. Some schools allow removable hooks but prohibit adhesive wallpaper, while others approve poster putty or painter’s tape. Test any adhesive in a hidden spot, follow its weight limit, and remove it slowly according to the manufacturer’s directions.
Keep decor at least 18 inches below sprinkler heads unless your school requires greater clearance. Don’t cover smoke detectors, vents, outlets, windows, or emergency information. Lightweight paper, fabric, felt, and foam board are generally more practical than glass, wood, or heavy framed artwork.
1. Create a Chrome-Pleated Wall Sculpture Above the Bed
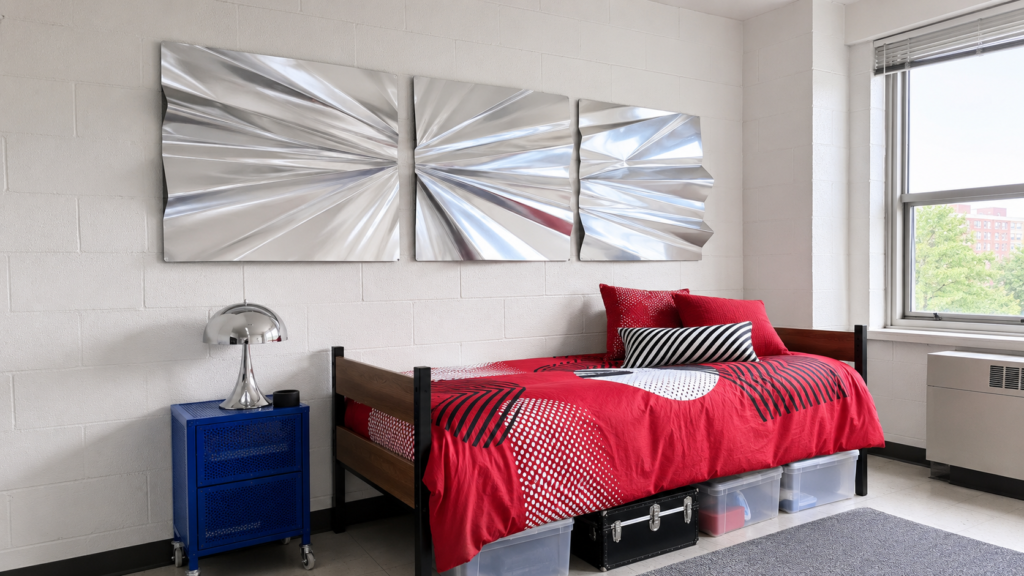
Fold lightweight metallic film into broad architectural pleats, then wrap it around two or three thin foam-board panels. Position the finished composition 8–10 inches above the bed and mount each panel with removable strips rated for its finished weight.
Silver catches daylight with a cool, crisp reflection, while warm bulbs give it a softer champagne cast. Use cherry-red bedding, a cobalt bedside cart, and one chrome mushroom lamp nearby, but keep other reflective finishes limited so the wall sculpture remains the focal point.
2. Create a Modular Dorm Portal From Layered Wall Frames
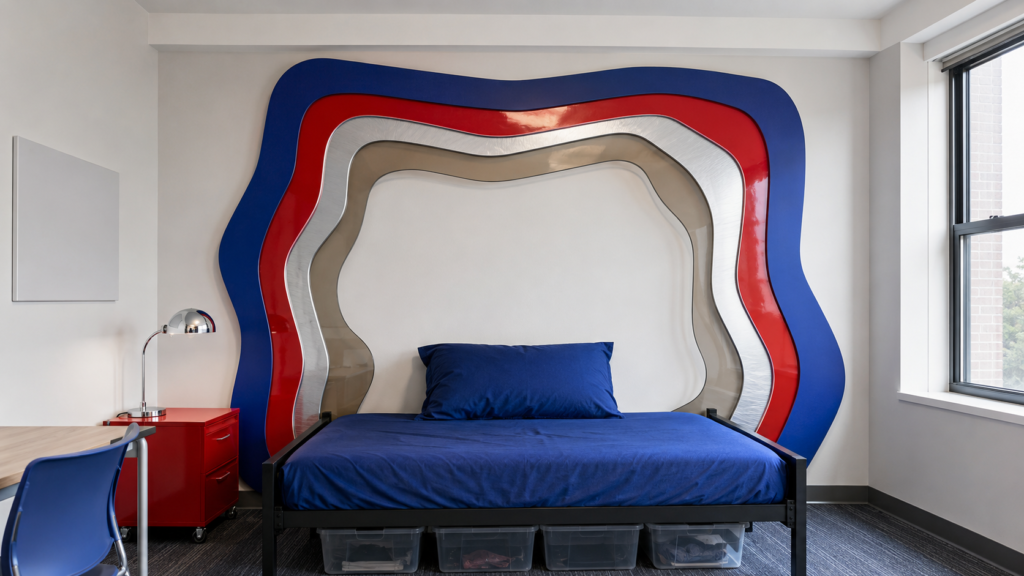
Cut three or four oversized irregular frames from lightweight foam board and overlap them around the bed to create a dimensional portal. Give every layer a distinct finish: matte cobalt, glossy red, brushed silver, and translucent amber make a strong combination without relying on printed patterns.
Leave the center open so the existing wall becomes part of the composition. Extend the outer frame 8–12 inches beyond each side of the mattress, but keep it clear of outlets and bed controls. The layered edges will create depth even when the room has flat overhead lighting.
3. Make a Translucent Color-Shadow Mural
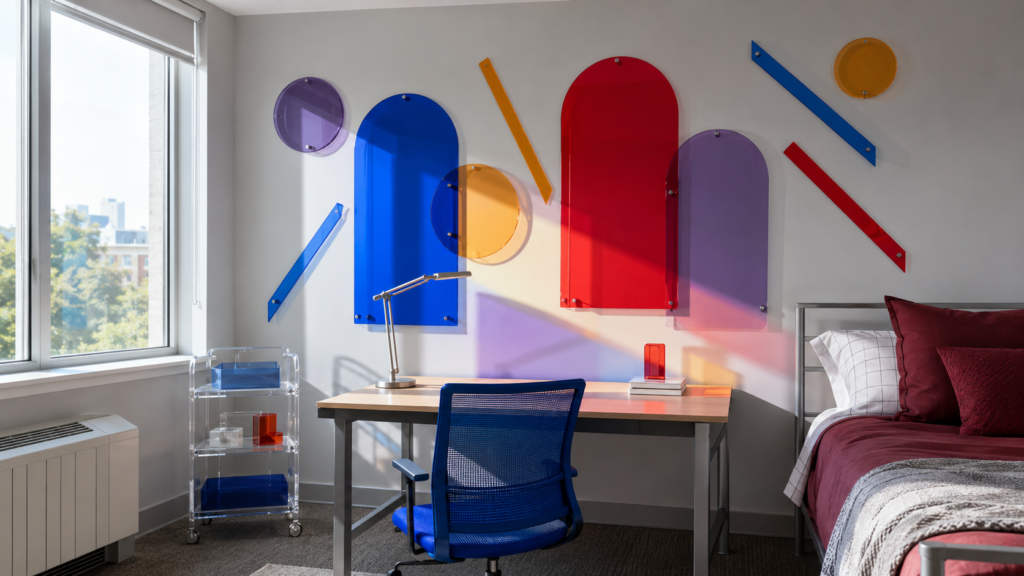
Layer pieces of colored acetate or static-cling film near a window, using overlapping circles, arches, and angled strips. Amber over blue creates a smoky green, while red layered over cobalt produces a deeper plum, giving the mural more variation without requiring numerous colors.
Leave at least half the glass or adjacent wall visually open so the arrangement doesn’t block too much daylight. A clear acrylic cart and streamlined metal desk chair can repeat the transparent quality, but the changing colored shadows should remain the room’s main visual effect.
4. Turn Removable Cork Layers Into a Topographic Hometown Map
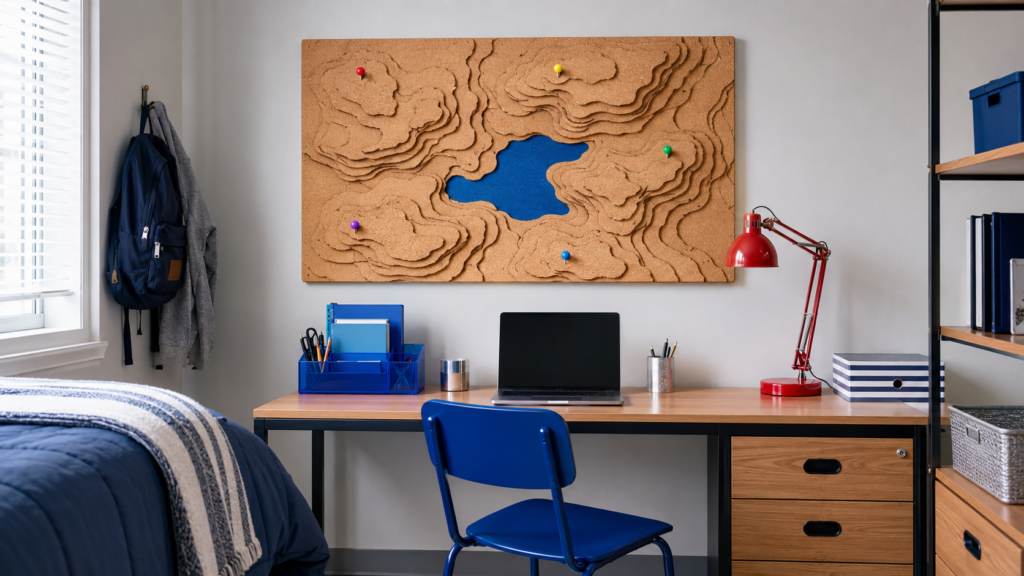
Trace the contours of a hometown, campus, lake, or favorite landscape onto thin cork sheets. Cut the shapes at slightly different sizes, layer them to form raised terrain, and mount the completed design to a lightweight backing rather than attaching every contour directly to the wall.
Cork’s warm matte finish balances glossy Gen Z accents such as a cobalt lamp or red lacquered organizer. Add only a few colored pins to mark meaningful locations. Too many markers will make the design resemble a conventional bulletin board instead of sculptural wall art.
5. Install a Sculptural Ribbon Track Across One Wall
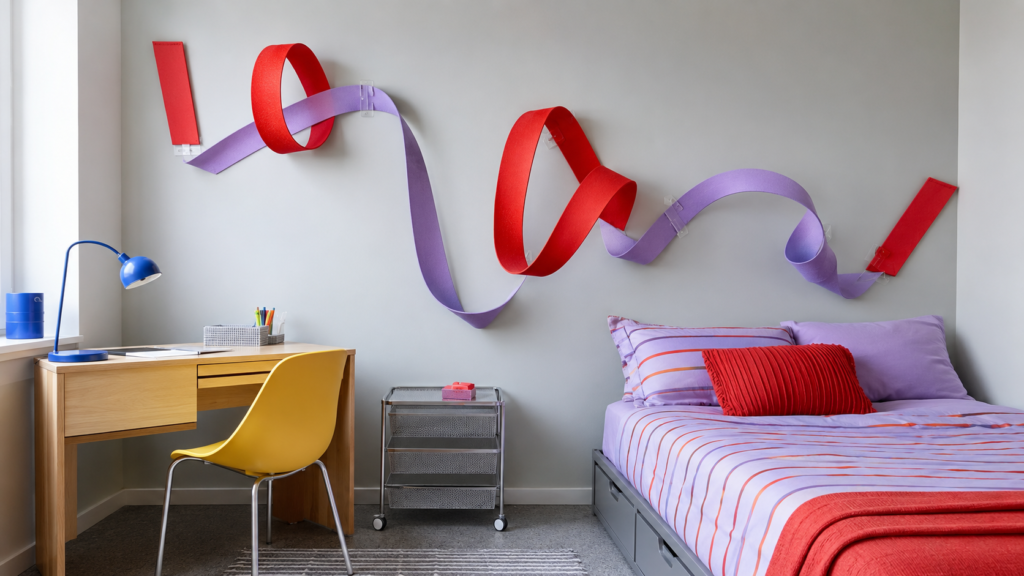
Stiffen wide fabric ribbon with fabric medium or use buckram, then shape it into oversized dips, loops, and controlled twists. Secure the curves with small removable clear clips, placing attachment points close enough together that the material doesn’t slump over time.
Tomato red and lilac look especially graphic against pale gray or cream dorm walls. Let the track travel diagonally above a desk or along the bed wall rather than covering the entire room. A butter-yellow desk chair can support the palette without competing with the flowing installation.
6. Design a Changeable Memory Vending-Machine Wall
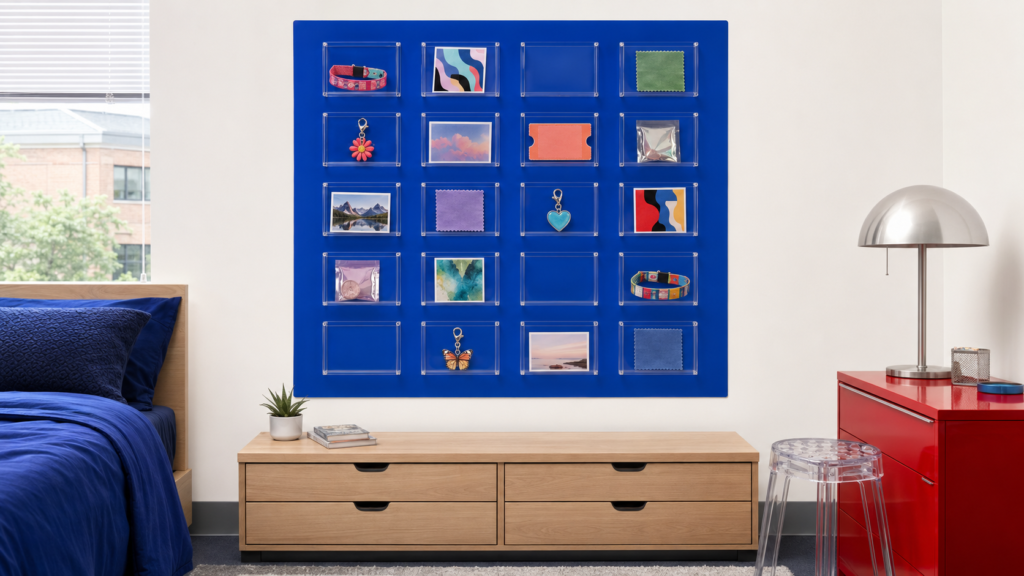
Arrange clear lightweight pockets in a precise grid and fill each one with a single small item: a concert wristband, packaged charm, postcard, fabric swatch, mini illustration, or photo. Maintain equal spacing and leave several pockets empty so the display has breathing room.
Mount the pockets to one removable backing panel if your dorm’s paint is delicate. The result resembles a colorful collectible machine rather than a loose scrapbook wall. Glossy red bedding and a cobalt cabinet can echo selected objects, helping the personal pieces feel deliberately curated.
7. Build an Acoustic-Felt Soundwave Above the Desk
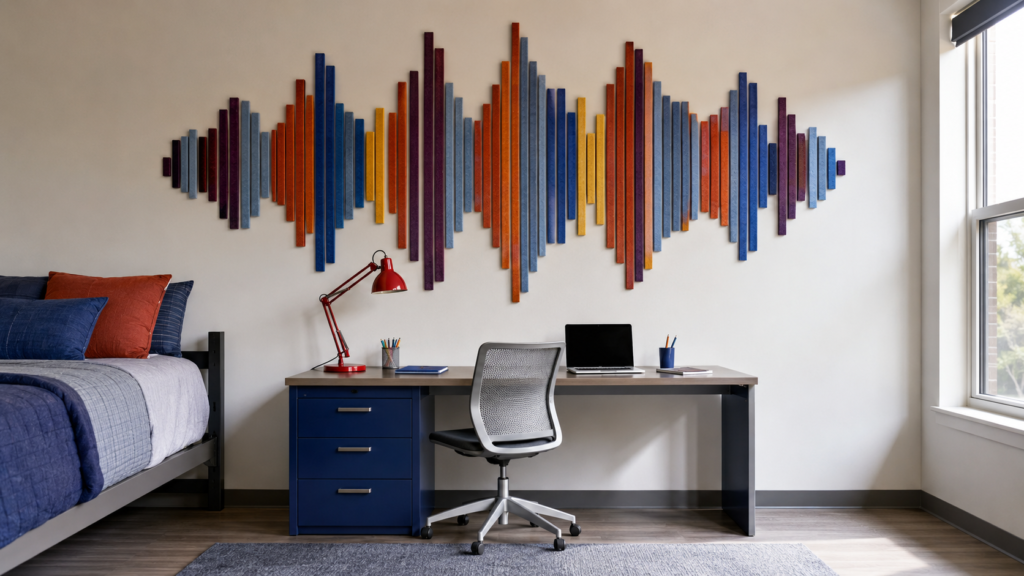
Translate a favorite sound into an abstract waveform using narrow acoustic-felt strips cut at graduated heights. You don’t need a scientifically exact pattern; alternating tall and short pieces will create the rhythm as long as the gaps remain consistent.
Center the design approximately 8 inches above the desktop so it relates visually to the study zone without interfering with a monitor or task lamp. Aubergine, rust, mustard, and blue felt will absorb more light than glossy decor, giving the wall a rich appearance even beneath basic dorm LEDs.
8. Create a Fashion-Pattern Wall in Translucent Layers
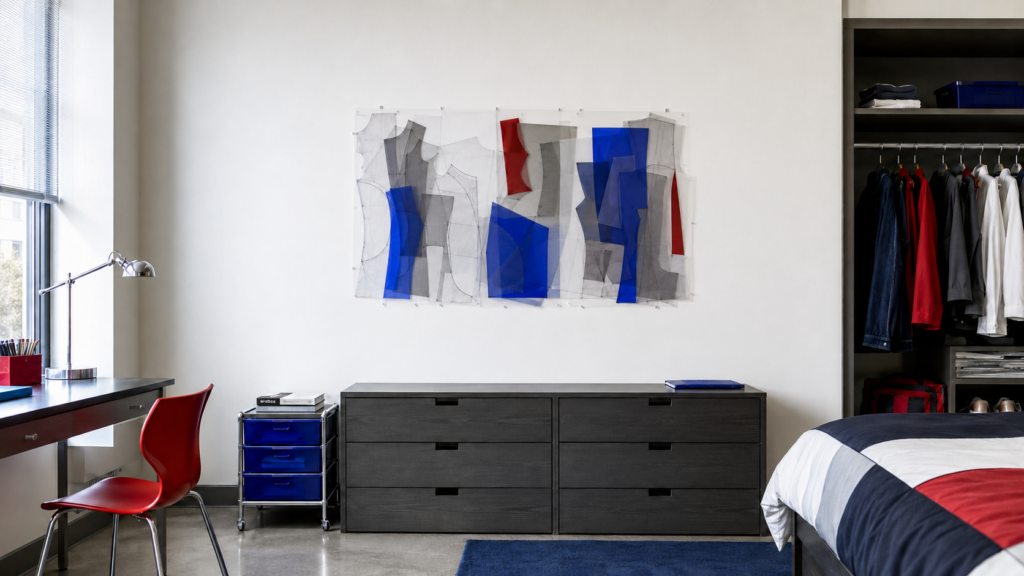
Enlarge selected curves and shapes from vintage garment patterns onto tracing paper, frosted acetate, and colored vellum. Remove all readable instructions, numbers, and brand markings, then overlap the pieces so seams and silhouettes form an abstract editorial composition.
Mount the work above a dresser or clothing rack, where its fashion reference makes sense. A cherry-red chair and a few silver accessories will sharpen the pale translucent materials. Keep the layers mostly flat because loosely hanging paper can curl quickly in humid rooms or near an open window.
9. Make a Faux Porthole With a Changeable Dreamscape
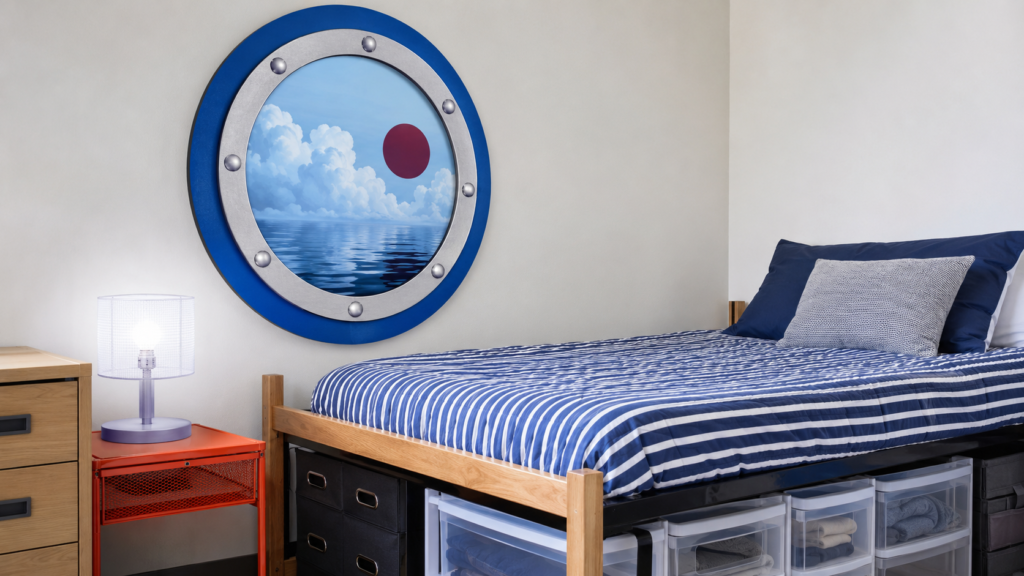
Cut several rings from lightweight foam board and layer them to create the depth of an oversized porthole. Paint the rings cobalt, silver, or deep burgundy, then insert a removable landscape print in the center—an ocean horizon, hazy city, cloudscape, or surreal desert all work well.
Aim for a finished diameter of 30–36 inches so the feature doesn’t look like a small wall sticker. Position it beside the bed rather than directly above the pillow, making it easier to change the printed view without climbing over the mattress.
10. Assemble a Paper Bas-Relief Wall From Folded Modules
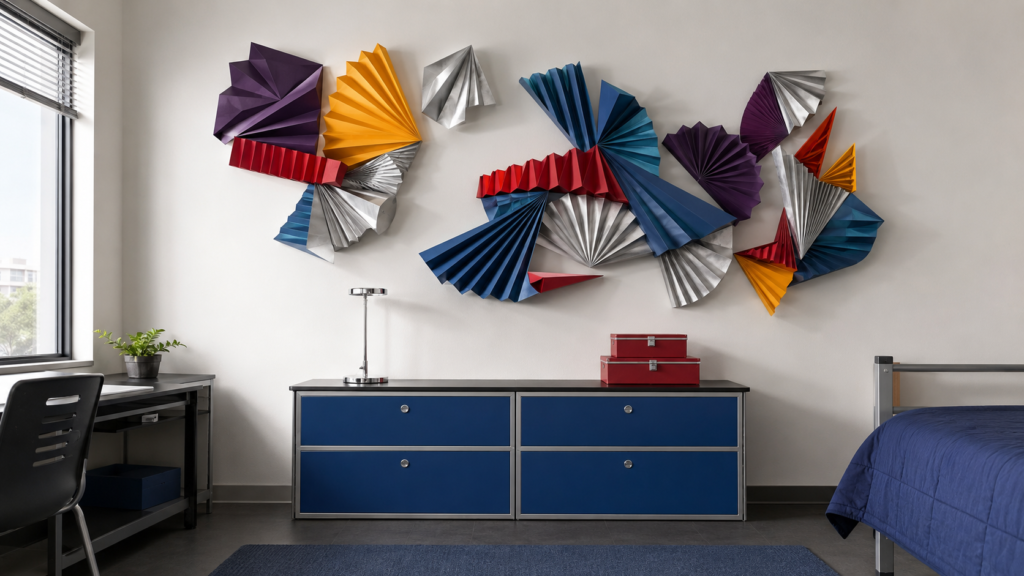
Fold heavyweight paper into fans, cones, ridges, and stepped geometric forms, then connect the pieces on a thin backing panel. Use aubergine, saffron, silver, and dusty blue, varying the depth rather than covering every module in a different pattern.
Directional light is important here. Place the relief where a desk lamp or side window will cast visible shadows across its folds. Matte paper hides small handling marks better than cheap glossy cardstock, which can crease white and reveal every uneven cut. Mount the finished work above a low dresser where it won’t be bumped.
11. Create Inflated Abstract Forms Without Using Words
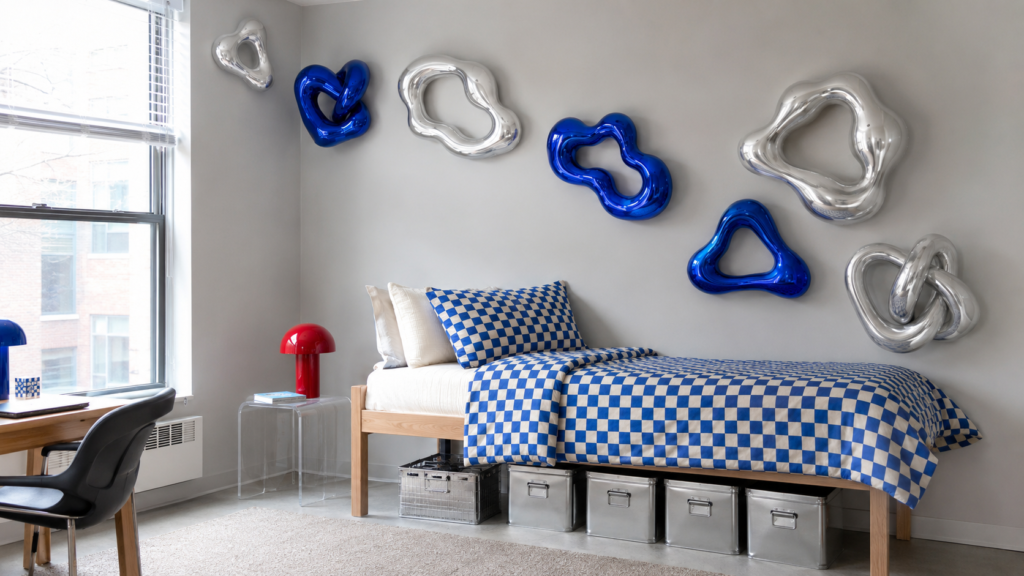
Use lightweight metallic balloon material or reusable inflatable decorations to form loops, knots, and cloudlike shapes instead of spelling names or phrases. A limited palette of silver and cobalt will feel more polished than a wall filled with assorted balloon colors.
Cluster the forms in an upper corner and let the arrangement taper toward the bed. Keep it clear of lights, vents, and sprinklers. Checkerboard bedding or a transparent stool can reinforce the playful Gen Z direction, but avoid crowding the wall with additional novelty decorations.
12. Build a Removable Faux-Tufted Wall Panel
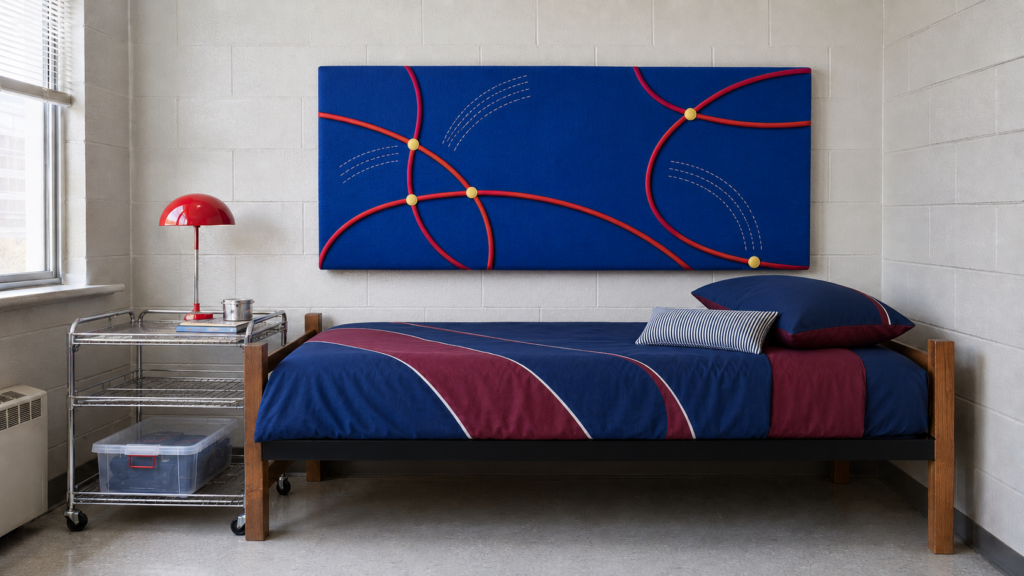
Wrap a lightweight foam panel in durable fabric, then create a geometric tufted pattern using yarn pulls, fabric-covered buttons, or stitched ties. Deep cobalt with red and butter-yellow details offers enough contrast to show the workmanship without looking like a standard upholstered headboard.
Size the panel slightly wider than the mattress and stop it 24–30 inches above the top of the bed. Confirm that the mounting system can safely hold the completed weight. Faux leather may wipe clean easily, but woven canvas or denim will hide fingerprints and minor wrinkles more effectively.
13. Turn Mesh Fabric Into a Floating Accessories Archive
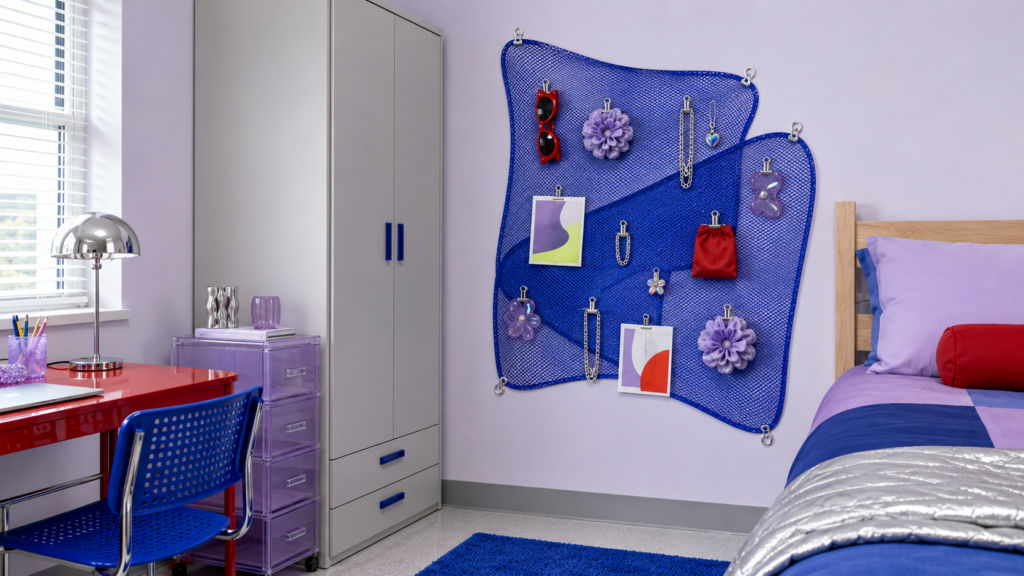
Stretch colored sports mesh or architectural netting between removable hooks, keeping the material taut rather than allowing it to hang like a hammock. Attach sunglasses, fabric rosettes, lightweight jewelry, small pouches, and printed cards with matching clips.
Limit the organizer to one defined rectangle near the wardrobe or dresser. An edited arrangement lets the mesh remain visible and prevents necklaces from tangling. Because accessories add weight quickly, reserve heavy belts, headphones, and bags for proper furniture storage instead of hanging them from the wall display.
14. Make a Giant Abstract Charm Bracelet Across the Wall
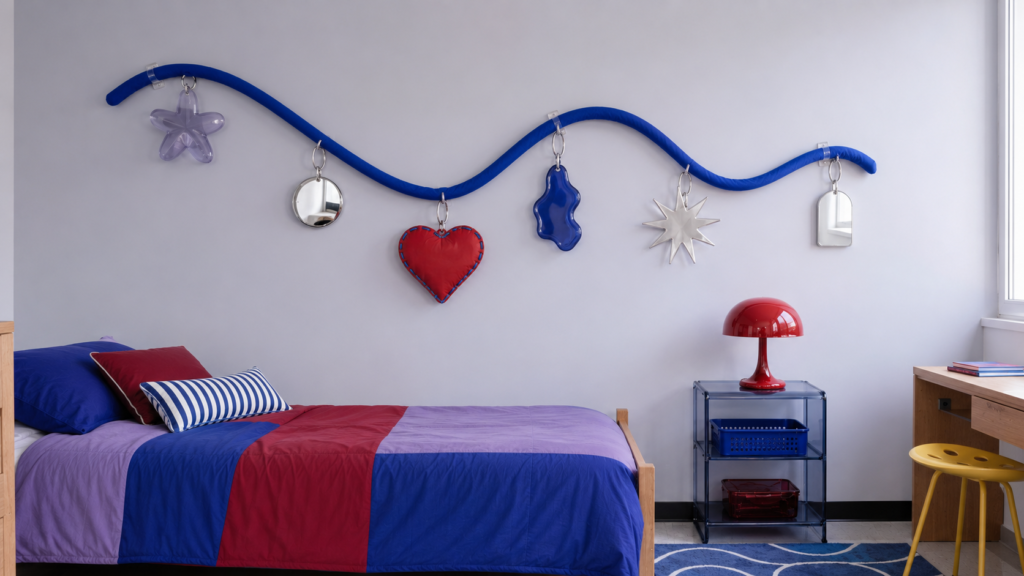
Run a thick removable cord in one broad curve across the wall, then attach oversized lightweight charms at irregular intervals. Mirrored acrylic stars, metallic discs, padded hearts, miniature frames, and fabric symbols create the jewelry reference without relying on readable words.
Vary the charm size from approximately 4 to 9 inches and leave generous gaps between them. The negative space keeps the idea graphic rather than childish. Chrome and cherry-red furniture accents can repeat two finishes from the charms, while plain bedding prevents the wall from competing with another strong pattern.
15. Create a Gradient Wall From Removable Fringe Tiles
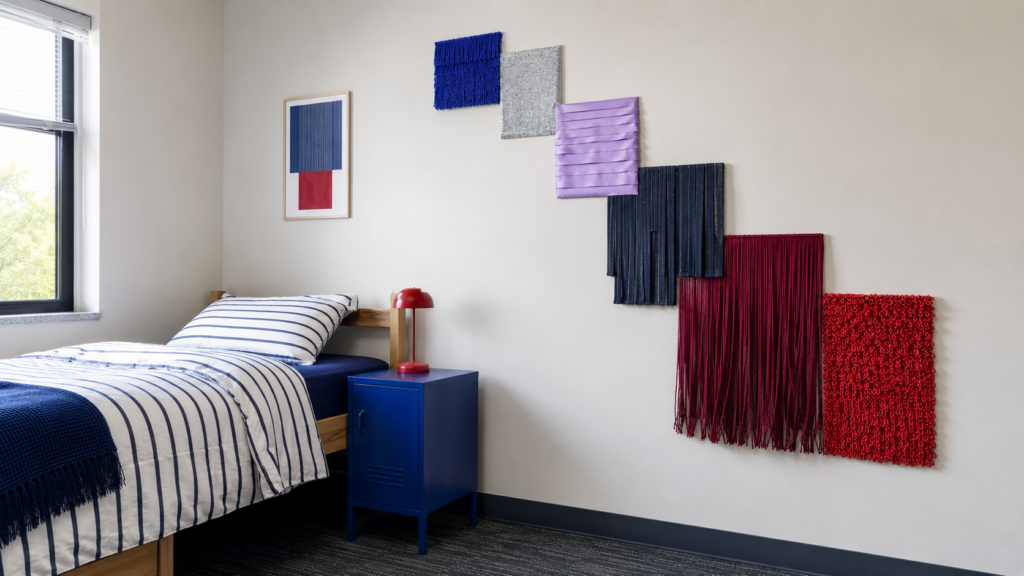
Cover separate lightweight tiles with short fringe, long fringe, satin ribbon, denim strips, metallic thread, and soft cord. Arrange them from the smoothest texture to the fullest so the wall appears to shift gradually in both depth and color.
A cascading formation along the side of the bed will produce more movement than a basic rectangle. Keep the lowest pieces above shoulder height to prevent them from catching on clothing. Fringe collects dust, so select tiles that can be removed and gently shaken or vacuumed using a low-suction upholstery attachment.
16. Install a Dorm-Safe Kinetic Flip Wall
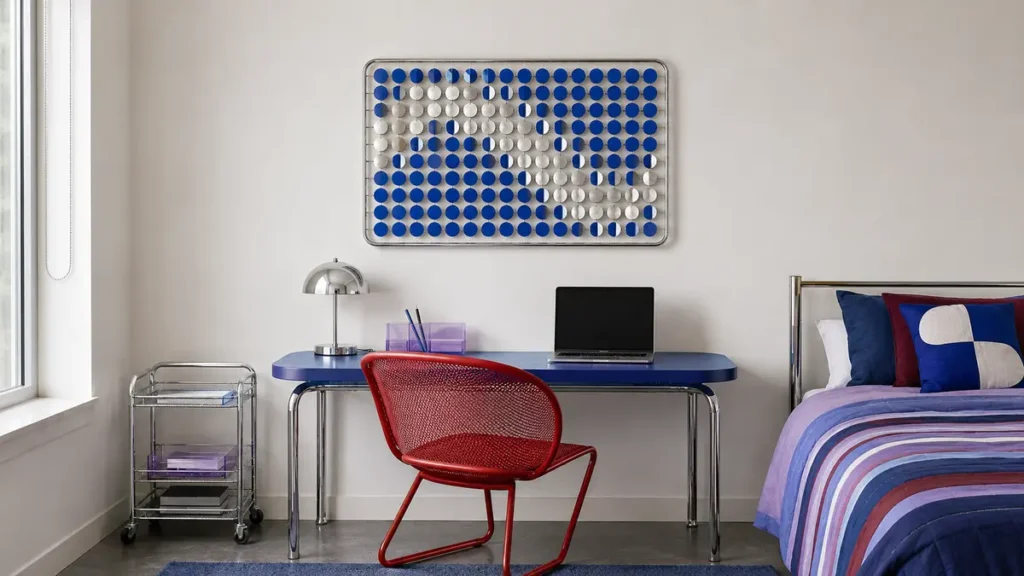
Mount two-color paper or thin plastic discs on small pivot points so each piece can be turned by hand. Arrange the discs in a compact grid, then choose a high-contrast combination such as cobalt and silver or burgundy and butter yellow.
The surface can shift from one color to the other, display simple patterns, or remain partially flipped for a pixelated effect. Place it above a desk or dresser where it’s easy to reach. Test the mechanism before installing the full panel, since tight pivots can tear paper after repeated use.
17. Build a Modular Magazine-Spine Sculpture
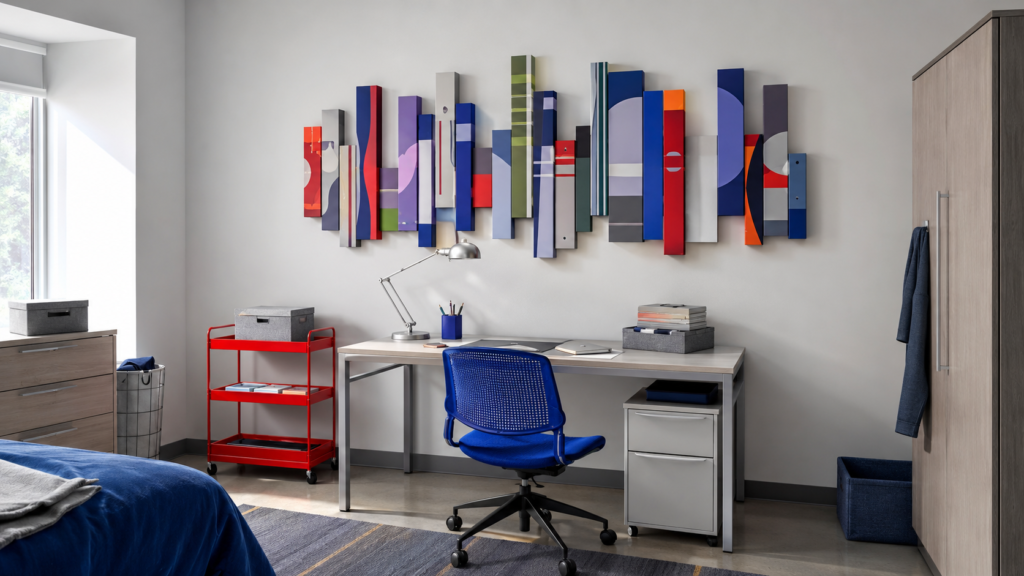
Photograph or scan colorful magazine spines, print the images, and wrap them around shallow foam blocks. Arrange the finished blocks in a staggered vertical skyline, mixing narrow and wide shapes while keeping their front edges aligned.
This method delivers the graphic color of a magazine collection without hanging heavy stacks of paper on the wall. Position the sculpture above a compact desk with a red metal cart below it. Avoid readable brand names when possible; color, scale, and repetition should create the effect rather than recognizable publications.
18. Make Lenticular Artwork That Changes With Your View
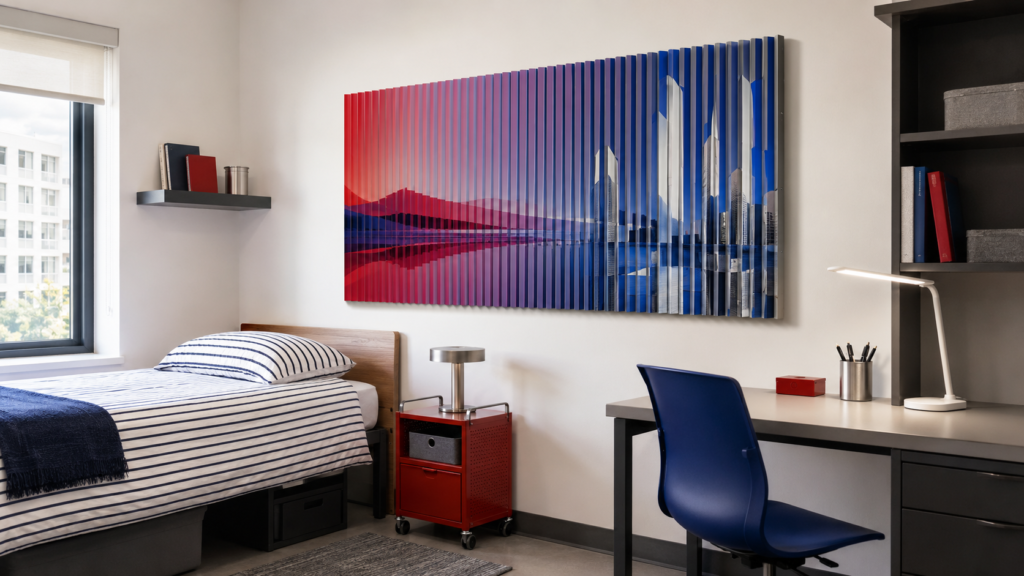
Choose two contrasting images, cut each into equal vertical strips, and attach them alternately to the angled sides of an accordion-folded base. From the bed, the piece may show a hazy sunset; from the desk, it can shift into a chrome-blue cityscape.
Use a sharp craft knife, metal ruler, and cutting mat because inconsistent strips will interrupt the optical effect. A finished width of 30–40 inches is large enough to make the change visible across a dorm room. Mount the lightweight artwork where both viewing angles remain unobstructed.
19. Create a Wall-Mounted Mini Textile Sample Library
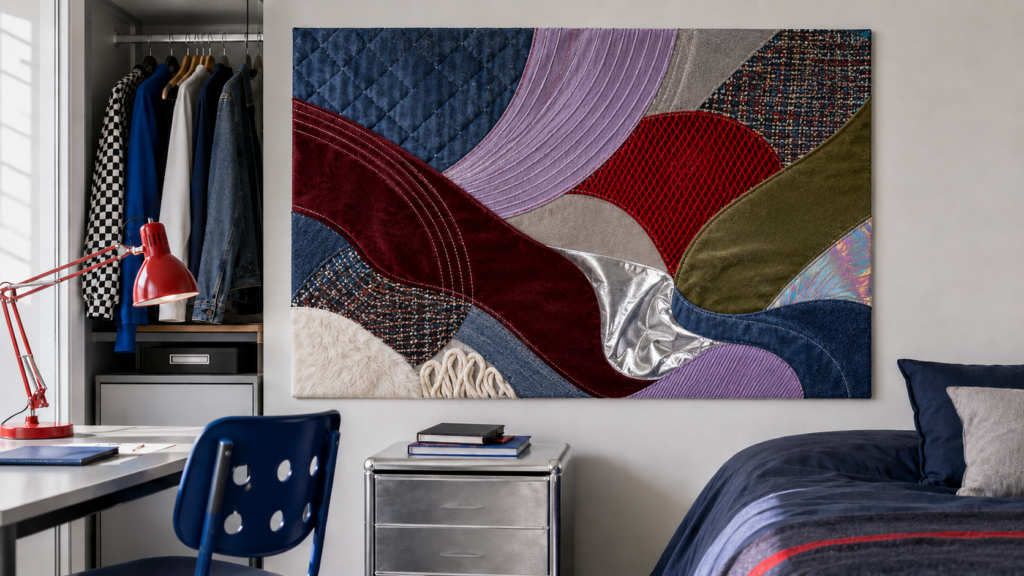
Fill clear sleeves with small samples of reflective nylon, quilted denim, faux patent leather, sports mesh, ribbed velvet, and iridescent organza. Arrange them by surface and visual weight instead of placing similar colors together.
The display should resemble a fashion materials library, with enough empty space to see each texture clearly. Install it near the closet or desk and keep the sleeves easy to open, allowing you to change samples during the semester. Avoid thin plastic sleeves that cloud or split quickly; heavier reusable pockets will photograph and wear better.
20. Aesthetic Abstract Wave Mural for a Gen Z Dorm Room
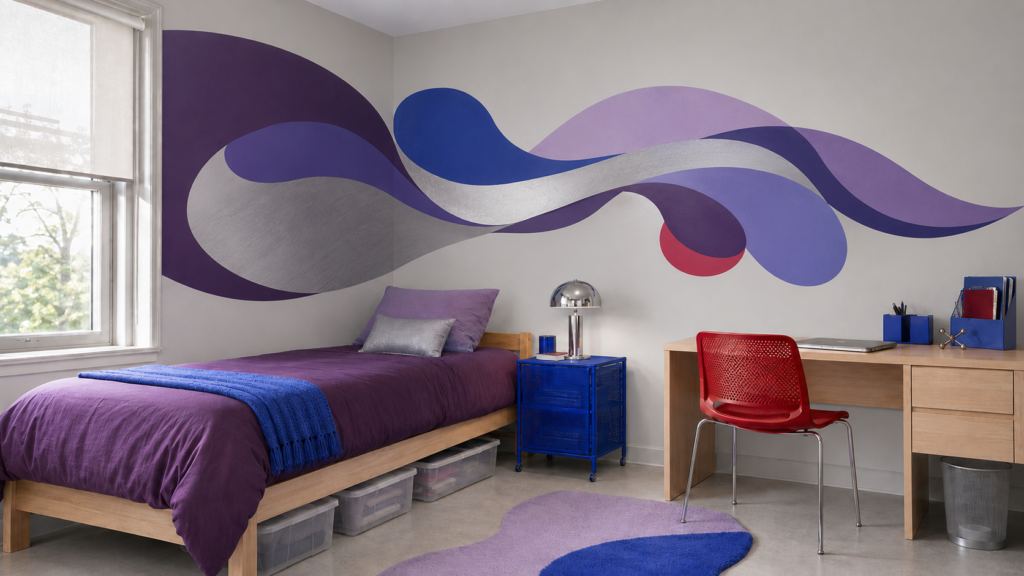
Move beyond a standard checkerboard by bending the pattern into a wide visual wave. Start with larger squares behind the bed, gradually reduce their size toward the desk, and allow a few rows to curve upward as if the grid were being pulled across the wall.
Transform a simple dorm room with a bold abstract wave mural in aubergine, cobalt blue, lilac, silver, and crimson. The flowing design creates a stylish focal wall while coordinated bedding, modern furniture, and bright neutral-white lighting keep the space youthful, balanced, and Pinterest-worthy.
21. Build an Oversized Pixel Headboard From Padded Wall Tiles
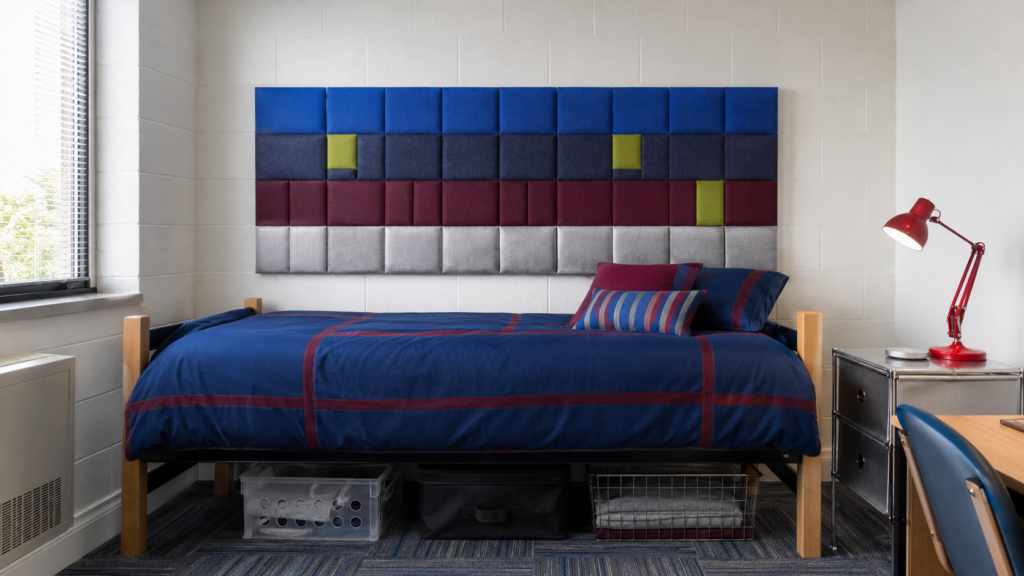
Small foam squares ko denim, silver, cobalt, lime, and burgundy fabric se wrap karke pixelated gradient mein bed ke peeche arrange karein. Tiles individually removable hon, jabke graphic bedding aur a powder-coated metal stool room ko coordinated rakhein.