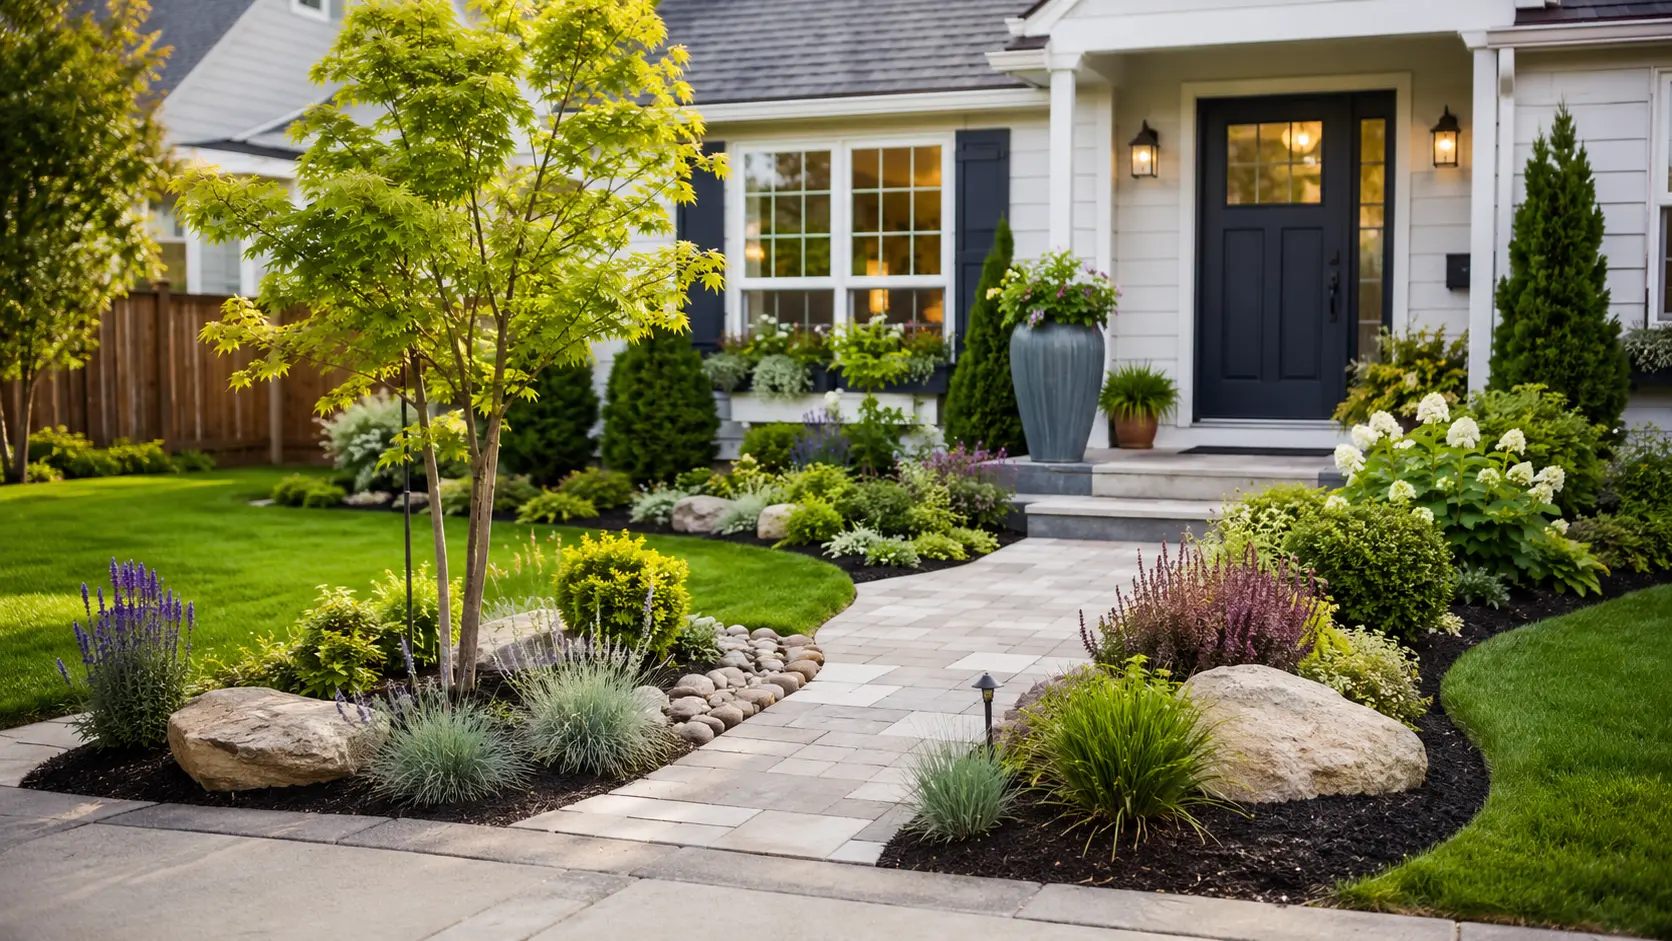
A small front yard can make a strong first impression when every surface, plant, and pathway has a clear purpose. The best small front yard landscaping ideas don’t fill every open inch. Instead, they use scale, repetition, and sight lines to make limited space feel organized and generous.
These 18 designs combine modern materials, climate-appropriate planting, useful access, and manageable upkeep. You’ll find options for narrow lots, shallow setbacks, rentals, patchy lawns, drainage problems, and modest budgets, all designed to look attractive from both the sidewalk and the front door.
What to Consider Before You Start
Measure the yard, path, foundation beds, and distance from the sidewalk before buying materials. Locate underground utility lines, note where roof runoff travels, and check local rules concerning fences, street trees, and work near sidewalks. Renters should also get written permission before making permanent changes.
Study the light at different times of day and choose plants by mature height and width rather than their nursery size. Preserve a walkway at least 42 inches wide where possible, along with clear access for deliveries, bins, meters, snow removal, and maintenance.
1. Create a Floating Garden Walk
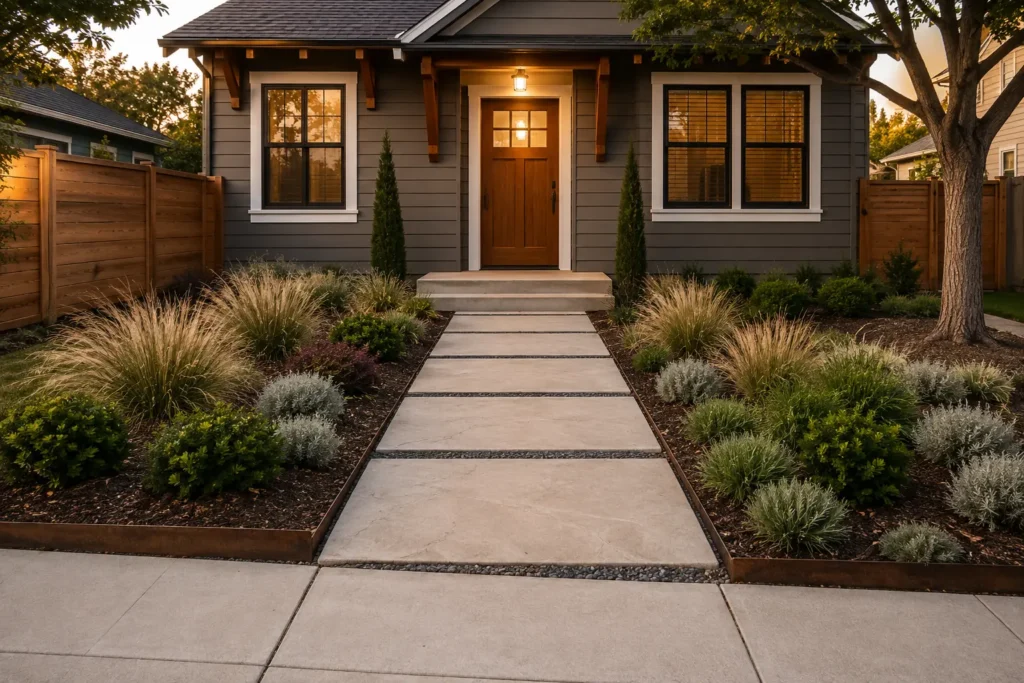
Replace a basic front path with large concrete or limestone-look slabs separated by narrow joints of dark permeable gravel. Keep the usable route 42 to 48 inches wide, then frame it with offset masses of low grasses, rounded evergreen foliage, and one burgundy accent.
Plants beside the walk should remain below about 30 inches at maturity so they don’t crowd visitors or hide the entrance. Large-format concrete pavers provide the look of cut stone at a more manageable price, although they still need a compacted, well-draining base to remain level.
2. Try a Checkerboard Garden
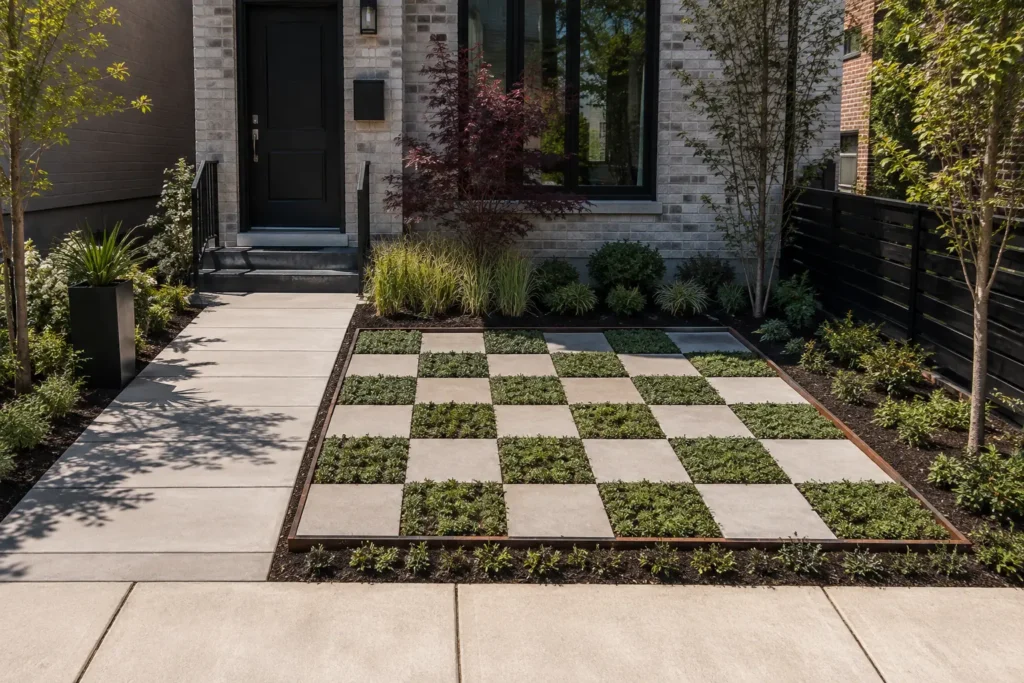
Turn a narrow patch of struggling lawn into a graphic checkerboard of square pavers and planted sections. Modules measuring 18 to 24 inches create a readable pattern from the street, while a simple border prevents the grid from disappearing into the surrounding yard.
Use permeable concrete, reclaimed brick, or frost-suitable pavers with locally appropriate low plants that tolerate light foot traffic. Keep the planted squares below 6 inches at maturity. Limiting the pattern to one defined area makes the yard look wider without allowing the design to compete with the walkway or facade.
3. Add a Curved Garden Portal
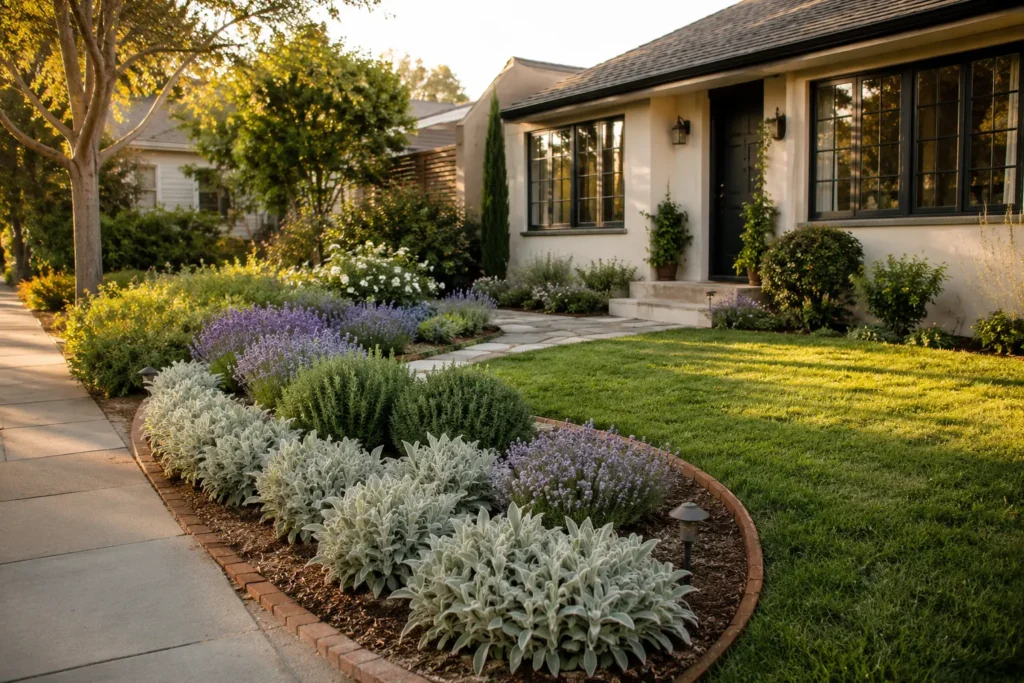
A tapered crescent-shaped bed can make a shallow setback appear deeper. Begin with low silver-green foliage near one sidewalk corner, continue with repeated knee-high mounds, and end with one narrow vertical plant near the entrance. The bed should become gradually slimmer as it approaches the house.
Warm brick, weathered steel, or a carefully cut edge will make the curve clear from the curb. Leave at least one-third of the yard relatively open so the composition has breathing room. Plants must suit local conditions and stay within their planned mature widths.
4. Design a Gravel Ribbon Garden
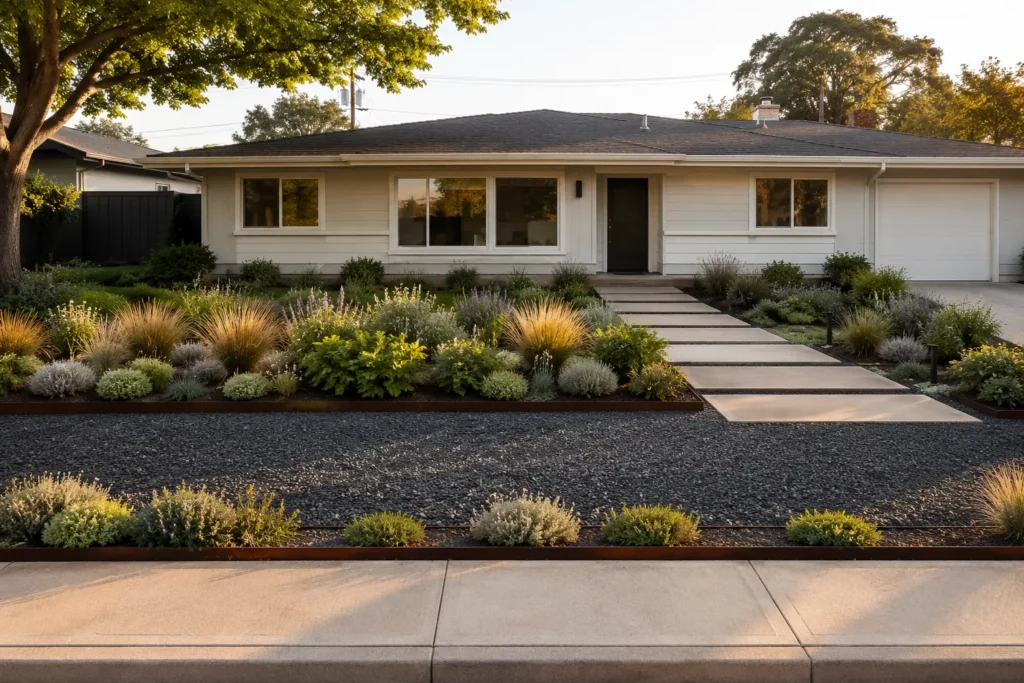
Replace difficult lawn with two or three broad horizontal bands made from planting, permeable gravel, and oversized stepping pads. Pair charcoal or warm-tan gravel with repeated groups of fine grasses, deep-green foliage, and restrained white or lavender flowers.
Avoid placing isolated plants across an exposed gravel field, which can look unfinished and become hot in strong sun. Dense planting bands offer better soil coverage and create a softer street view. A properly prepared base costs more initially, but it can reduce mowing and make rainwater easier to manage than a compacted surface.
5. Feature One Sculptural Tree
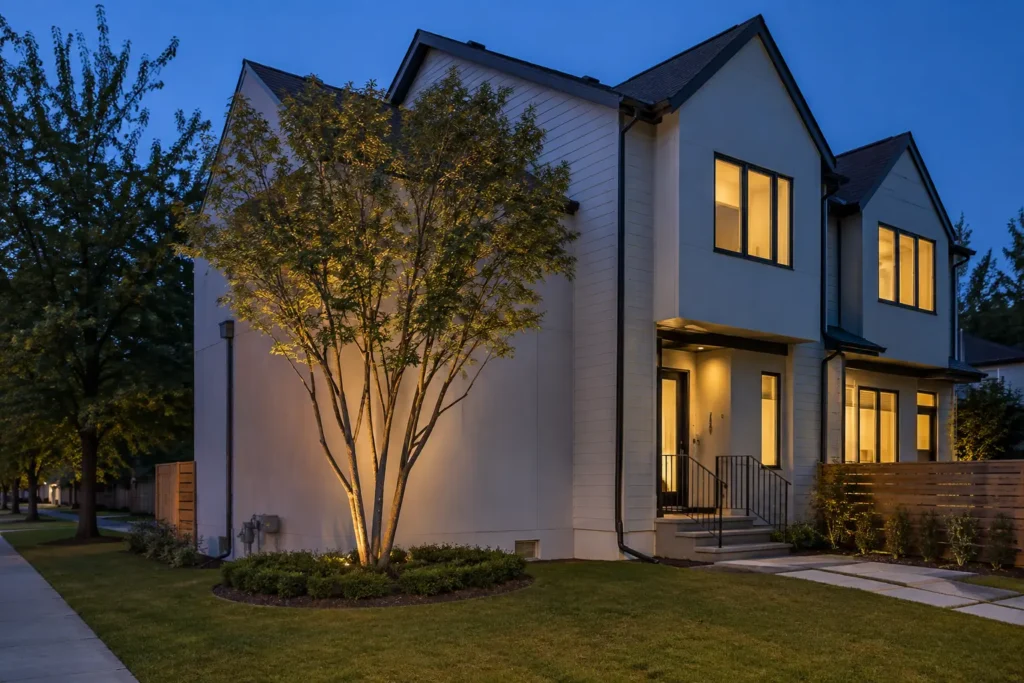
Choose one compact multi-stem tree as the yard’s main vertical feature rather than squeezing several woody plants into the frontage. Position it near a blank section of wall where its canopy can frame the architecture without hiding windows, house numbers, or the front door.
Look for a locally appropriate tree that matures around 10 to 15 feet, with roots and branching suited to its distance from the foundation. Underplant it with one low foliage mass and a slim steel edge. This quiet base keeps attention on the bark and canopy instead of creating a crowded tree ring.
6. Shape a Layered Green Wave
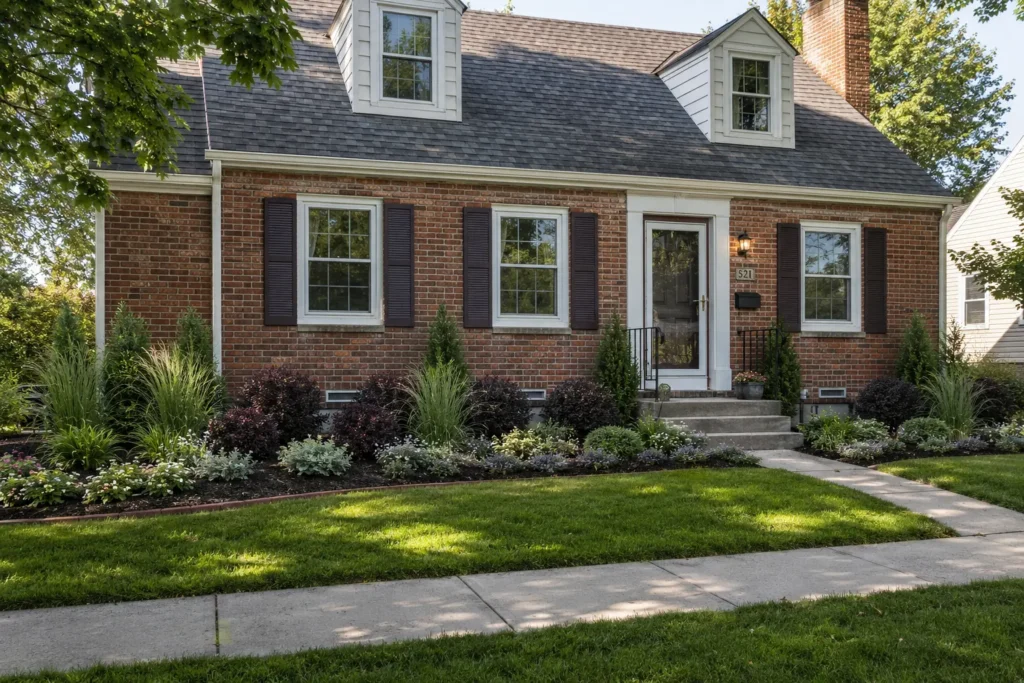
Create a shallow foundation bed with three controlled heights. Use plants around 12 inches tall along the front, rounded 24-inch mounds through the middle, and narrow 36-to-48-inch forms only between windows or at suitable corners.
Repeat a limited mix of deep green, silver-green, burgundy, and small white flowers instead of planting one of everything. The repeated shapes produce rhythm, while the gradual rise softens the line between the ground and house. Leave space around vents, faucets, and siding, and select mature sizes that won’t require constant box-shaped trimming.
7. Build a Mini Entry Courtyard
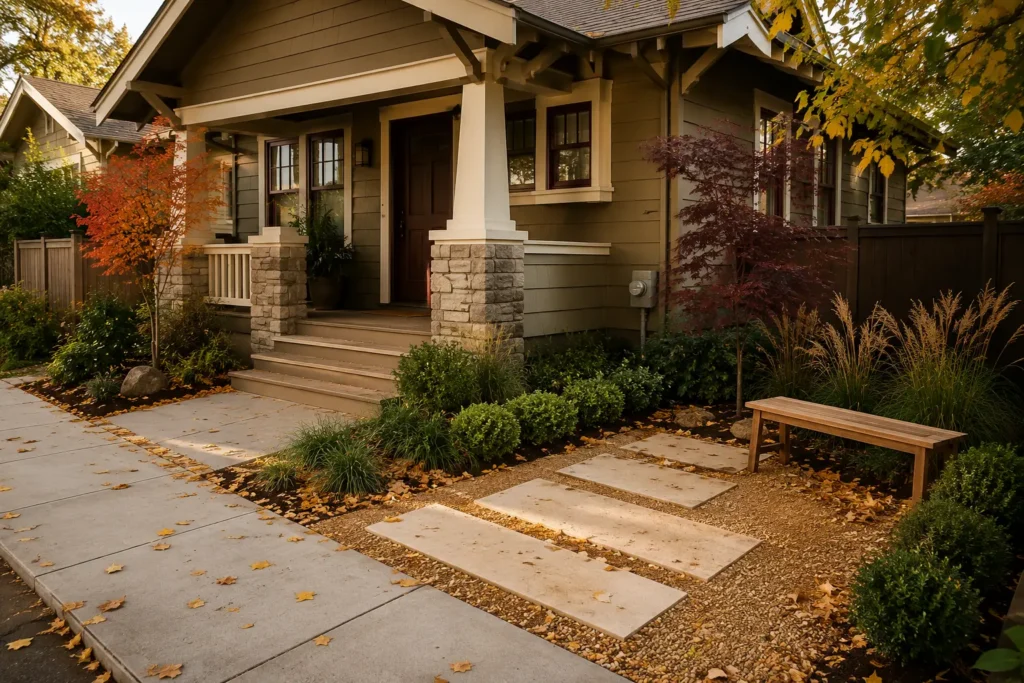
Convert an unused area beside the front path into a 6-by-8-foot pause point with oversized stepping pads set in compacted permeable gravel. Add one slim chair or backless bench and place a low planting band behind it, keeping all furniture outside the main route.
Creamy stone, natural wood, deep-green foliage, and one terracotta accent create a polished material palette without requiring a large porch. Loose seating is practical for renters and cold climates because it can be moved for inspections or snow clearing. Avoid loose gravel where wheels, strollers, or mobility aids need to travel.
8. Style a Boulder Garden
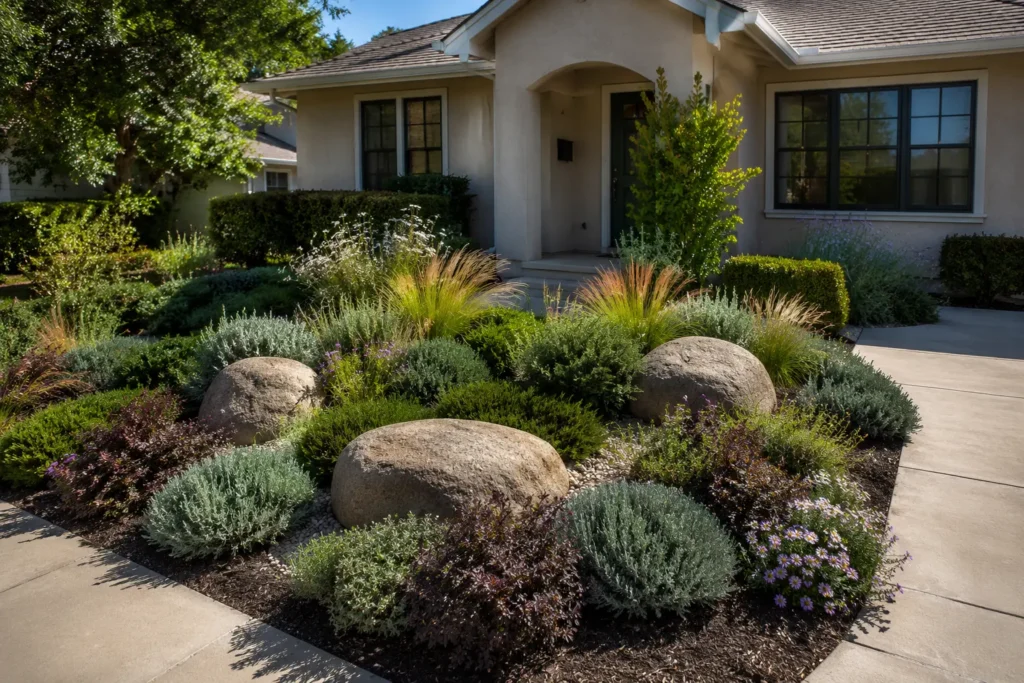
Anchor a water-wise bed with three locally sourced boulders in related colors but different sizes. Partially bury each stone so it appears settled into the landscape, then arrange broad groups of silvery foliage, fine grasses, compact evergreens, and restrained seasonal flowers around them.
Choose plants with compatible water and sunlight needs instead of combining species simply for appearance. The rocks provide year-round structure while young plants fill out, but they shouldn’t interfere with sidewalks, underground utilities, or snow storage. Use gravel sparingly between planted areas to avoid an exposed, heat-reflective surface.
9. Add a Rain Chain Garden
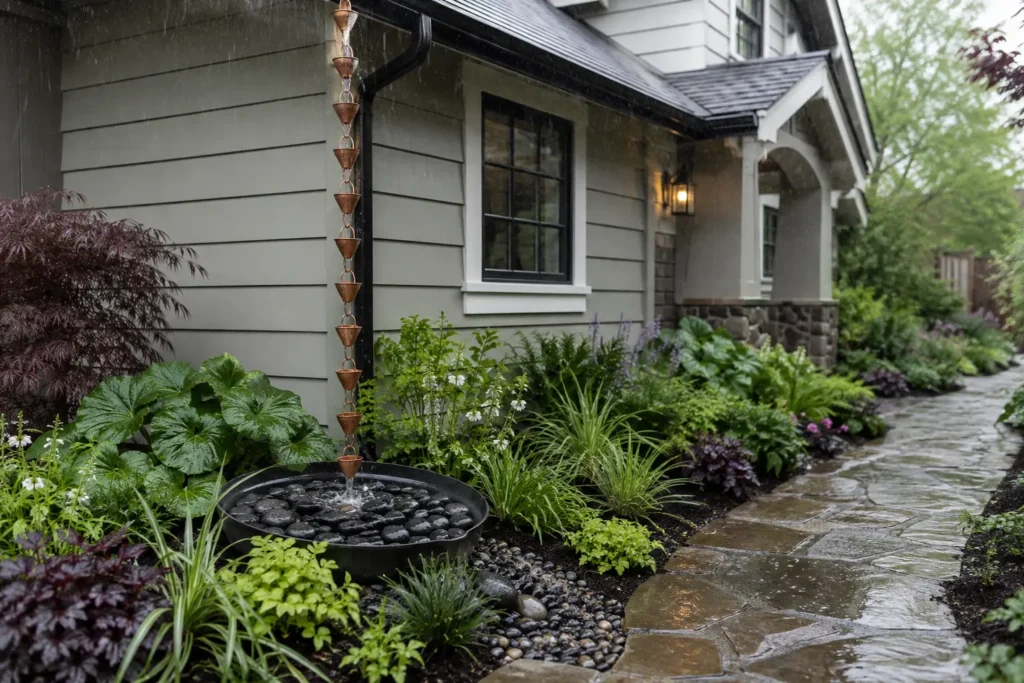
Where local conditions allow, direct a rain chain into a shallow stone basin that overflows into a slim planted drainage area. Dark river rock, weathered metal, and moisture-tolerant greenery create a strong visual moment during rainfall without occupying much ground.
Keep the basin away from the foundation and preserve a firm, dry walkway. Before installation, check the soil’s drainage rate and confirm where overflow will travel during heavy rain. Areas with freezing winters may need a different seasonal setup, and persistent standing water usually requires professional grading or drainage advice.
10. Make a Movable Garden Wall
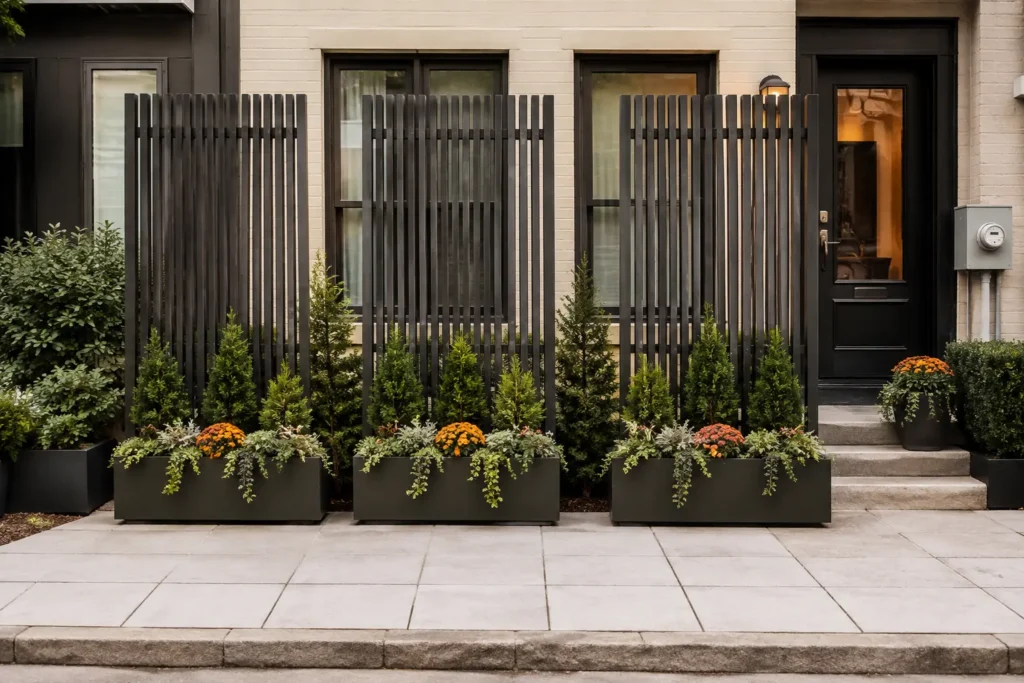
Renters can introduce height by placing three narrow freestanding slatted panels against a plain permitted wall or boundary. Use stable weighted bases and align matching trough planters below them, filling the containers with repeated upright foliage, trailing greenery, and one seasonal accent.
Natural wood, matte charcoal, or muted olive finishes look more convincing than thin plastic trellis panels. Leave windows, vents, utility meters, and emergency routes clear. Container plants dry faster than in-ground beds, so choose sizes that hold enough soil and consider simple drip lines connected to an approved outdoor faucet.
11. Plant Evergreen Islands
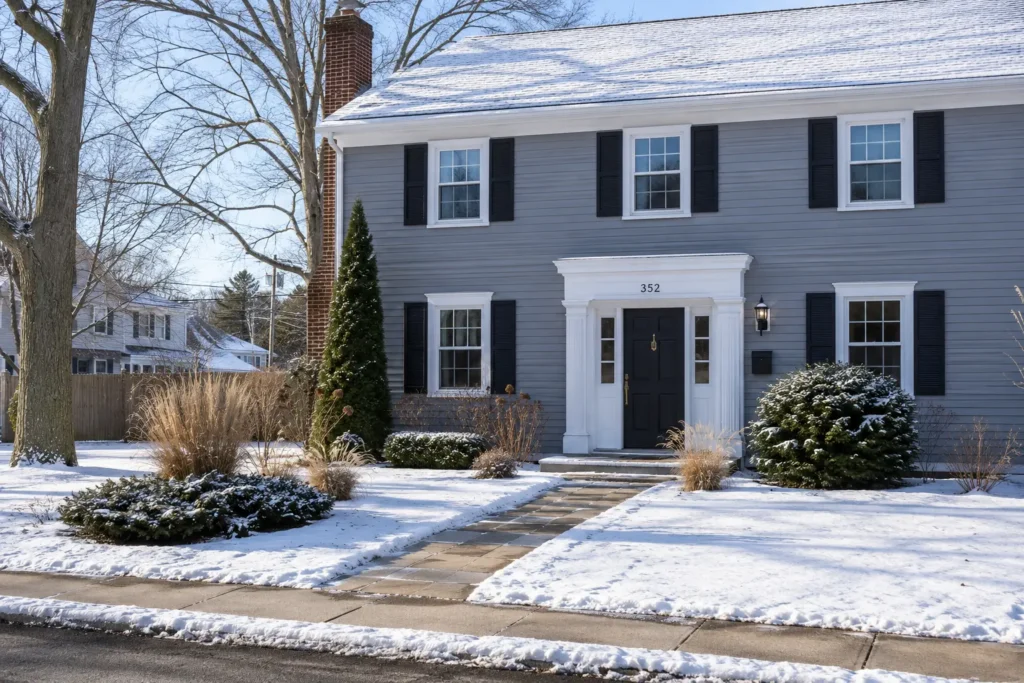
Arrange three separate evergreen groups instead of installing one continuous hedge across the foundation. Place a low group near the path, a rounded form near one corner, and a narrow vertical plant where it won’t cover a window or interfere with the roofline.
Connect the islands visually with repeated grasses, bulbs, or low seasonal foliage while leaving open ground between them. Those gaps make a small frontage appear less enclosed and allow easier access for maintenance. Choose naturally compact regional varieties so the plants retain their form without frequent shearing or bare interior growth.
12. Create a Color Pixel Strip
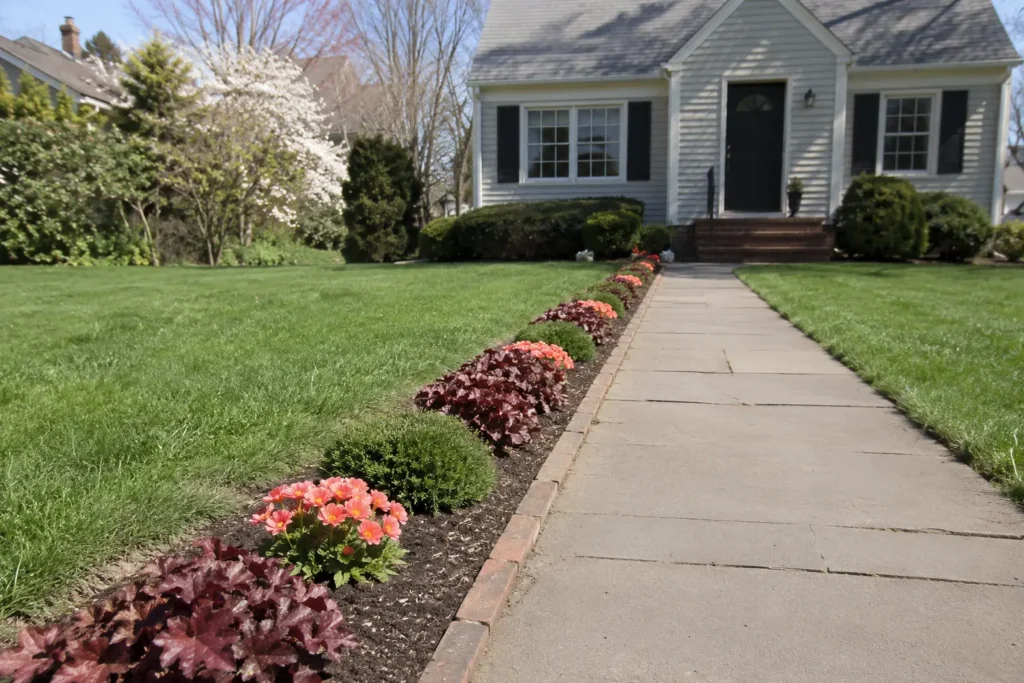
Concentrate seasonal color in one slim strip beside the entry path. Divide the strip into 18-to-24-inch visual blocks, alternating low evergreen foliage, burgundy leaves, and one flower color suited to the season and local exposure.
The complete planting should stay below approximately 15 to 18 inches so the pattern remains visible and doesn’t lean into the walkway. Using bulbs or locally reliable perennials can lower annual replacement costs, while a few annual sections provide flexibility. A single controlled color reads more clearly from the street than many scattered flowers in unrelated shades.
13. Install a See-Through Screen
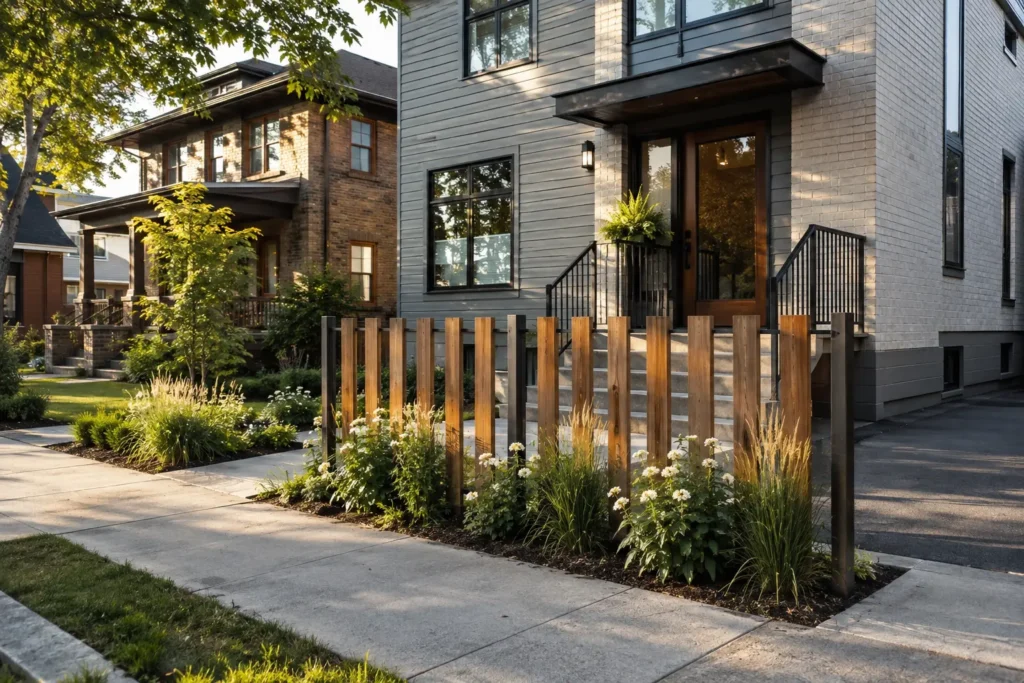
Define a shared boundary with a short run of widely spaced cedar or matte-metal slats softened by narrow upright grasses. Keep the screen around 3 to 4 feet high and retain generous gaps so light, airflow, and views of the entrance can pass through.
Use the screen along only part of the property line rather than enclosing the entire yard. This creates privacy near a window or seating area without making the house appear defensive. Before building, check local fence height, sidewalk setback, HOA, corner visibility, and rental rules, especially on properties near driveways or intersections.
14. Conceal Outdoor Clutter
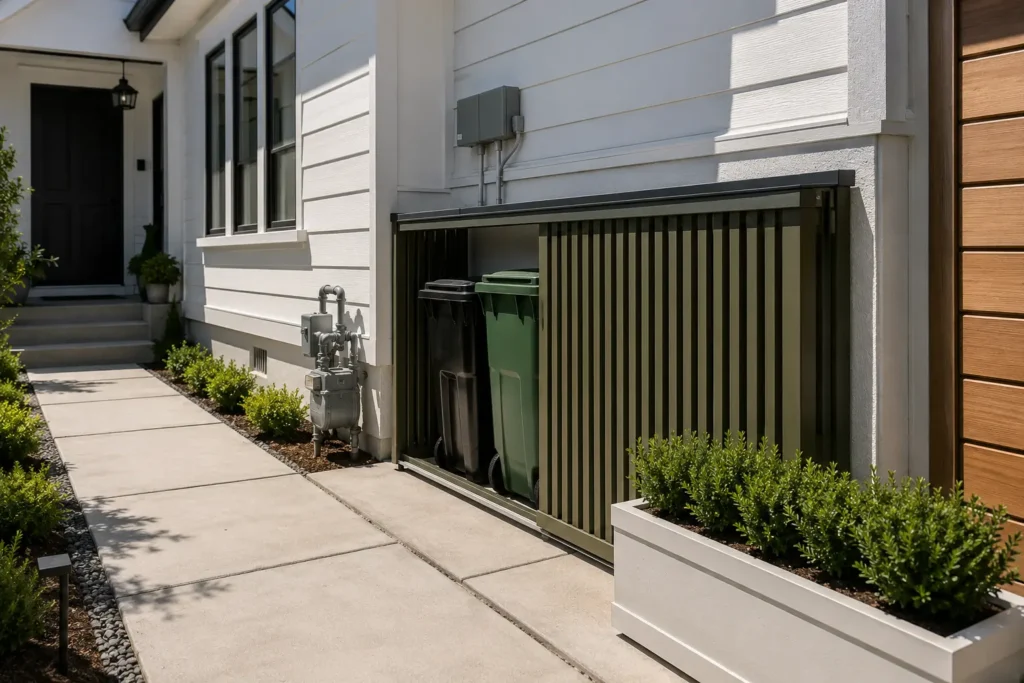
Hide bins, exposed pipes, or utility equipment behind a slim sliding or lift-away screen. Vertical timber battens, perforated weathered steel, or exterior-grade panels can repeat a finish already used on the house, helping the enclosure look planned rather than added later.
Keep it only as tall as necessary and preserve ventilation, meter-reading clearance, and access for technicians. A shallow planting trough on the public-facing side can soften the surface, but avoid thorny plants or spreading roots. Confirm that bins can still move easily between their storage area and collection point.
15. Design a Sunken-Look Nook
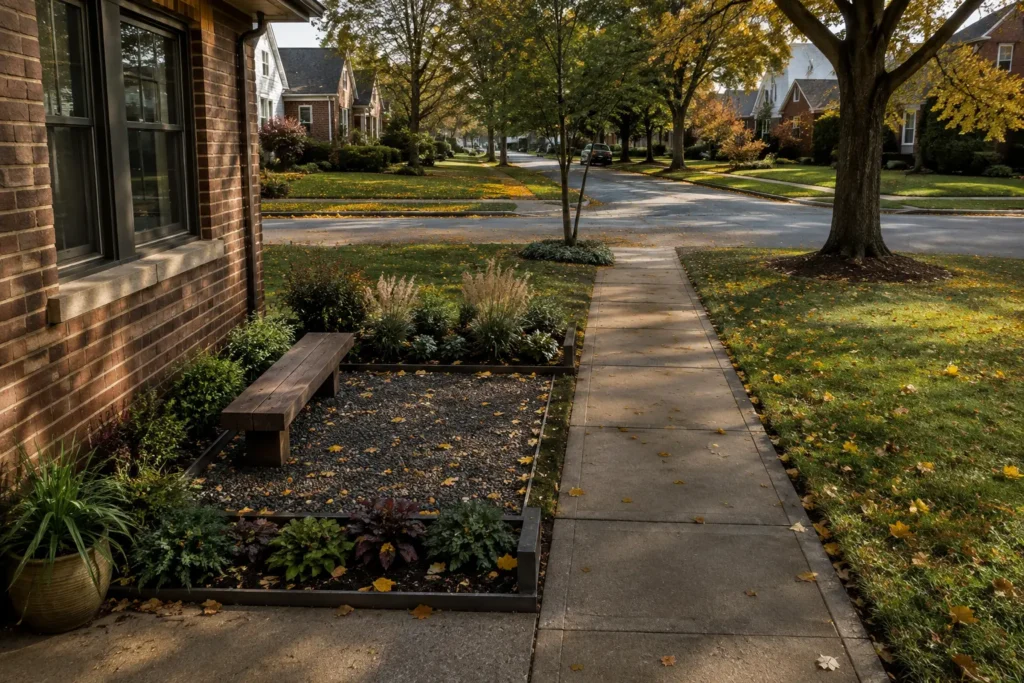
Create the impression of a recessed courtyard without excavating by using a dark 5-by-6-foot gravel or brick panel framed by planting bands raised 8 to 12 inches. Add one backless bench and use foliage below 30 inches to make the space feel sheltered while preserving street views.
Reclaimed brick or modular concrete blocks can lower material costs, although both require a stable base and careful leveling. Position the nook beside the path rather than within it. In snowy regions, removable furniture and a simple rectangular layout will make winter clearing easier.
16. Build an Address Focal Wall
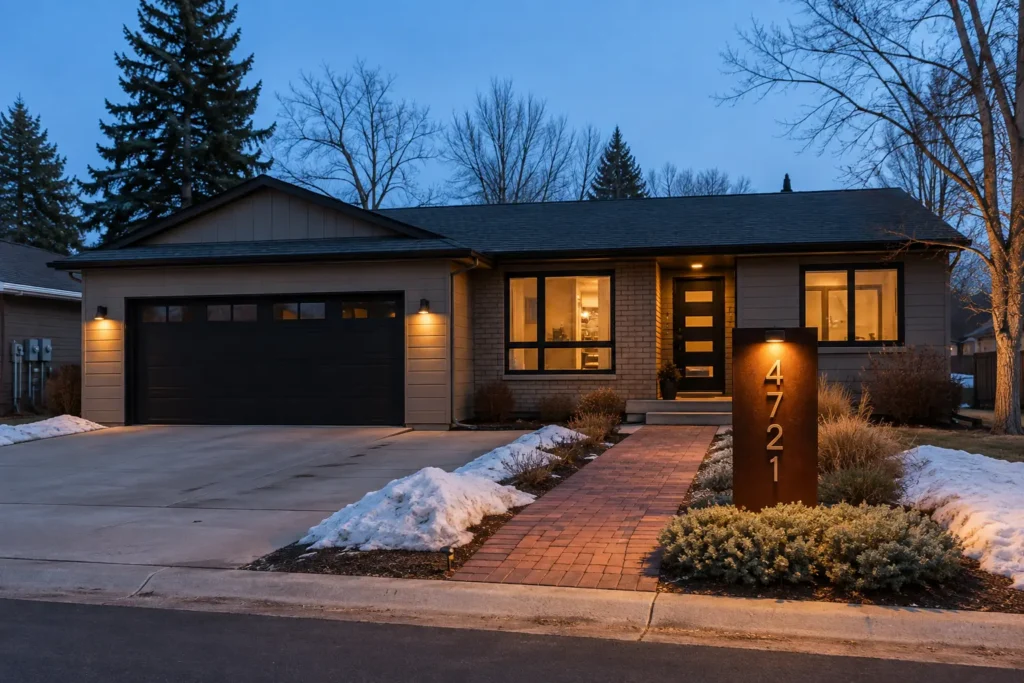
Combine house identification, lighting, and planting in one narrow vertical feature near the sidewalk or entrance path. Use sealed wood, weathered steel, smooth masonry, or matte charcoal metal, then place large numbers where they remain easy to read from the street.
A shielded warm light around 2700K keeps the numbers visible after dark without sending glare toward neighboring windows. Finish the base with one low evergreen or fine-foliage group that won’t cover the address when mature. Keep the structure outside utility zones, snow-storage areas, and required visibility triangles.
17. Lay a Brick Garden Rug
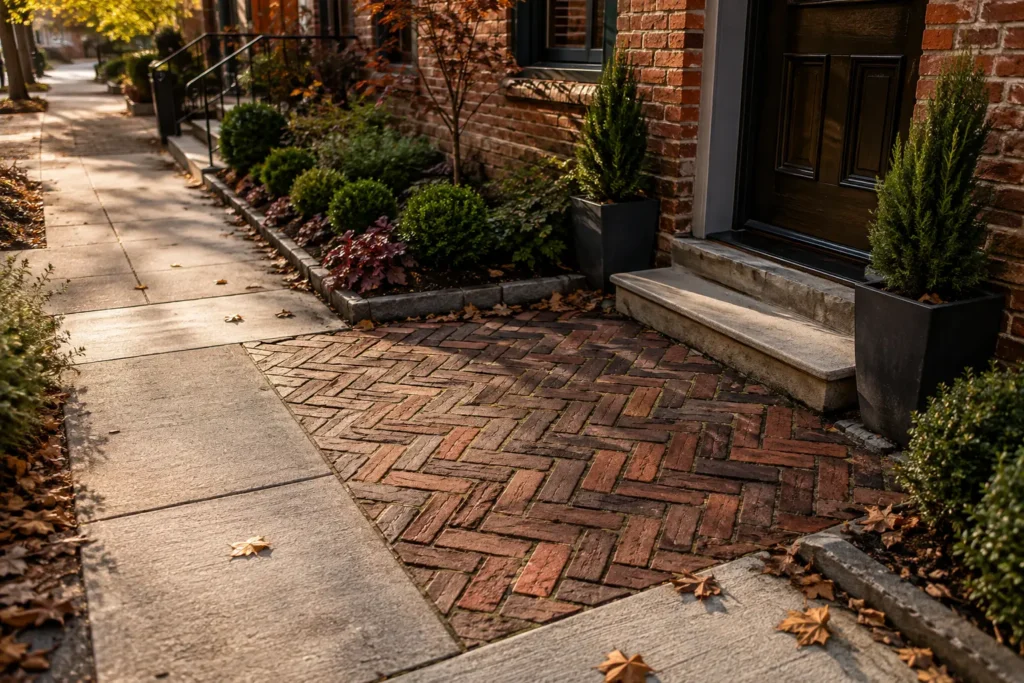
Insert a rectangular panel of reclaimed brick or secondhand pavers into an existing concrete or gravel approach. A basketweave or herringbone section measuring 4 to 6 feet long resembles an outdoor rug and adds craftsmanship without requiring replacement of the complete path.
Frame the insert with the original walkway material and repeat its warm tones through nearby burgundy foliage or a narrow brick edge. Reused materials can look convincing when their color variation feels natural, but damaged, slick, or frost-sensitive pieces aren’t worth the savings. Prepare a draining base to prevent settling and uneven edges.
18. Build a Layered Entry Stage
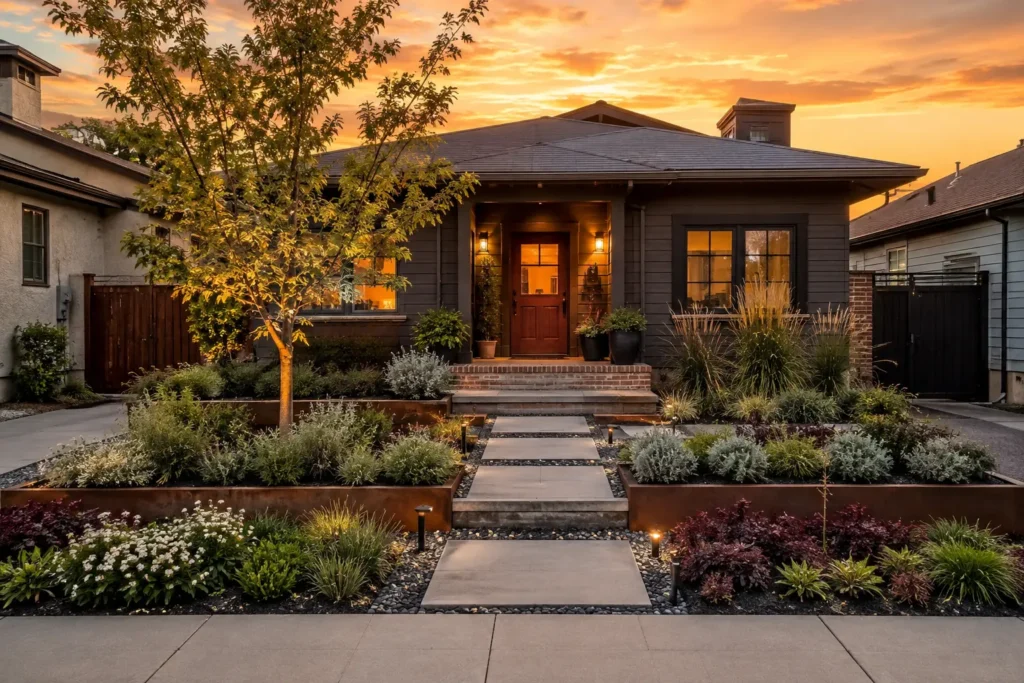
Organize the entire frontage into three shallow planes: a low street-facing planting ribbon, a middle permeable terrace, and a slightly raised foundation layer. Carry one broad, accessible path through all three, using warm brick, creamy stone, charcoal gravel, weathered steel, and repeated green foliage.
Add one compact architectural tree and a few burgundy accents, leaving enough negative space for the separate layers to remain visible. Keep elevation changes visual or minimal so the entrance stays accessible. This larger project can be phased by completing the path and structural edges before adding locally appropriate plants.