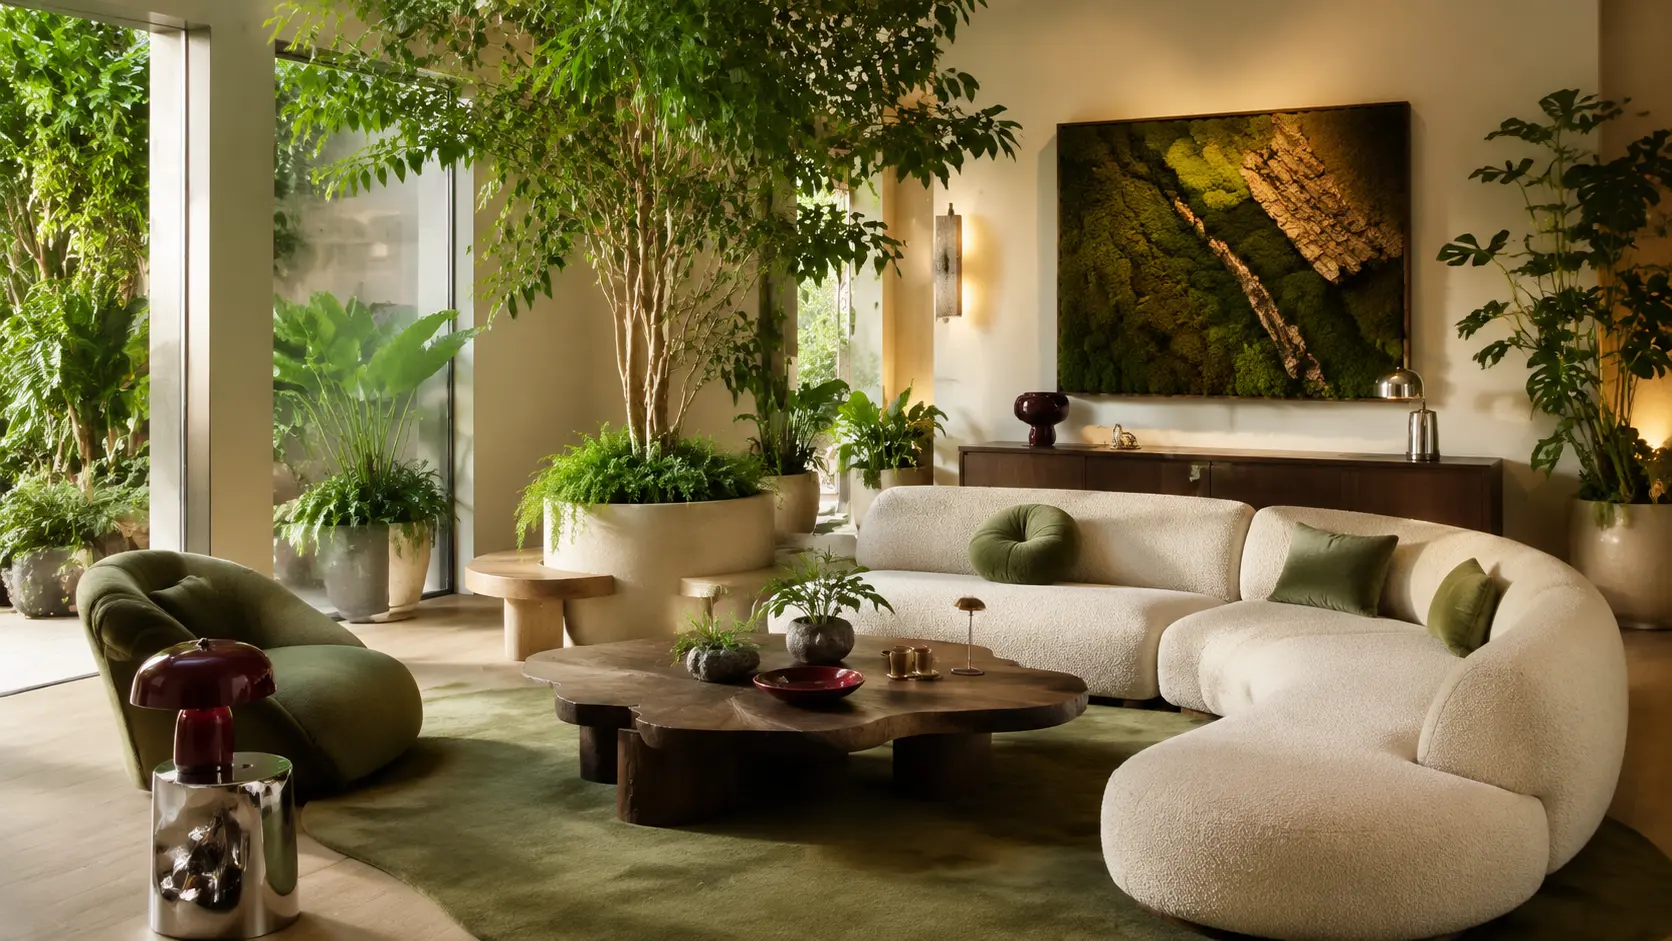
A few scattered houseplants won’t automatically make a room feel connected to nature. Strong biophilic interior design ideas combine greenery with daylight, airflow, organic shapes, tactile materials, and views that change throughout the day. The goal isn’t to create an overcrowded indoor jungle.
These 18 ideas take a more intentional approach. Expect sculptural planting, clever renter-friendly installations, chrome-and-moss contrasts, edible gardens, and calming spaces that still function in a real home. Each design creates a distinctive visual moment while keeping maintenance, circulation, and everyday comfort in mind.
1. Build a Sculptural Indoor Tree Island
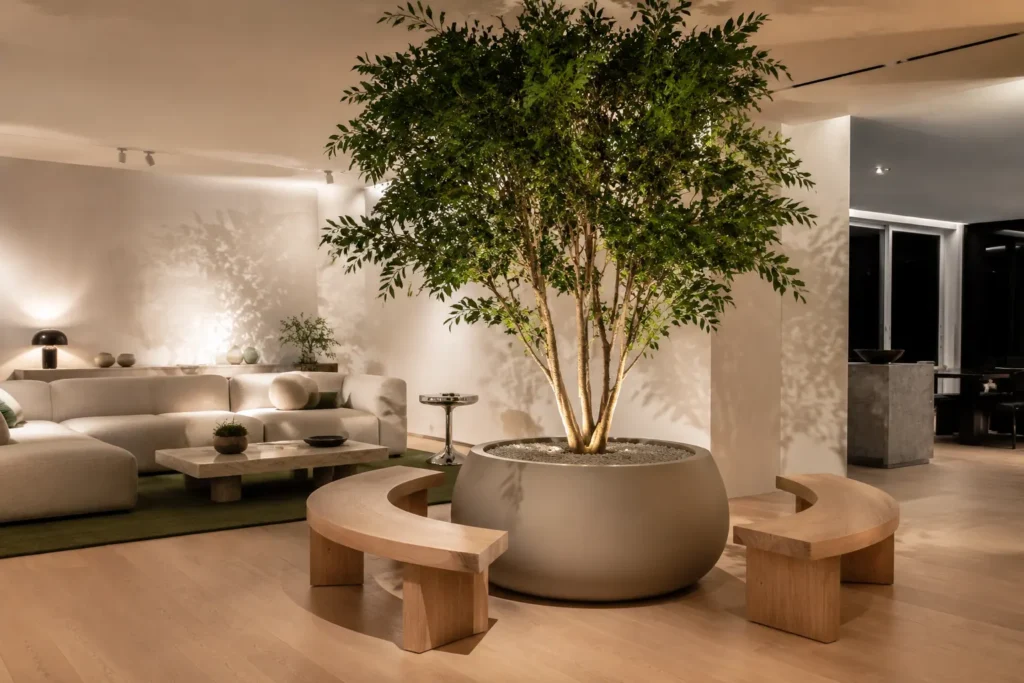
Give one large indoor tree the presence normally reserved for furniture. Position a ficus, schefflera, or kentia palm in a broad planter beside a curved bench, or place it inside a custom bench with a removable waterproof insert. Allow enough space around the canopy so leaves don’t brush against walls or block a walkway.
A planter around 16–20 inches wide will visually support a six- to seven-foot tree. Pale oak, warm-white upholstery, and concealed uplighting make its shifting shadows part of the room. If custom joinery is too expensive, curve two small backless benches around a freestanding planter instead.
2. Suspend an Airy Plant Canopy Above a Dining Nook
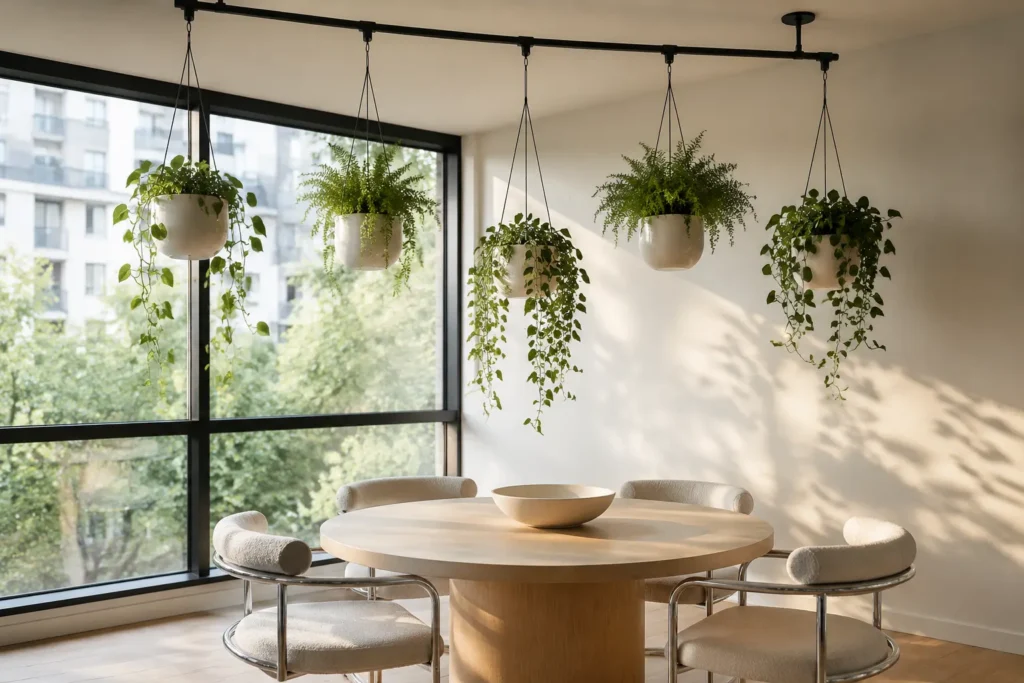
Mount a slim ceiling rail parallel to a bright window and hang several lightweight planters at staggered heights. Hoya, small ferns, and trailing philodendron create soft movement without producing the dense, tangled appearance of a full indoor jungle.
Keep the lowest planter at least 36 inches above the tabletop and away from pendant lights. Self-watering liners reduce drips, although each pot still needs to be removed occasionally for cleaning. In a rental, a tension-pole system beside the table is more realistic than ceiling anchors. The completed nook should feel open, filtered, and sunlit rather than crowded from above.
3. Design a Low Conversation Pit Framed by Greenery
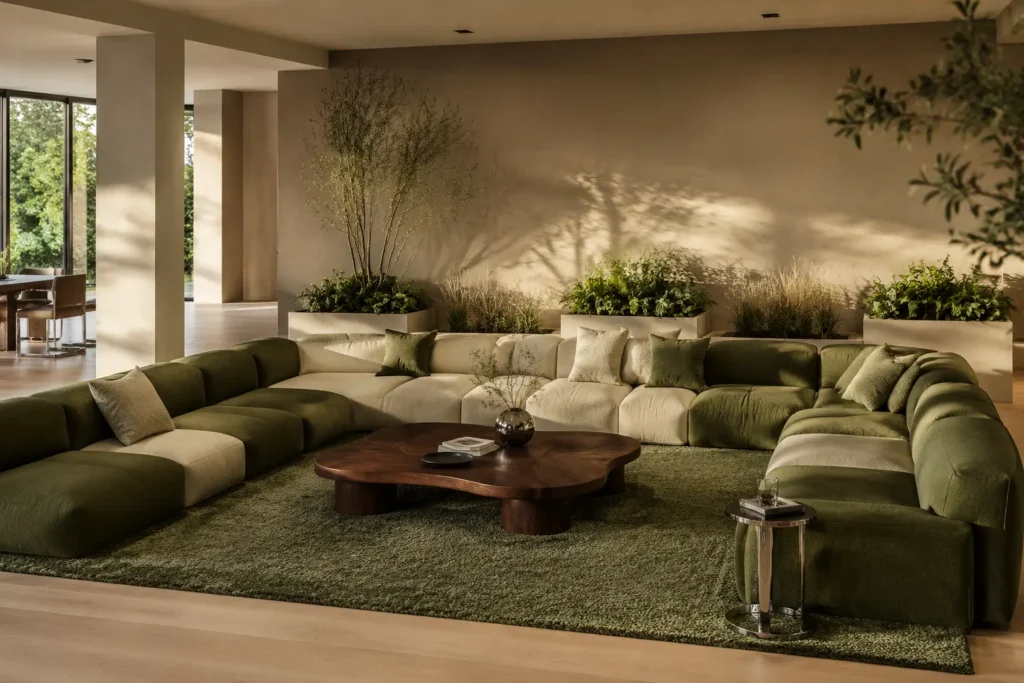
You don’t need to lower the floor to capture the relaxed proportions of a 1970s conversation pit. Start with a low modular sectional, a thick flat-woven rug, and an oval coffee table positioned 16–18 inches from the seating. Place floor-level plants behind the sofa instead of between seats, where pots could interfere with foot traffic.
Moss, olive, oatmeal, and dark-brown fabrics support the landscape-inspired effect. A chrome drink table keeps the arrangement from looking too earthy or retro. From the room’s entrance, the furniture should create a low horizontal line with foliage rising loosely behind it.
4. Turn a Plain Window Into a Living Plant Portal
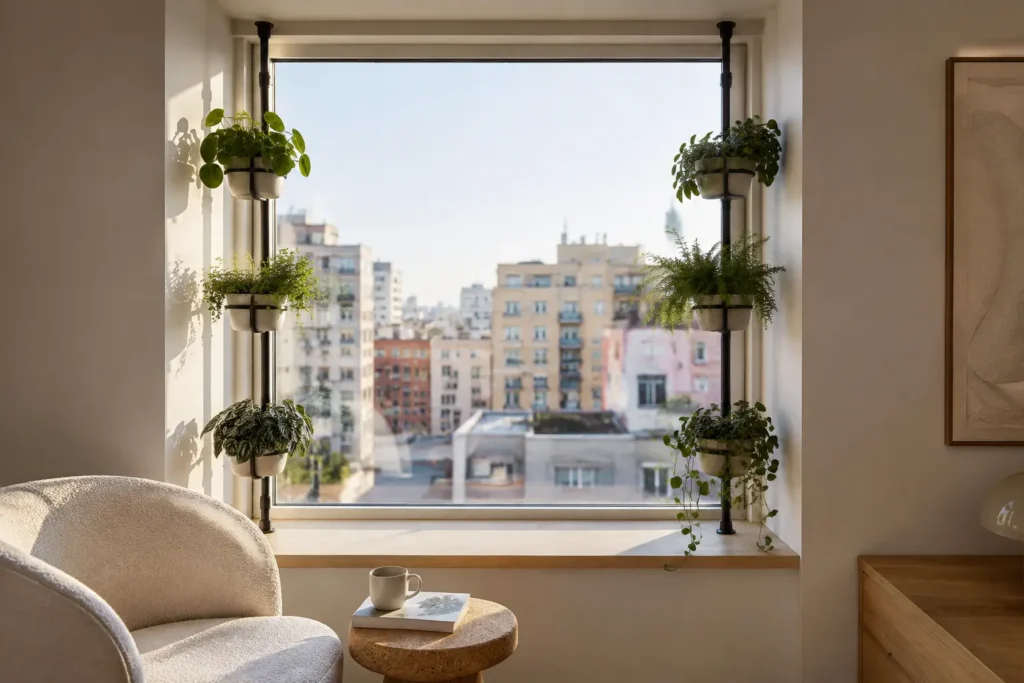
Fit narrow tension rods inside a deep window reveal, then suspend small reservoir planters along the sides. Leave the center open so you retain the view, ventilation, and most of the daylight. Compact peperomia, pilea, miniature ferns, and restrained trailing plants are better choices than species with heavy root systems.
This treatment makes the greenery appear integrated with the window instead of added as an afterthought. Select light pots and verify the rods’ weight limits before installation. If the window receives strong afternoon sun, use plants that tolerate direct light or shift the installation to a bright east-facing opening.
5. Pair Chrome With Moss for a Futuristic Natural Contrast
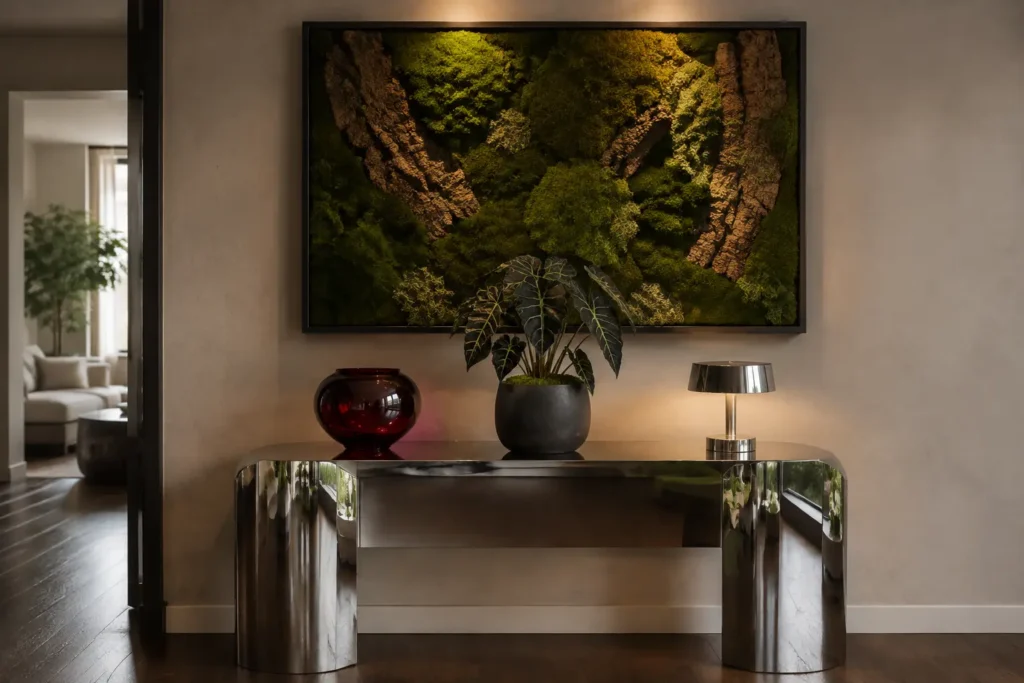
Biophilic rooms don’t have to rely on rattan, beige linen, and rustic timber. Place a preserved-moss relief above a polished stainless-steel console, then add one dark-leaved plant and a piece of colored glass. Chrome reflects the irregular greenery, making a relatively small botanical feature appear more expansive.
Use preserved moss in a dim hall where living plants would struggle, but protect it from direct sunlight and high humidity. Cheap metallic film tends to reveal seams and scratches quickly; a secondhand chrome table or commercial stainless-steel shelf usually looks more convincing. Leave part of the surface empty so the contrasting finishes remain easy to read.
6. Grow a Living Headboard Beside the Bed
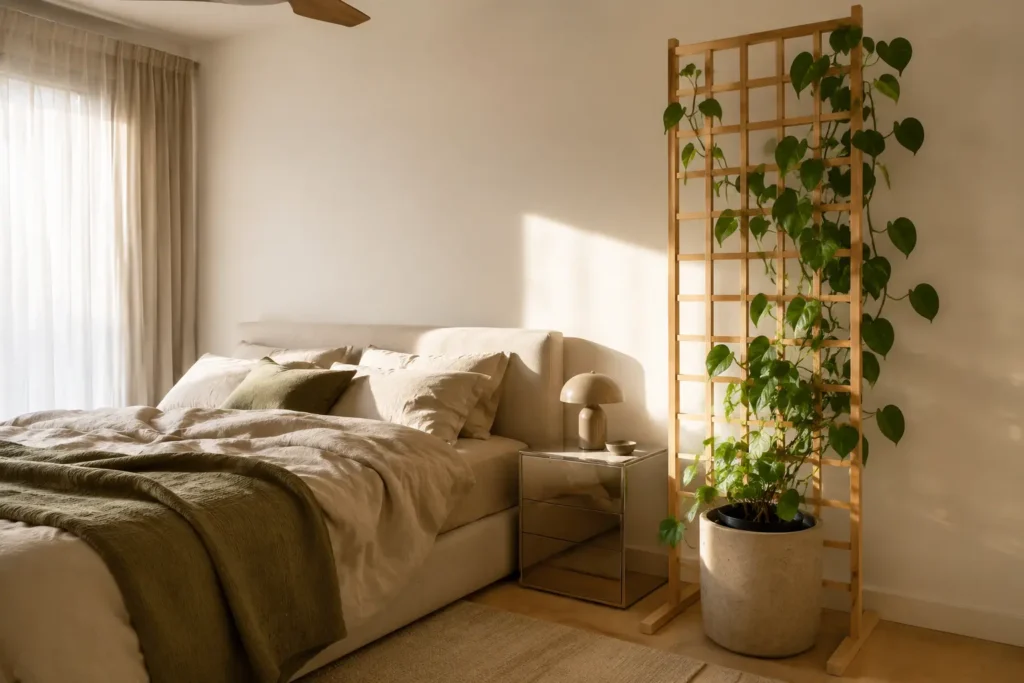
Install a narrow timber or powder-coated metal trellis beside—not over—the headboard. Train a hoya or heartleaf philodendron upward from a stable floor planter, keeping vines away from pillows, electrical outlets, and ceiling fans. An airy, asymmetrical growth pattern looks more natural than forcing every stem into a tight grid.
This arrangement gives the bed a sheltered garden quality without placing wet soil or a heavy hanging pot over your head. Choose a cachepot with a waterproof liner, and leave enough room to lift out the nursery pot. Renters can lean a freestanding trellis against the wall and secure it with removable furniture straps where appropriate.
7. Filter an Open Room With a Branch-Shaped Divider
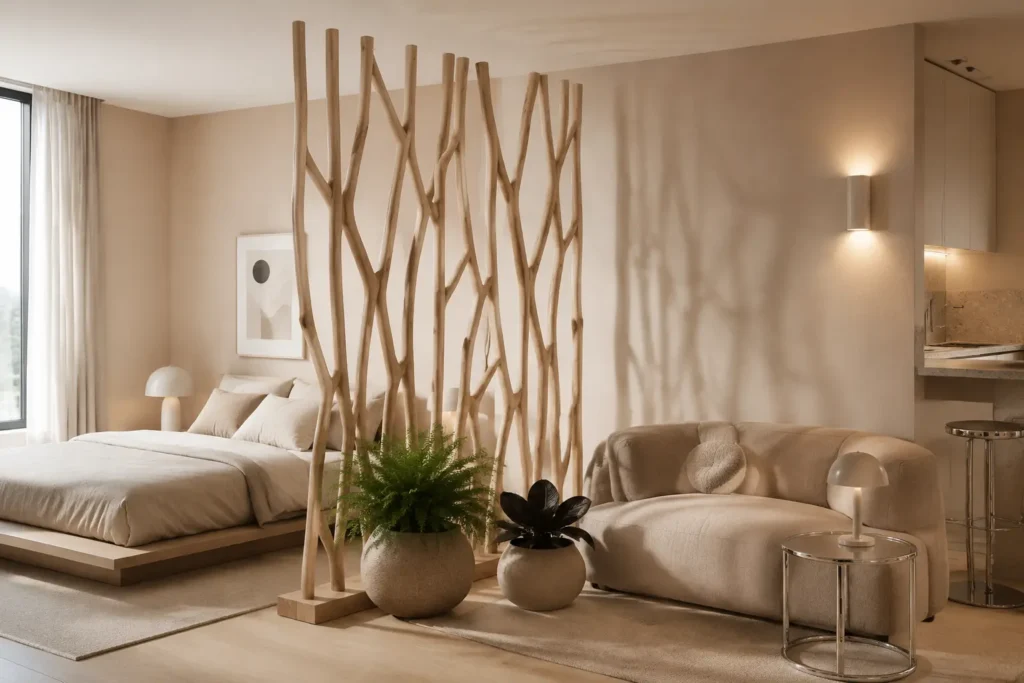
A divider made from irregular vertical timber slats can separate a sleeping area, dining zone, or home office while allowing daylight to pass through. Look for Y-shaped joints, varied spacing, or gently curved components that suggest branching growth without copying a tree literally.
Maintain openings between the slats and avoid placing the screen across the main walking route. A divider should define the room rather than make it feel boxed in. Add only one or two compact plants at its base; covering the entire structure with vines would hide its form. A freestanding screen offers a practical alternative when drilling into the floor or ceiling isn’t possible.
8. Install a Stainless-Steel Kitchen Herb Laboratory
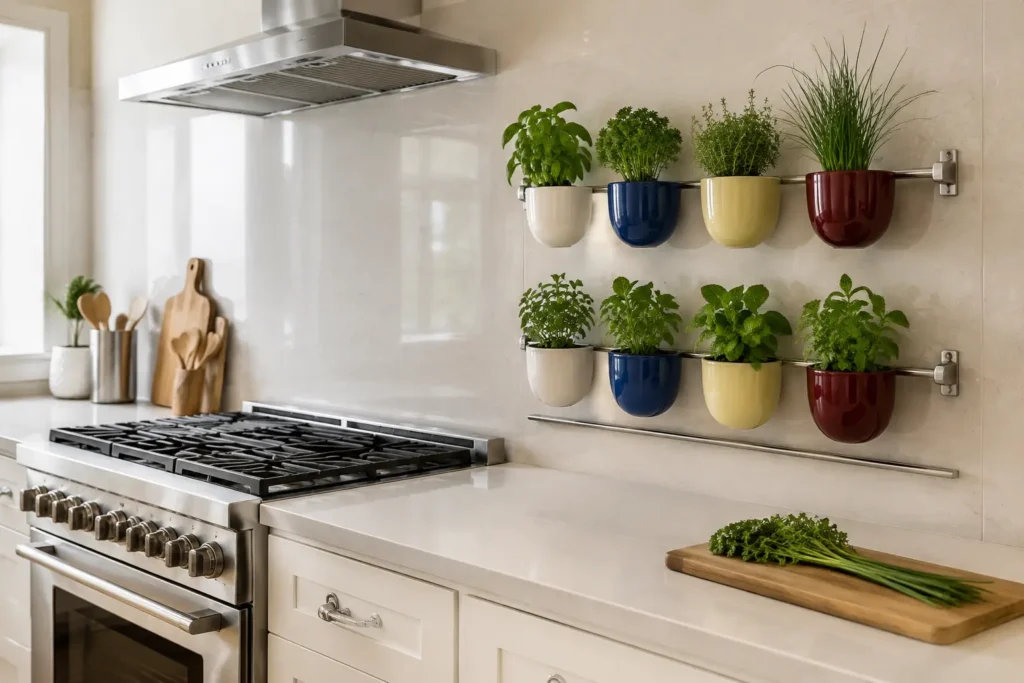
Replace the familiar collection of mismatched windowsill pots with two slim stainless-steel rails and small sculptural containers. Position the garden beside the preparation zone, but not directly behind the range, where heat and grease can damage leaves. Basil, parsley, thyme, chives, and mint provide varied shapes as well as useful ingredients.
Allow roughly 10–12 inches between rows so the herbs have room to grow. Add removable drip trays or a narrow concealed channel beneath the lowest rail. Chrome hardware, cream pots, and one or two colored vessels create a crisp Gen Z look, while regular harvesting prevents the display from becoming overgrown.
9. Shape a Pebble-Inspired Reading Pod
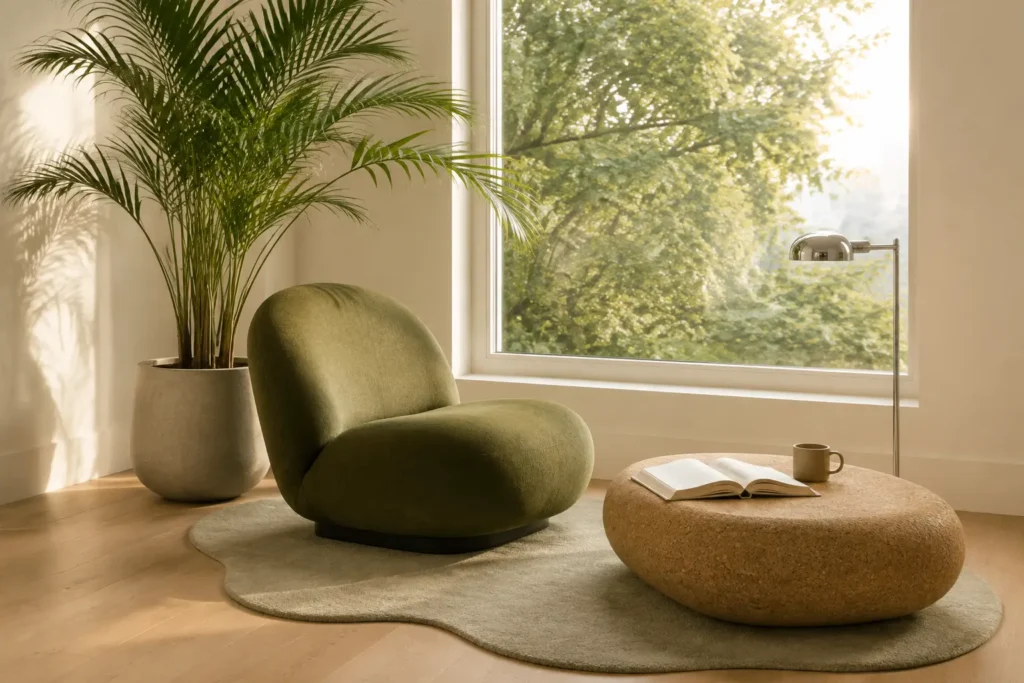
Place a curved lounge chair beside a window and ground it with an irregular wool rug, a rounded cork table, and one tall plant. Keep the palette close to river stone, pale bark, moss, and lichen so the organic silhouettes remain the focus.
The table needs enough surface area for a mug and book; extremely small sculptural tables often photograph well but become irritating in daily use. Aim for a tabletop within two inches of the chair’s arm height. In a compact apartment, choose a chair with a slim base rather than a wide swivel mechanism. The result should feel enclosed enough for rest without blocking the window.
10. Run a Narrow Indoor Garden Behind the Sofa
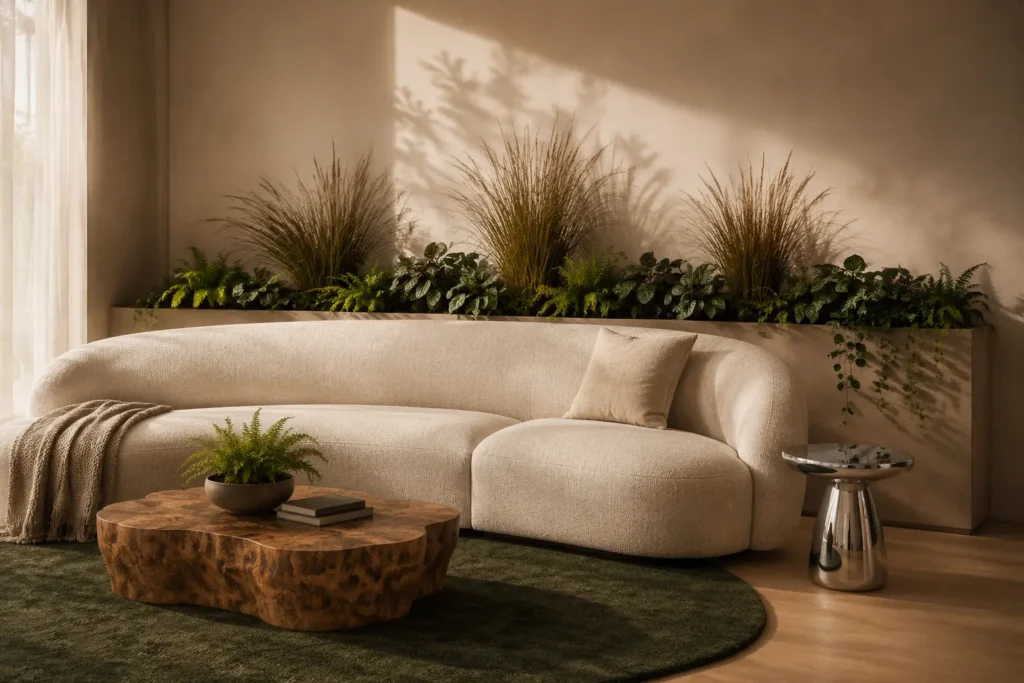
The awkward gap between a sofa and wall can hold a narrow planted landscape. Use an 8- to 10-inch-deep console with waterproof trays, or commission a sealed trough with removable nursery-pot inserts. Mix upright grasses with peperomia and controlled trailing foliage to create an uneven, natural skyline.
Keep the tallest leaves below seated eye level if the sofa floats in an open-plan room. The greenery can hide cords and visually soften the back of a sectional, but it must remain accessible for watering. Casters beneath the console make maintenance easier. This works best when the sofa receives bright indirect light and the main walkway remains at least 36 inches wide.
11. Make the Shower Look Onto a Fern Courtyard
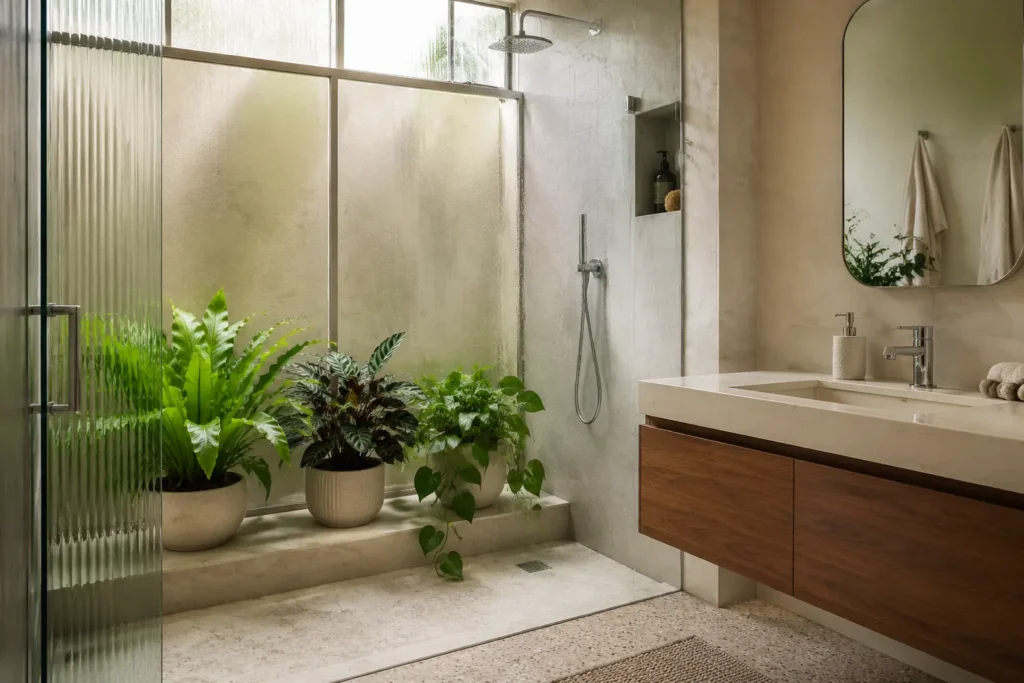
Use a tiled ledge outside the shower enclosure to hold bird’s-nest ferns, calatheas, or trailing philodendron. Position the plants where they benefit from humidity without receiving direct spray or interfering with toiletries. Ribbed or frosted glass softens their outlines, making the greenery appear like a small courtyard beyond the shower.
Humidity doesn’t compensate for a lack of light. A windowless bathroom will need a properly rated grow light on a timer, and all electrical fixtures must suit the location. Keep pots in waterproof saucers and wipe the ledge regularly; standing water can damage grout and encourage mildew even when the plants themselves enjoy moisture.
12. Curate a Three-Dimensional Botanical Hallway
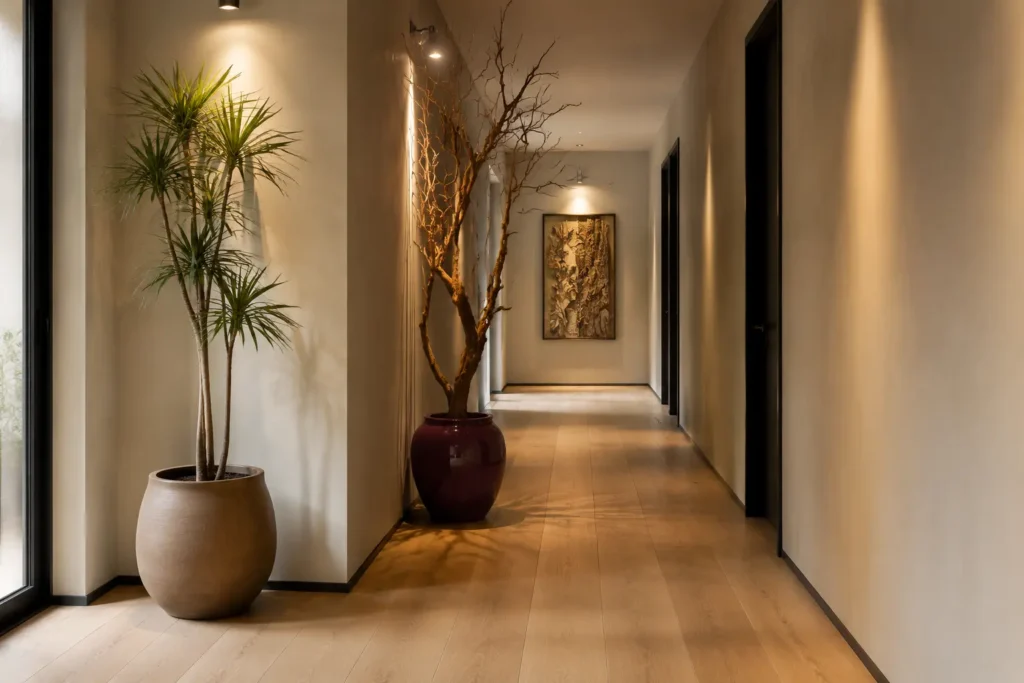
Instead of filling a passage with conventional framed art, arrange three different botanical forms in sequence. Start with a tall narrow plant, follow it with a preserved branch in a weighted floor vessel, and finish with a shallow pressed-leaf or bark relief under a wall washer.
The variation creates rhythm as you move through the hall, while repeated wood or clay tones hold the composition together. Keep at least 36 inches of clear passage and avoid brittle branches that project at face level. If the hall is dark, reserve the living plant for the brighter end and use preserved natural materials elsewhere. The space should feel immersive but never obstructed.
13. Float Small Plants on Clear Acrylic Shelves
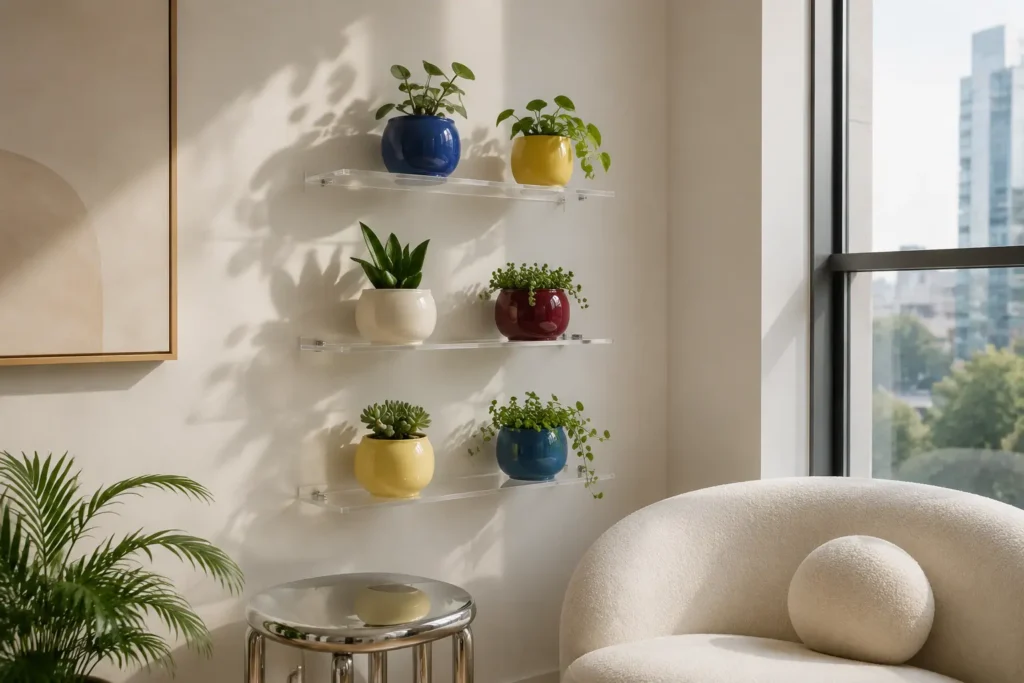
Transparent acrylic shelves allow colorful pots and foliage to appear almost suspended against the wall. Install two or three short shelves beside a bright window, staggering them instead of building a rigid floor-to-ceiling grid. Compact succulents, peperomia, and miniature hoya keep the total weight manageable.
Acrylic shows dust, mineral marks, and scratches more readily than painted wood, so use drip-proof cachepots and clean shelves with a nonabrasive cloth. Verify the anchors and weight rating rather than relying on removable adhesive strips for planted pots. Irregular ceramic containers in cobalt, butter yellow, or oxblood add Gen Z color without overwhelming the light visual structure.
14. Create a Green Gradient at the Patio Door
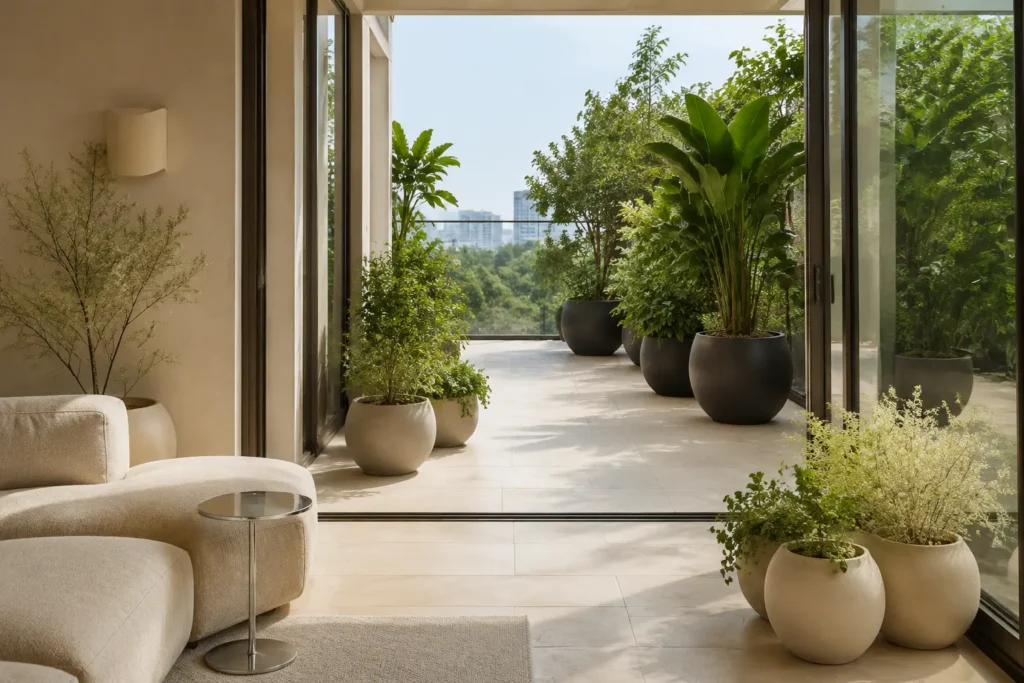
Connect an interior to its balcony or backyard by arranging plants from visually light to increasingly lush. Use pale, delicate foliage inside; medium-green plants near the threshold; and larger, darker specimens outdoors. Repeating the same planter shape or material on both sides of the glass ties the progression together.
Keep pots outside the door swing and preserve a clear 36-inch path. Matching every container can feel commercial, so vary the heights while limiting the palette to two finishes, such as cream ceramic and dark metal. When the door is open, the gradient makes the indoor and outdoor areas read as one continuous landscape.
15. Combine Oxblood Red With Botanical Green
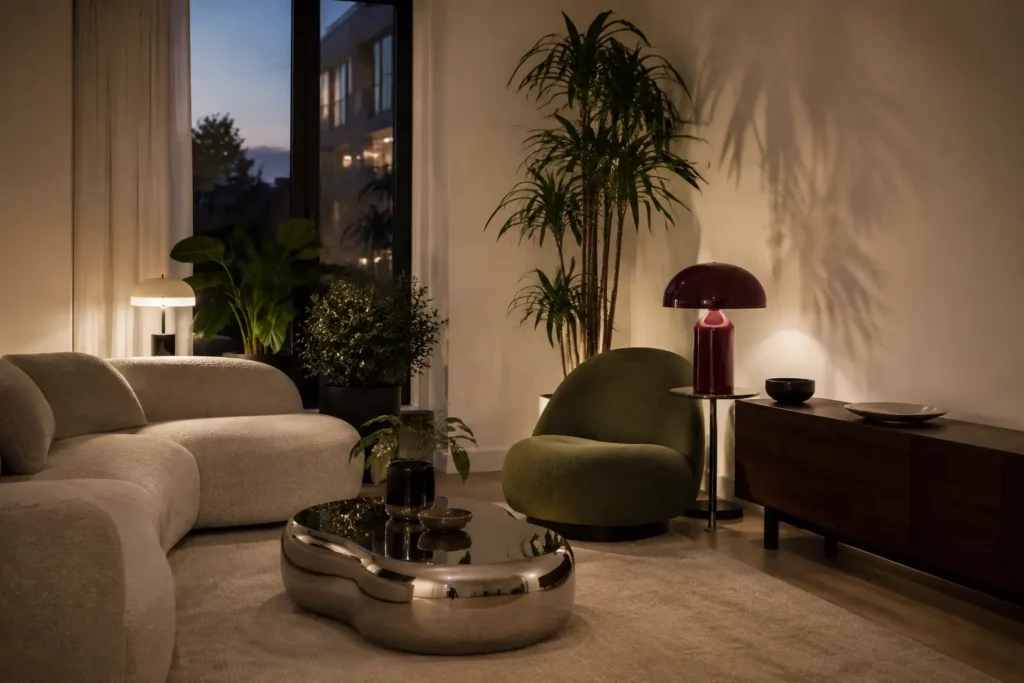
Move beyond predictable sage and beige by pairing moss or forest green with controlled accents of oxblood. Let greenery provide much of the green, then introduce the red through a lacquered cabinet, mushroom lamp, or compact lounge chair. Mushroom-colored walls and polished chrome prevent the scheme from becoming heavy or traditionally rustic.
Deep colors can look flat in a dim room, so use warm directional lighting and leave lighter surfaces around them. Aim for roughly 70% warm neutral, 20% green, and 10% oxblood. That restraint allows the red to sharpen the foliage and gives the room a richer, fashion-aware character.
16. Project Oversized Leaf Shadows Across a Wall
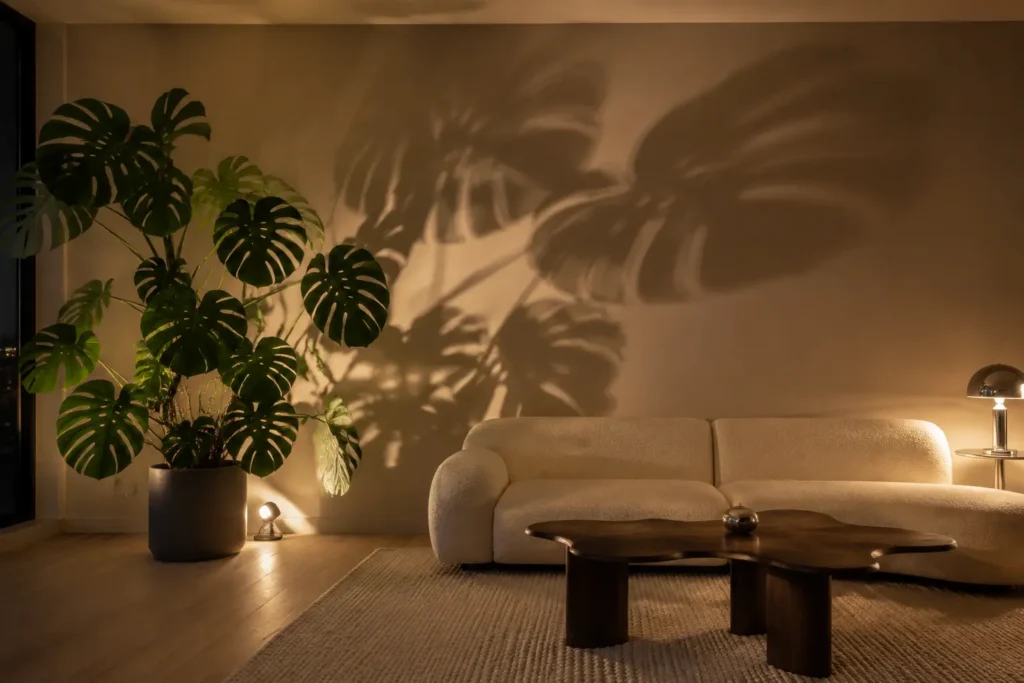
Place an architectural plant, such as a monstera or palm, several feet in front of a plain matte wall. Aim an adjustable warm LED spotlight through the leaves so their shadows become an evolving nighttime mural. Moving the lamp closer to the plant produces larger, softer silhouettes; moving it away creates sharper outlines.
Use a cool-running LED and keep it clear of foliage. Matte paint handles the effect better than high gloss, which can create distracting reflections and emphasize uneven plaster. During the day, the installation reads as a restrained plant corner. After sunset, it becomes a dynamic layer of biophilic lighting without requiring additional wall decor.
17. Build a Balcony Garden That Resembles Custom Joinery
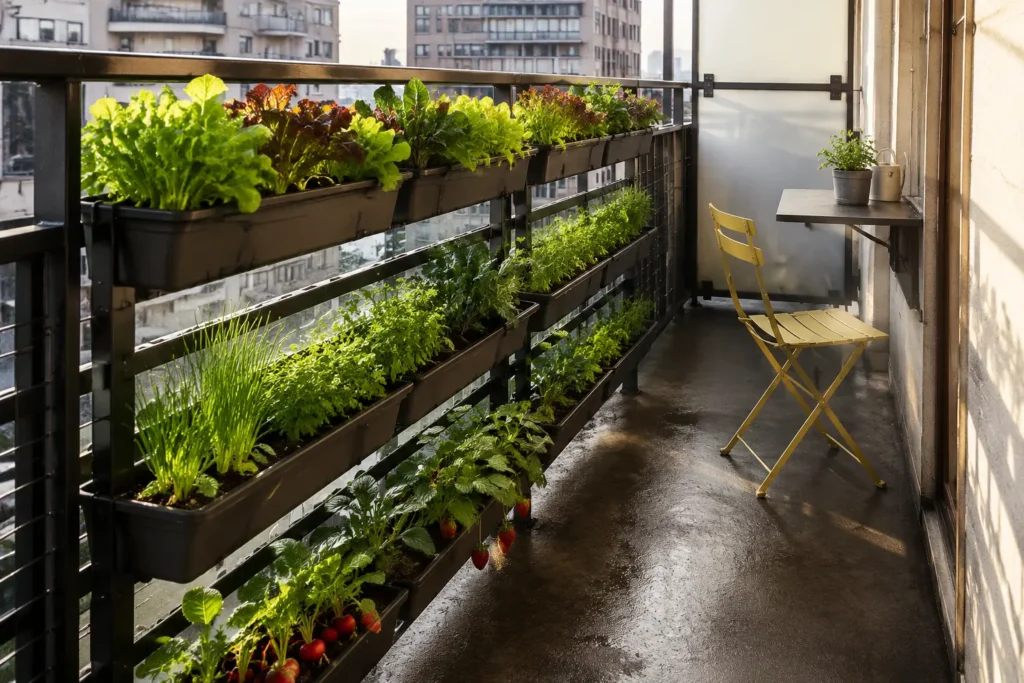
Secure a modular frame to the inside of the balcony railing and arrange lightweight planters across three staggered levels. Grow loose-leaf lettuce, chives, baby kale, strawberries, and compact herbs rather than placing oversized shrubs in deep, heavy containers.
All planters should remain inside the balcony boundary and include drainage trays. Account for wet soil weight, wind exposure, railing rules, and a walking route of approximately 30 inches. Charcoal frames with matching containers create the clean appearance of fitted joinery, while one folding chair or narrow wall table keeps the balcony usable. Avoid hanging anything over a public sidewalk or neighboring property.
18. Frame a Doorway With a Living Light Tunnel
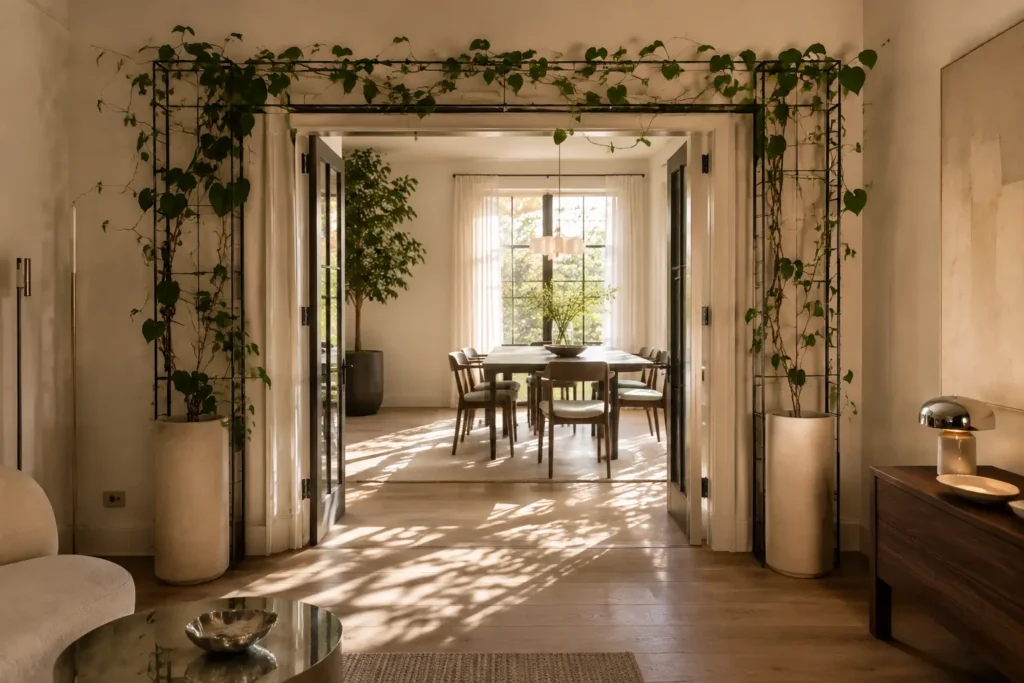
Finish with an immersive green transition between two bright rooms. Place tall, slim planters on both sides of a wide doorway and train lightweight vines over a removable trellis around its outer edge. Keep the growth sparse enough that sunlight passes through and maintain at least seven feet of head clearance.
This is more architectural than adding plants to a room corner: the doorway becomes a living portal that changes as you approach it. A freestanding metal frame can provide a renter-conscious version, although it must be weighted and kept clear of the door swing. Prune regularly so the route never feels narrow or overgrown.
What to Consider Before Using Biophilic Interior Design Ideas
Start with the conditions in your home, not with a plant-shopping list. Note which windows receive direct sun, how the light shifts from morning to afternoon, where air vents create drafts, and which surfaces can tolerate occasional moisture. Choose plants only after matching them to those conditions.
A successful biophilic room also needs negative space. Combine living greenery with organic forms, natural materials, airflow, water, or an outdoor view instead of repeating plants in every available corner. Homes with children or pets require extra care: verify plant toxicity, stabilize tall pots, secure freestanding dividers, and keep trailing stems away from small hands.